The Definitive Guide to Removing Sticky Residue from Your Windshield
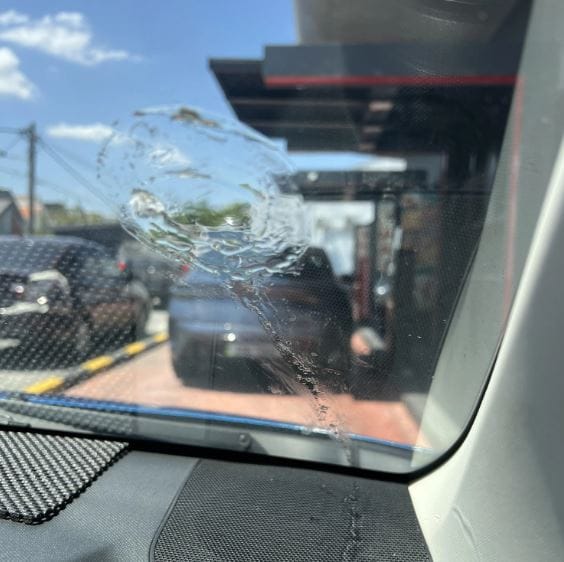
That stubborn, sticky film or gummy residue on your windshield isn’t just an eyesore; it’s a significant safety hazard. It reduces visibility, creates glare from oncoming headlights, and makes driving in rain particularly dangerous. Whether the culprit is an old decal, off-gassing from dashboard plastics, or a film from vaping, this guide provides a comprehensive, professional approach to restoring crystal-clear visibility .
Understanding the Enemy: Types of Windshield Residue
Before you begin cleaning, it’s crucial to identify the type of residue you’re dealing with, as different adhesives respond best to specific solvents.
The Arsenal: A Comparative Guide to Residue Removers
Choosing the right product is key to effective removal without damaging your car’s interior or paintwork. Here is a comparison of the most effective solutions.
Step-by-Step Professional Cleaning Process
Achieving a professional, streak-free finish requires a methodical approach, not just the right chemicals.
Phase 1: Preparation
- Park in the Shade: Direct sunlight will cause cleaning solutions to evaporate too quickly, leaving behind streaks and water spots .
- Gather Your Tools: You will need a few high-quality, lint-free microfiber towels (use the two-towel method—one for application, one for buffing), a plastic razor blade or old credit card, and your chosen solvent.
- Protect Your Interior: If cleaning the inside of the windshield, place a towel over the dashboard to catch any drips.
Phase 2: Application and Removal
- Apply Solvent to Towel, Not Glass: For most cleaners, especially aerosol sprays, it is best practice to spray the product onto your microfiber towel rather than directly onto the glass. This prevents drips from running down into the dashboard or pooling at the edges of the glass .
- Soak (Let Chemistry Work): Firmly press the dampened towel against the sticky residue. Allow it to sit for 3-5 minutes. This “dwell time” is critical as it allows the solvent to penetrate and break down the adhesive polymers .
- Wipe and Lift: Wipe the area with a clean section of the towel using overlapping circular motions. For thick, crusty residue, use a plastic scraper or a credit card at a low angle to gently lift the softened gunk. Never use a metal razor blade, as it can scratch the glass.
- Buff to a Streak-Free Finish: Once the residue is gone, take your second, completely dry microfiber towel and buff the area using straight, overlapping strokes (vertical or horizontal). This final pass removes any lingering moisture and ensures a haze-free finish .
Phase 3: Advanced Techniques (For Stubborn Haze)
- The Clay Bar: For bonded contaminants or a deep haze that won’t lift with chemicals alone, a clay bar is an excellent tool. Lubricate the glass with warm water or a detailing spray, then gently glide the clay bar across the surface to pull out microscopic contaminants .
- Magic Eraser (Melamine Sponge): Slightly dampen a Magic Eraser and gently scrub the glass to remove stubborn films. Caution: This is abrasive. While safe for glass, it should be avoided on any tinted windows, as it can dull the film over time .
Phase 4: Prevention and Protection
- Apply a Hydrophobic Coating: After cleaning, apply a high-quality water-repellent glass treatment to the exterior. This creates a protective barrier that prevents dirt, bugs, and residues from bonding easily to the glass .
- Use Anti-Fog Treatments: Apply an anti-fog solution to the interior surface to resist moisture buildup and haze in humid or cold conditions .
- Prevent Adhesive Issues: For future decals (like inspection stickers), attach them to a piece of clear “static cling” plastic before placing them on the windshield. This allows for easy removal without leaving any adhesive behind .
Frequently Asked Questions (FAQ)
Q: Why does my windshield look worse after I clean it?
A: This is often due to using the wrong cleaner (like ammonia-based ones) or cleaning in direct sunlight. The most common cause is using a single towel that just smears the dirt around. Always use the two-towel method .
Q: Can I use Windex on my car windshield?
A: Generally, no. Most household glass cleaners contain ammonia, which is harmful to window tints and can be harsh on automotive glass, leading to a build-up over time. Always choose an ammonia-free automotive glass cleaner .
Q: How often should I clean the inside of my windshield?
A: As a general rule, clean the interior glass at least once every two weeks. This prevents the build-up of off-gassing films and oils from the dashboard that can cause dangerous glare .