How to Clean Black Dust Around Air Vents: A Complete Guide
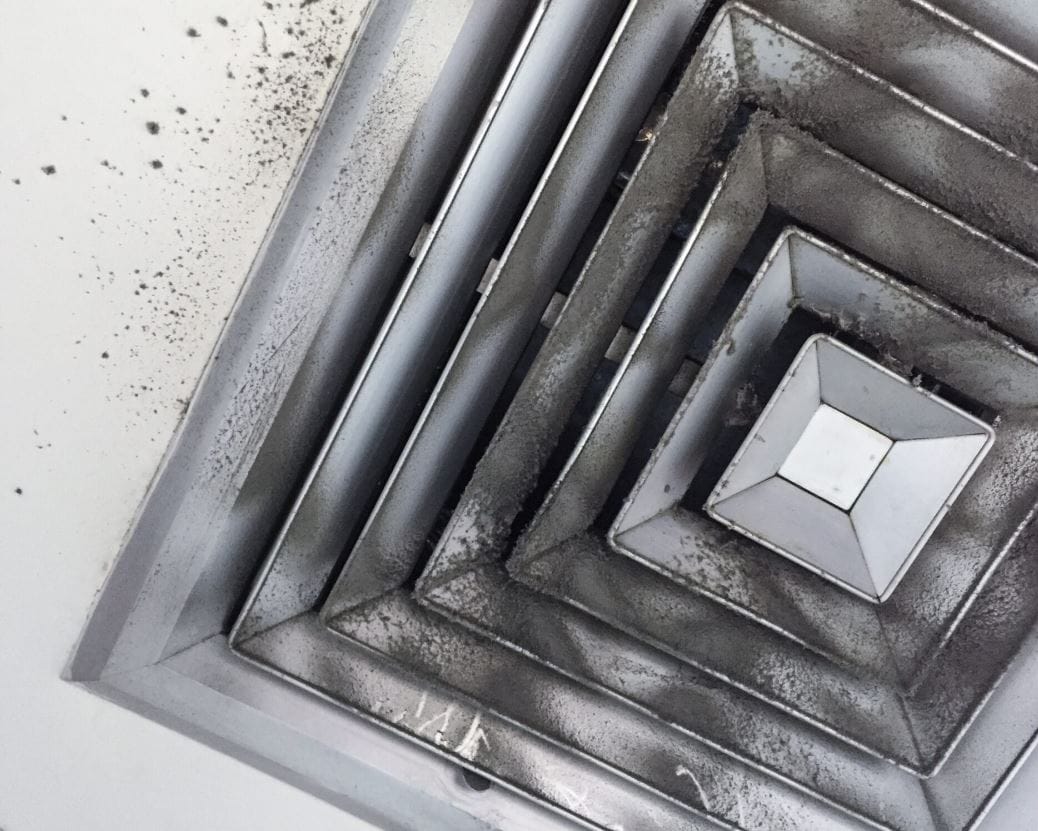
Noticing a mysterious, dark powder collecting around your air vents is more than just an eyesore—it’s a sign from your HVAC system. This black dust can be a cocktail of contaminants that affect your home’s air quality and your health.
Ignoring it is not an option. This comprehensive guide will walk you through what this black dust is, why it appears, and a simple, effective method to clean it for good.
What Is That Black Dust Around My Vents?
Before you start cleaning, it’s helpful to know what you’re dealing with. The black dust around air vents is typically a combination of several substances:
- Dust and Dander: The usual suspects—dead skin cells, pet dander, and fabric fibers.
- Soot: From candle burning, fireplaces, or even outdoor pollution being drawn into the system.
- Mold Spores: In areas with high humidity, black mold can grow in your ductwork, presenting as a black, speckled substance.
- Dirt and Pollen: Fine particles that enter the home from outside.
As John Myers, a Certified HVAC Professional, explains: “The black color is often due to carbon particles from combustion, like candles or vehicle exhaust. When this soot mixes with standard household dust, which is naturally sticky, it creates that tenacious black grime you see around registers.”
Why You Should Address Black Dust Immediately
This isn’t just about aesthetics. Allowing this dust to accumulate can lead to:
- Poor Indoor Air Quality: Every time your HVAC system kicks on, it can blow these contaminants directly into your living space.
- Health Irritations: Inhaling these particles can aggravate allergies, cause respiratory issues, and lead to persistent coughing or sneezing.
- Reduced HVAC Efficiency: A clogged vent and dirty system make your furnace and AC work harder, increasing energy bills and wear-and-tear.
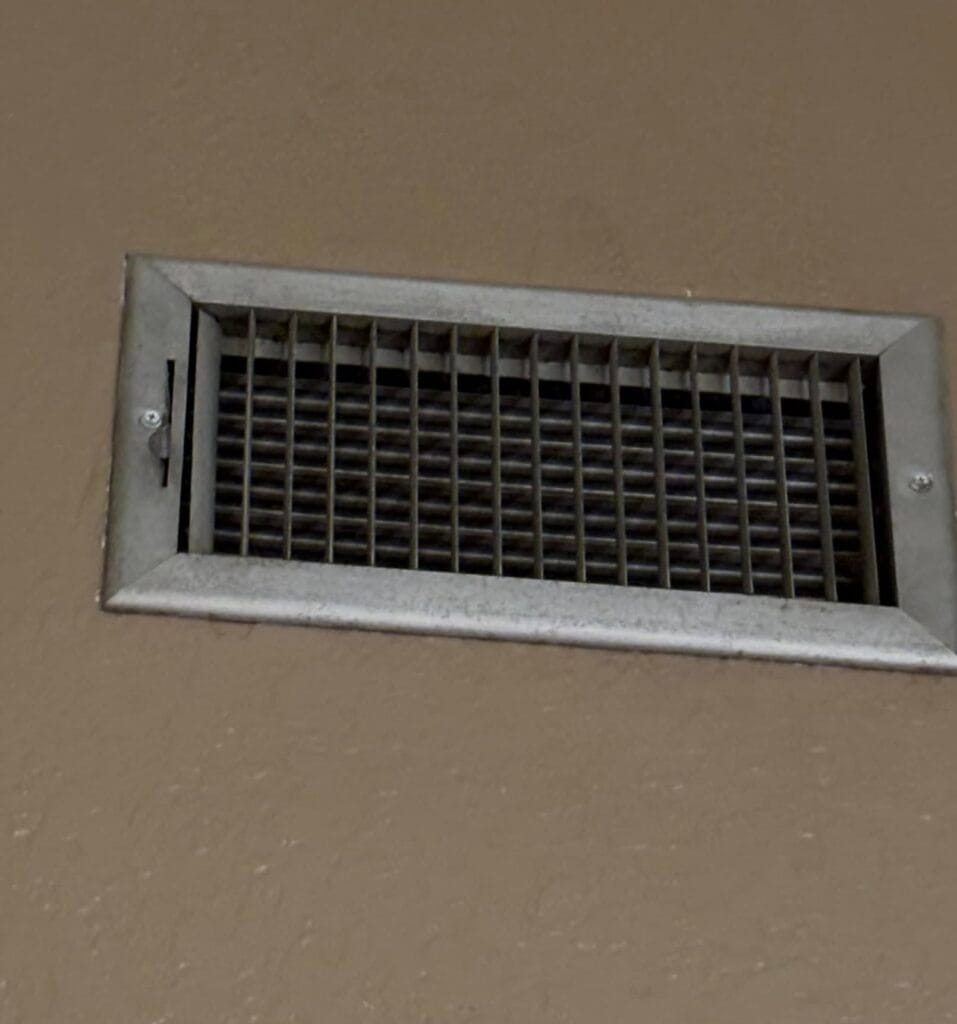
Your Step-by-Step Guide to Cleaning Black Dust from Vents
Cleaning the visible dust is a straightforward DIY project. Here’s how to do it safely and effectively.
Tools & Materials You’ll Need:
- Screwdriver
- Vacuum cleaner with a brush and hose attachment
- Microfiber cloths
- All-purpose cleaner or a vinegar/water solution (50/50 mix)
- A small brush (an old toothbrush works perfectly)
- Warm, soapy water (for grates)
- Safety gear: N95 mask and gloves
The Cleaning Process:
- Turn Off the HVAC System: This is a critical first step. You don’t want the system blowing new dust into the air or sucking cleaning chemicals into the ducts while you work.
- Remove the Vent Covers: Use a screwdriver to carefully unscrew and remove the vent grates or registers from the wall, ceiling, or floor.
- Vacuum the Ducts and Grates: With the hose attachment, thoroughly vacuum inside the exposed duct as far as you can comfortably reach. Then, vacuum the back and front of the vent covers to remove loose dust and cobwebs.
- Wash the Vent Covers: Take the grates to a sink or bathtub and wash them with warm, soapy water. Use your small brush to scrub the slats and remove any caked-on grime. Rinse and let them dry completely.
- Wipe Down the Surrounding Area: Dampen a microfiber cloth with your all-purpose cleaner or vinegar solution and wipe the wall or floor around the vent opening. This will pick up any residual dust and leave the area spotless.
- Reinstall the Dry Vent Covers: Once everything is clean and dry, screw the vent covers back into place.
- Turn the HVAC System Back On: You’re all done! Enjoy the cleaner air and peace of mind.
DIY vs. Professional Duct Cleaning: When to Call the Experts
While cleaning the vent covers is a great maintenance task, sometimes the problem is deeper within the ductwork. How do you know when to handle it yourself and when to call a professional?
The table below will help you decide:
| Feature | DIY Cleaning (You) | Professional Duct Cleaning |
|---|---|---|
| Cost | Low (cost of cleaning supplies) | High ($300 – $1000+ depending on home size) |
| Scope | Surface-level; cleans the vent covers and first few inches of duct. | Comprehensive; cleans the entire length of the ductwork, blower, and coils. |
| Best For | Regular maintenance, light dust, and immediate visual improvement. | Heavy dust/debris, suspected mold, post-renovation, or rodent infestation. |
| Effectiveness | Good for managing visible dust and improving immediate air quality. | Superior for deep cleaning and removing hidden contaminants. |
| Time | 15-30 minutes per vent. | Several hours for the whole system. |
When to Go Pro: Consider hiring a certified duct cleaning company if you notice a musty odor coming from your vents, visible mold growth inside the ducts, evidence of pests, or if there has been significant construction dust.
Preventing Black Dust from Coming Back
A one-time clean is great, but prevention is better. Keep black dust at bay with these habits:
- Change Your Air Filter Regularly: This is the #1 most effective step. A clean filter prevents dust from entering the system in the first place. Check it monthly and change it at least every 90 days, or more often if you have pets or allergies.
- Use Higher-Quality Filters: Consider upgrading to a filter with a higher MERV rating (8-11) to capture smaller particles.
- Maintain Low Humidity: Use a dehumidifier to keep indoor humidity below 50% to discourage mold growth.
- Burn Candles Mindfully: Soot from candles is a major contributor. Trim wicks and avoid burning them near air intake vents.
- Schedule HVAC Maintenance: An annual tune-up by a professional will ensure your system is running cleanly and efficiently.
Final Thought: Taking control of the black dust around your air vents is a simple yet powerful way to invest in your home’s health and your own. By following this guide, you can breathe easier knowing you’ve tackled a common problem at its source.