How to Buff Scratches Out of Plexiglass and Restore Its Clarity
Plexiglass (a common brand name for acrylic glass) is a fantastic material—lightweight, shatter-resistant, and versatile. However, its main weakness is its susceptibility to scratching. Unlike glass, which can be hardened, acrylic is relatively soft. The good news? Most scratches in Plexiglass are not permanent and can be successfully buffed out.
Whether it’s a scratch on a picture frame, a protective barrier, a motorcycle windshield, or a custom project, this guide will walk you through the process from minor scuffs to deeper gouges.
Understanding the Science: Why Buffing Works
Plexiglass scratches because a foreign object removes material from its surface, creating a groove that distorts light and creates a visible line. Buffing works through a process of controlled abrasion.
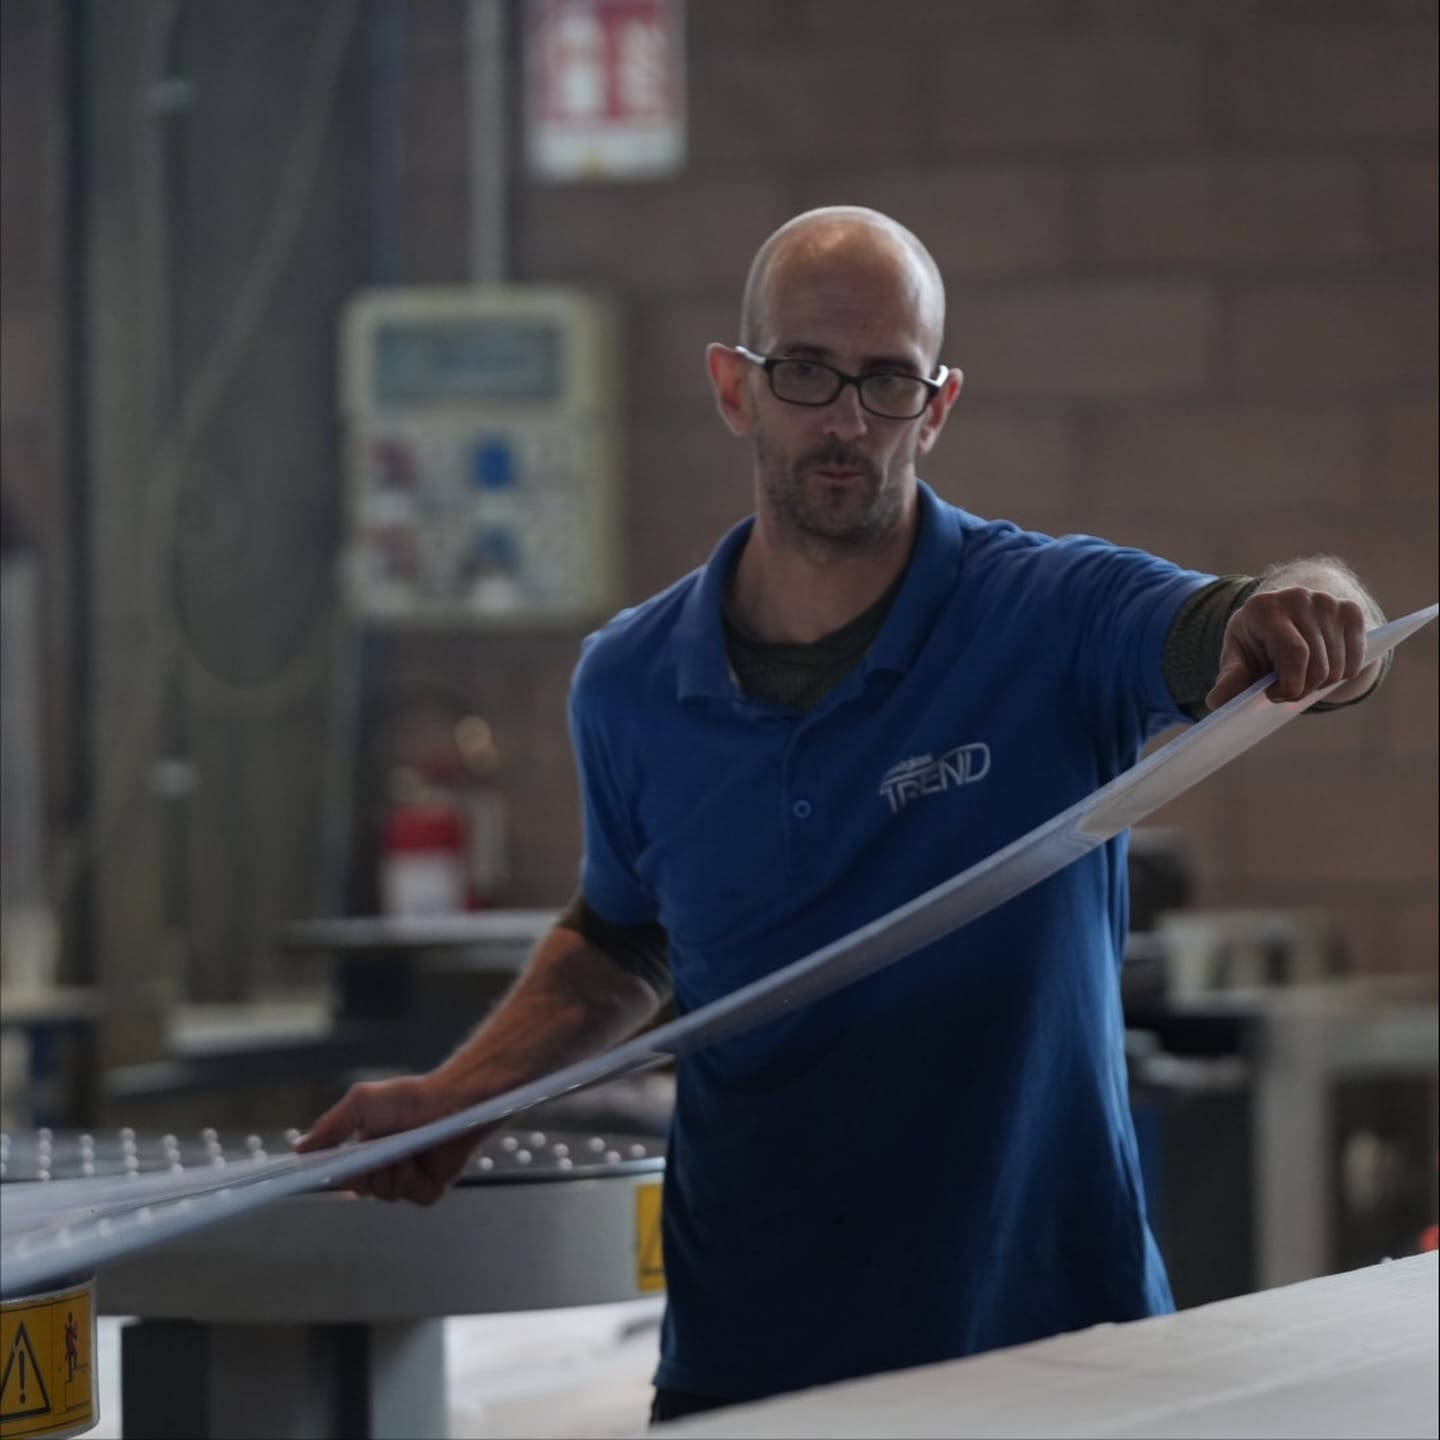
As John Smith, a veteran plastics fabricator, puts it: “Think of a scratch as a valley. You can’t just fill the valley; you have to gently lower the surrounding peaks until the surface is level again. That’s the essence of buffing acrylic.”
The key is to use progressively finer abrasives to sand away the damaged layer and then polish the surface back to a crystal-clear, high-gloss finish.
Assessing the Scratch: The First Critical Step
Before you start, diagnose the depth of the scratch. This determines your approach.
- Light Surface Scratches: Can be felt with a fingernail but do not catch it. These are often hazy scuffs.
- Medium Scratches: Your fingernail catches slightly in the groove. These are clearly visible lines.
- Deep Gouges: Your fingernail catches easily and the scratch is very pronounced. Warning: Extremely deep scratches may be difficult or impossible to remove completely without compromising the structural integrity or optical clarity of the panel.
Method 1: The DIY Home Remedy (For Light Scratches)
For very fine, hazy scratches, you might already have what you need in your pantry.
What You’ll Need:
- A clean, soft, lint-free cloth (microfiber is ideal)
- Non-gel toothpaste or a plastic polish like Novus #1
The Process:
- Clean: Thoroughly wash and dry the Plexiglass surface to remove any dust or grit that could cause more scratches.
- Apply: Put a small amount of toothpaste or plastic polish on your cloth.
- Buff: Using light to medium pressure, rub the paste into the scratch in a circular motion. Work on a small area for 30-60 seconds.
- Inspect: Wipe away the residue with a clean part of the cloth. Check your progress. You may need to repeat the process 2-3 times.
- Finish: Once the scratch is gone, wipe the entire area clean with a damp cloth and dry it.
Why it works: Toothpaste contains mild abrasives like hydrated silica, which act as a very fine polishing compound.
Method 2: The Wet Sanding & Polishing Method (For Medium to Deep Scratches)
This is the most effective and reliable method for removing noticeable scratches. It requires more effort and specific materials but delivers professional results.
What You’ll Need:
- Sandpaper: Multiple grits (e.g., 400, 600, 800, 1000, 1500, 2000+)
- Polishing Compound: A dedicated plastic polish (Novus #2 or #3, Meguiar’s PlastX) or a paste made from Brasso or a similar metal polish.
- Water Spray Bottle
- Clean, Lint-Free Cloths (multiple)
- Power Drill with a Buffing Pad Attachment (Optional but helpful)
Step-by-Step Guide:
Step 1: Preparation
Clean the surface meticulously. Work in a clean, well-lit area.
Step 2: Wet Sanding – The Key to Success
Always keep the surface and sandpaper wet. This lubricates the surface, prevents friction heat (which can melt or warp the acrylic), and washes away debris.
- Start Coarse (if needed): If the scratch is deep, start with 400-grit sandpaper. Focus only on the scratched area, sanding in a straight line along the length of the scratch until it is no longer visible.
- Progress Finer: Move to 600 grit, then 800, then 1000. With each successive grit, expand your sanding area slightly to blend the repaired spot into the surrounding plastic. Sand in a direction perpendicular to the previous grit’s sanding marks. This helps you see when the old scratches have been removed.
- Final Smoothing: Finish with 1500 and then 2000+ grit sandpaper. The surface will now have a uniform, frosted haze. Don’t worry—this is normal and will be removed in the polishing stage.
Step 3: Polishing to a High Gloss
The sanding process leaves microscopic scratches that cause haze. Polishing removes this haze.
- Apply a small amount of your chosen plastic polishing compound to the hazy area.
- Using a clean cloth (or a buffing pad on a low-speed drill), buff the area vigorously using a circular motion.
- Continue buffing until the haze disappears and the clarity returns. This may take several minutes.
- Wipe away any leftover compound residue.
Comparison Table: Choosing Your Abrasives
| Product Type | Best For | Pros | Cons |
|---|---|---|---|
| Toothpaste / Baking Soda | Very light scuffs, hazing | Readily available, inexpensive, low risk | Ineffective on anything but the finest marks |
| Commercial Plastic Polish (e.g., Novus) | Light to medium scratches, final polishing | Formulated specifically for acrylic, easy to use, excellent results | Can be more expensive than DIY options |
| Wet Sanding Kits | Medium to deep scratches | Most effective method for significant damage, full control over abrasion | More time-consuming, requires more skill and tools |
Pro Tips and Pitfalls to Avoid
- NEVER use paper towels or coarse cloths for cleaning or polishing, as they can cause micro-scratches.
- AVOID ammonia-based cleaners (like Windex) or harsh solvents, as they can craze and crack the acrylic.
- Patience is everything. Rushing the process by skipping grits will leave you with deeper scratches that are harder to remove.
- Test First: Always test any method on a small, inconspicuous area first.
- For curved surfaces, be extra careful with power tools to avoid generating too much heat in one spot.
When to Call a Professional
If the scratch is extremely deep, the panel is very large, or you’ve attempted repair without success, it might be time to seek professional help. A plastics fabrication shop has industrial-grade buffing wheels and compounds that can handle severe damage. Sometimes, for critical applications like aircraft windows or museum display cases, replacement is the safer and more optically perfect option.
Conclusion
Buffing scratches out of Plexiglass is a satisfying and entirely achievable DIY task. By correctly assessing the scratch, using the right materials in the correct sequence, and employing a healthy dose of patience, you can restore your acrylic item to its former, crystal-clear glory. Remember the golden rule: start gentle, work wet, and progress slowly through the grits for a flawless, invisible repair.