The Complete Guide to Cleaning RV Water Lines: Sanitation, Descaling, and Maintenance
Meta Description: A professional, step-by-step guide on how to clean RV water lines. Learn proper bleach ratios, safe PSI limits for blowouts, descaling methods, and filter comparisons to ensure safe drinking water on every trip.
Maintaining a clean recreational vehicle (RV) water system is not merely a matter of taste; it is a critical health and maintenance requirement. An RV fresh water system is a fertile environment for bacterial growth, biofilm formation, and mineral scaling if left untreated. Whether you are de-winterizing in the spring, addressing a “stale” odor, or preparing for a long boondocking expedition, a systematic approach to cleaning your water lines is essential.
This guide provides a comprehensive, professional protocol for sanitizing your RV plumbing, including chemical ratios, mechanical purging techniques, and a comparison of filtration solutions to protect your system year-round.
Understanding the Threats: Biofilm, Scale, and Stagnation
Before introducing cleaning agents, it is necessary to understand what you are fighting. RV water systems differ from residential plumbing because they are often subjected to variable water quality from different municipal sources or wells, followed by periods of stagnation during storage.
- Biofilm: This is a slimy, protective layer of bacteria that adheres to the inner walls of your fresh water tank and PEX lines. Once established, biofilm protects pathogens from chlorine and can cause persistent bad tastes and odors .
- Mineral Scale: If you frequently fill your tank in areas with “hard” water (high calcium and magnesium content), scale can accumulate in your water heater and lines. This reduces flow, strains the water pump, and provides crevices for bacteria to hide .
- Stagnation: Water left sitting in a tank for a month or longer without circulation creates an ideal environment for anaerobic bacteria, leading to the classic “rotten egg” sulfur smell .
Phase 1: The Sanitation Protocol (The Bleach Method)
The most widely accepted method for disinfecting an RV fresh water system is the use of a diluted household bleach solution. This method is endorsed by health authorities and manufacturers for its efficacy against harmful pathogens .
Critical Ratios and Safety
It is imperative to use unscented, plain household bleach (typically 5.25% to 6% sodium hypochlorite). Do not use splashless, scented, or thickened bleaches, as these additives can damage seals and are not safe for potable water systems.
The Standard Concentration:
Health authorities generally recommend a ratio of 1/4 cup of bleach for every 15 gallons of fresh water tank capacity. Alternatively, for metric calculations, use approximately 250 mL of bleach for every 250 liters (roughly a 1:1000 dilution) .
Safety Warning: Never mix bleach with other chemicals (like vinegar or ammonia), as this can create toxic chlorine gas. Always add bleach to water, not the other way around.
Step-by-Step Sanitation Procedure
- Preparation and Bypass: Remove any external inline filters or empty the filter canister (you will install a new cartridge after cleaning). If your RV is equipped with a water heater bypass, set it to the bypass position if you are using a high concentration of bleach, though standard sanitation protocols often allow the heater to be treated as long as it is completely filled and rinsed . Note: For tankless water heaters, always consult the manufacturer; many require bypassing during chemical treatments.
- Drain and Fill: Drain the fresh water tank completely. Close the drain valves. If you have a gravity fill port, use a funnel to pour the calculated amount of bleach into the tank. If you are using a city water connection, premix the bleach in a bucket of water and siphon it in using the winterization hose or a funnel .
- Circulate the Solution: Fill the fresh water tank to capacity with potable water. Turn on the water pump. Open each faucet (hot and cold) one at a time—including the shower, outdoor shower, and toilet—until you smell chlorine. This ensures the solution reaches every part of the plumbing, not just the tank .
- Dwell Time: Allow the chlorinated water to sit in the system. While some sources suggest a minimum of 4 hours, Alberta Health Services recommends at least 6 hours, with overnight being optimal for killing entrenched bacteria .
- Flush: Drain the entire system. Refill the tank with fresh potable water and run all faucets again to flush the lines. You may need to repeat this rinse cycle 2–3 times until the chlorine odor is completely gone .
Phase 2: Mechanical Purging and Descaling
Sanitation kills bacteria, but it does not remove sediment or mineral scale. If you are experiencing low water pressure or if the water heater is making popping noises, descaling is required.
Descaling with Vinegar or Citric Acid
For hard water deposits, a mild acid solution is effective. A common DIY solution is a 4:1 mixture of white vinegar and water . For a more professional approach, use a citric acid-based descaler designed for RV boilers.
- Procedure: Fill the system with the descaling solution. Allow it to sit for several hours (or up to 12 hours for heavy scale). Run the solution through the hot water heater (if it is a tank style) to dissolve calcium deposits on the heating element. Flush thoroughly with fresh water afterward .
The Air Blowout (Winterization Prep)
If you are cleaning lines as part of winterization, or simply want to ensure no standing water remains in the lines to stagnate, use compressed air.
- Pressure Limit: Do not exceed 30–40 PSI when blowing out RV water lines. Higher pressure can crack PEX fittings or damage the water pump check valve .
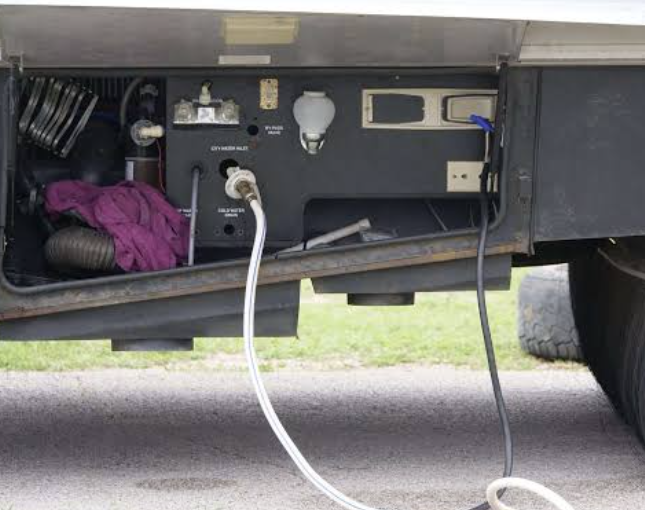
- Method: Connect a blowout plug to the city water inlet. Open all faucets one at a time and let air purge the lines until no mist remains. Never apply air pressure to the system while the water pump is running or while the water heater is full and isolated without a bypass .
Comparative Analysis: Water Filtration and Treatment Solutions
Cleaning the lines is only half the battle; keeping them clean requires controlling the quality of the water entering the rig. The table below compares the primary categories of RV water filtration available on the market.
Note on Microns: A 20-micron filter catches sand and rust. A 5-micron filter catches most cysts (like Giardia). A 0.5-micron filter is required to catch most bacteria. Viruses require UV or chemical treatment as they are too small for most physical filters .
Phase 3: The Water Heater and Appliance Lines
The water heater is a frequently overlooked component of the water line cleaning process. Sediment accumulates at the bottom of tank-style heaters, reducing efficiency and providing a breeding ground for bacteria.
- Tank Heaters: After sanitizing the main lines, remove the anode rod (if equipped) or drain plug. Flush the tank with a high-pressure stream of water using a tank rinser tool to remove the calcium sludge at the bottom. Inspect the anode rod; if it is more than 75% consumed, replace it .
- Tankless Heaters: These require specific descaling protocols. For example, Truma AquaGo units typically require decalcification after every 1,585 gallons of use, using the manufacturer’s specific descaling tablets. Do not use standard bleach solutions in tankless units unless explicitly approved, as the chlorine can damage the internal heat exchanger .
- Ice Makers and Washers: If your RV is equipped with an ice maker or washing machine, these lines are notorious for trapping stagnant water. Run the sanitation solution through them (if the manufacturer permits) or disconnect the lines and flush them manually. Discard the first few batches of ice after sanitizing .
Frequently Asked Questions (FAQ)
1. How often should I sanitize my RV fresh water tank?
You should sanitize the system at least once every six months or at the start of every camping season. However, if you use your RV full-time or fill your tank from uncertain sources (like wells or while traveling internationally), a monthly or bi-monthly sanitation cycle is recommended to prevent biofilm formation . Additionally, you must sanitize immediately if you suspect the water has been sitting stagnant for over a month or if you notice a change in taste or odor .
2. Can I use household bleach to clean my RV water lines, and how much should I use?
Yes, you can use plain, unscented household bleach (5.25%–6% sodium hypochlorite). The standard ratio is 1/4 cup of bleach per 15 gallons of tank capacity. For a typical 50-gallon tank, you would use approximately 3/4 cup of bleach. It is crucial to dilute the bleach in a bucket of water before adding it to the tank to prevent damaging the plastic or rubber components with a concentrated splash. Never use scented or splashless bleach .
3. Why does my RV water smell like rotten eggs, and will cleaning fix it?
The “rotten egg” smell is typically caused by sulfur-reducing bacteria or a reaction between the magnesium anode rod in your water heater and sulfate in the water. Cleaning (sanitation and flushing) will usually fix the issue in the fresh tank and lines. However, if the smell persists only when using hot water, the problem is likely the anode rod in the water heater. You may need to replace the anode rod and flush the heater tank thoroughly with a vinegar solution to remove the sulfurous buildup . If the smell is in both hot and cold, the fresh water tank and lines require a full bleach sanitation cycle as described above.