The Complete Guide to Removing Rust from a Wood Burning Stove: Restoration and Prevention
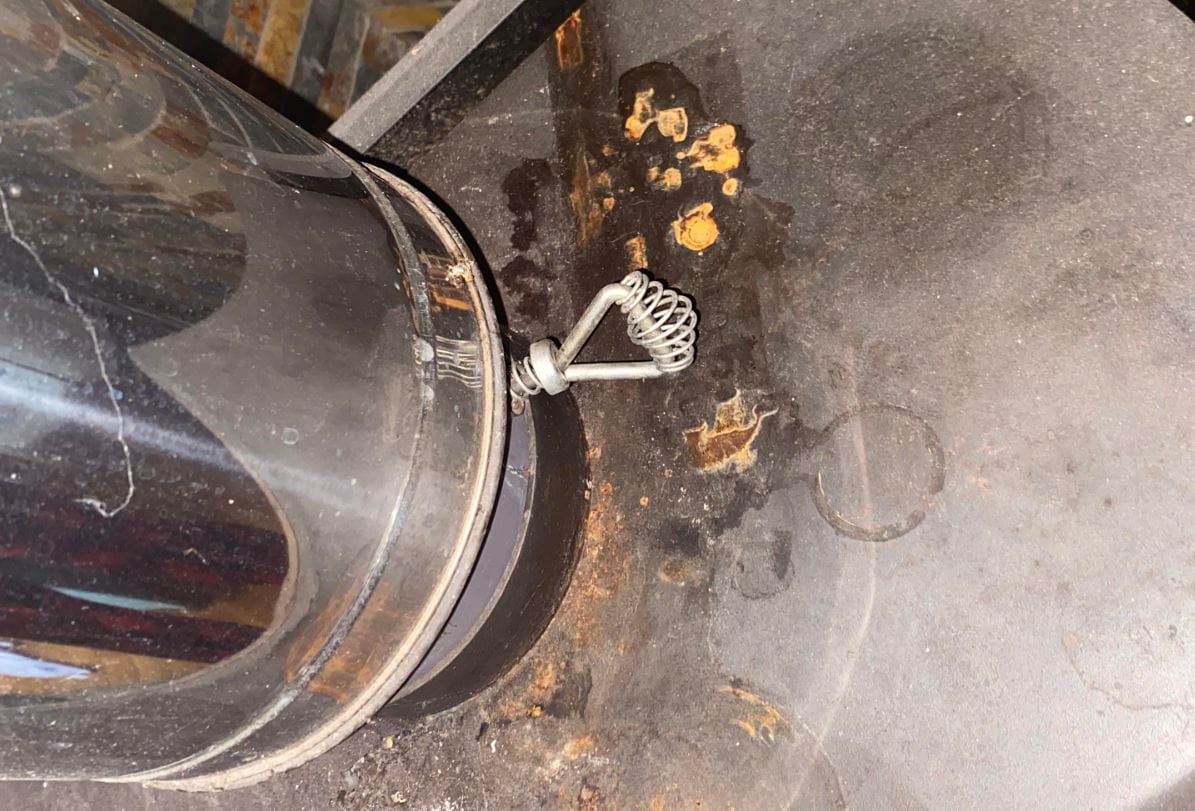
A wood burning stove is more than an appliance; it is the heart of the home during winter. However, the combination of intense heat, metal expansion, and ambient humidity creates the perfect environment for oxidation. Rust is not merely a cosmetic flaw; left untreated, it pits the metal, reduces wall thickness, and compromises the structural integrity of the firebox.
This guide provides a systematic, professional approach to removing rust, treating the surface, and applying protective finishes that can withstand extreme thermal cycling.
1. Diagnostic Assessment: Surface Rust vs. Deep Pitting
Before selecting a removal method, you must classify the corrosion. Using the wrong grit or chemical on deep structural rust can render a stove unsalvageable.
| Classification | Visual Indicators | Tactile Indicator | Prognosis |
|---|---|---|---|
| Flash/Surface Rust | Orange-red dusting; no flaking. Usually appears on flat surfaces during humid off-seasons. | Wipes off with a dry finger, leaving a minor stain. | Excellent. Easily reversible. |
| Scale Rust | Dark brown/black bubbling; flaking layers. The metal surface feels uneven. | Scraping with a fingernail removes crusty flakes. | Good. Requires abrasive mechanics, but the core metal is intact. |
| Pitting Corrosion | Deep, cratered orange spots. Visible depth when viewed under magnification. | Screwdriver tip sinks into a cavity. | Guarded. Requires aggressive grinding. Thickness loss must be monitored. |
| Through-Penetration | Day-light visible through pinholes; lamination of steel layers. | Soft, spongy spots that flex under pressure. | Critical. Stove is a burn hazard and should be replaced or professionally welded. |
2. Preparation and Safety Protocol
Do not underestimate the toxicity of vintage stove finishes or rust dust. Prior to starting, establish a safe workspace.
- Ventilation: Work outdoors or in a garage with cross-draft fans. Iron oxide dust is a respiratory irritant.
- PPE Requirements: NIOSH-approved N95 respirator (mandatory during sanding), chemical-resistant nitrile gloves, and ANSI Z87.1 safety goggles.
- Containment: Lay down 6-mil polyethylene sheeting to capture debris. Avoid using paper, as sparks from metal friction can ignite it.
- Surface Cool-Down: Ensure the stove has not been fired for at least 24 hours. The metal must be chemically cold.
3. The Methodology: Chemical vs. Mechanical Intervention
Choosing the right tool for the job prevents irreversible aesthetic damage to the original cast iron patina, if desired, or prepares the surface perfectly for paint.
Method A: Chemical Rust Dissolution (Chelation)
Best for intricate cast iron reliefs, decorative doors, and surface rust where preserving the metal mass is critical.
The Evapo-Rust or Phosphoric Acid Protocol:
Chemical rust converters (tannic acid) turn rust into a black, inert primer (iron tannate). Rust removers (chelating agents) lift the rust entirely, leaving bare metal. Do not use standard naval jelly containing strong acids unless you can fully neutralize the metal; residual acid causes flash rusting under high heat.
- Degreasing: Scrub the area with mineral spirits to remove soot and creosote, which block chemical action.
- Application: Soak paper towels in the chelating rust remover and apply them as a poultice to the rusted area. Cover with plastic wrap to prevent evaporation.
- Dwell Time: Leave for 4–24 hours, depending on depth. Do not let the poultice dry out.
- Neutralization: Wipe thoroughly with a water-dampened cloth. Flash rust appears within minutes; you must immediately force-dry the surface with a heat gun or hair dryer.
Method B: Mechanical Abrasion
Best for scaling rust and preparation for high-heat paint, where a surface “profile” (scratch pattern) is required for adhesion.
| Tool | Application | Grit/Attachment | Risk Level |
|---|---|---|---|
| Hand Sanding | Final smoothing, light flash rust. | 120–220 grit Aluminum Oxide | Low |
| Wire Brush (Hand) | Removing loose scale from decorative grooves. | Brass (soft, non-sparking) or Stainless Steel | Low |
| Drill Wire Wheel | Medium scale removal on flat panels. | Crimped stainless steel wire | Medium (can polish grooves) |
| Angle Grinder | Heavy pitting, weld splatter, stubborn scale. | Strip disc (poly-abrasive) or 80-grit flap disc | High (can gouge soft cast iron) |
| Media Blasting | Complete restoration of intricate parts. | Crushed walnut shells or aluminum oxide (80-grit) | High (requires full disassembly) |
The Mechanical Protocol:
- Start Coarse, Finish Fine: Remove scale with 80-grit, then refine the scratches with 120-grit to reduce visible swirl marks under paint.
- Avoid Polishing: Do not polish cast iron to a mirror finish. Paint requires a microscopic “tooth” of around 1.5–2.0 mils profile. Over-sanding clogs pores and leads to paint delamination.
- Dust Extraction: Use a HEPA vacuum simultaneously with sanding to prevent iron dust from embedding in the surrounding mortar and firebrick.
4. Surface Decontamination: The Silent Killer of Paint Jobs
Most DIY paint failures occur not from heat, but from silicone contamination or invisible salts. After mechanical stripping, the metal is covered in microscopic debris.
The Two-Cloth Wipe Down:
- Solvent Wash: Douse a lint-free microfiber cloth in Acetone or Isopropyl Alcohol (99%). Do not use paint thinner, as it leaves an oily residue.
- Wipe: Wipe the surface in one direction. Do not scrub in circles; this redistributes contaminants.
- The Tracking Cloth: Immediately follow with a clean, dry cloth to lift the solvent before it evaporates and leaves the suspended contaminants behind.
5. Protective Finish Selection: High-Heat Coatings
Standard paint will blister, discolor, and off-gas toxic fumes at wood stove operating temperatures (400°F–650°F / 204°C–343°C).
| Coating Type | Max Continuous Temp | Application Method | Finish & Notes |
|---|---|---|---|
| Stove Polish (Paste) | Varies (formulation dependent) | Hand-rubbed with cloth | Traditional graphite/charcoal sheen. Requires periodic re-buffing. Not moisture-proof. |
| High-Heat Silicone Alkyd Spray | 650°F (343°C) | Aerosol | Satin or matte black. Flexible; resists flaking during thermal cycling. |
| Ceramic Header Paint | 1200°F–2000°F (649°C–1093°C) | Aerosol (requires curing) | Contains ceramic particles for heat reflection. Used on exhaust headers; extremely durable but limited color palette (usually flat colors). |
| Thurmalox (Silicone Resin) | 1200°F (649°C) | Industrial aerosol/Brush-on | The professional industry standard for stove restoration. Self-priming. |
Curing Protocol (Critical Step):
Air-drying is insufficient. You must stage-cure the paint to cross-link the silicone resins.
- Stage 1: Air dry for 1 hour.
- Stage 2: Light the stove and bring the surface temperature to 250°F (121°C) for 30 minutes. Mild smoke is normal as solvents off-gas.
- Stage 3: Increase to 450°F (232°C) for 30 minutes.
- Stage 4: Run a full hot fire (600°F+) for 1 hour. Ventilate the house thoroughly during the first burn.
6. The Off-Season Preservation Strategy
Rust is a year-round problem, even when the fire is out. The primary culprit during summer is humidity migrating from the chimney.
- The Desiccant Method: Place a tray of silica gel desiccant crystals (like those used in gun safes) inside the cold firebox. This keeps the internal dew point low.
- The Ventilation Rule: Close the damper tightly, but leave the primary air intake slightly cracked open. This prevents a vacuum seal that traps moisture. Do not leave the door wide open; this invites humidity.
- Sacrificial Coating: For stoves in seasonal cabins, wipe down exposed iron with a very light mist of WD-40 or a dedicated anticorrosion oil, knowing it will burn off cleanly during the first autumn fire.
Frequently Asked Questions (FAQ)
Q1: Can I burn the rust off by building an extra-hot fire?
No. A common myth is that a “runaway” fire will burn rust clean. While extreme heat (over 1000°F) can dehydrate iron oxide and cause scale to flake due to thermal expansion differentials, it does not remove the corrosion pits. It also risks warping the baffle plate and cracking internal firebrick. You are simply converting red rust (hydrated oxide) to black scale, which is harder to paint over.
Q2: Is it safe to use a rusty stove if there are no holes?
Surface rust is safe. However, delaminating scale rust is dangerous. As rust forms, it expands up to six times the volume of the original steel, acting like a wedge in welds and seams. A heavily scaled stove can develop micro-fractures that leak carbon monoxide. A smoke pencil test or incense stick test should always be performed along seams after cleaning to check for gas leaks.
Q3: Why does my stove rust only on the top cooking plate?
This localized rust is almost always caused by placing a cold, wet kettle directly on a hot steel plate. The rapid cooling causes micro-condensation at the interface. This is known as “cold shoe pitting.” The fix is aesthetic sanding, but prevention requires never placing a dripping vessel on the stove; dry the bottom of your kettle before use.
Q4: Can I use a rusty stove without repainting, opting for a “raw” oiled finish?
Yes, a traditional “black lead” oil or a hard wax oil (linseed-based) finish can be maintained on a raw cast surface. However, this requires constant maintenance. The bare metal must be buffed weekly with the oil paste to prevent atmospheric moisture from causing flash rust. This is suitable for a constantly used living-room stove but impractical for an infrequently used burner. The surface temperature must stay below the smoke point of the oil (usually 300°F), making it unsuitable for the hottest firebox surfaces.