How to Safely Remove Frayed Power Cords or Zip-Tied Clutter During Deep Cleans

You know the feeling – you’re halfway through a deep clean, elbows-deep in cobwebs behind the dresser, and suddenly you spot it: a mangled cord peeking out like a snake with burnt skin. You freeze. Your gut says “not good”, but your to-do list says “keep moving.” This right here? That’s the moment that separates safe homes from fire risks.
So let’s pause and get real about what danger actually looks like.
- Cord sheath damage: We’re not talking a little scuff. If you see anything resembling an alligator’s cracked hide – especially with hints of exposed copper – it’s already in the danger zone. FYI: a typical 16 AWG cord running 13 amps can start a fire if left compromised.
- Pinching or bending at plug ends: You ever see how headphones fray at the jack? Same idea, but this time it’s 120 volts and heat buildup, not Spotify dropping out mid-rep.
- Over-tight zip ties: If that tie looks like it’s squeezing the life out of the cord harder than your third cup of coffee does your nervous system, it’s too tight. Anything that compresses a cable by 10% or more? Cut it off and breathe easier.
- Burn marks or odors: That faint scent of toasted plastic? Yeah, it’s not your air fryer. That’s insulation breakdown – and it doesn’t give second chances.
Don’t guess – inspect. Because melted wires don’t knock before they strike.

Don’t Just Yank and Hope: Tools That Give You Control and Safety
Ever try to open a pack of zip ties with your teeth? (Don’t lie.) You wouldn’t cut into drywall with a butter knife – so why would you go after cords with scissors from the junk drawer?
Let’s upgrade your toolkit – and your dignity.
Best Pliers/Cutters: Maun Diagonal Cutting Pliers.
These aren’t the “$5 pliers from aisle 12” kind. These are forged for precision, for real pros who care about accuracy. Here are some standout features:
- Induction-hardened edges (62–65 HRC): Cuts clean through hardened ties like a hot knife through rebar.
- Flush-cut jaws: Leaves a smooth finish, not a jagged shard waiting to slice your forearm next week.
- Micro-serrated grip: Perfect for gripping slippy or awkward items. Like the treads on an off-road tire – solid grip, no slip. Especially handy when your hands are sweaty, dusty, or shaking from too much pre-workout.
Also worth grabbing:
- Non-contact voltage tester (CAT III 600V): Think of it as a stud finder for danger. Good models like the Klein Tools NCVT-2P beep when near live current (90–1000V AC) – so you don’t. Non-contact testers only detect live AC voltage, not whether a circuit is completely de-energized. They can give false negatives if not used properly or near DC/current-neutral faults.
- Insulated gloves (Class 0, ASTM D120): Yes, they’re a bit clunky. But so are burns, lawsuits, and explaining to your spouse why the breaker tripped mid-laundry.
- High-CRI headlamp (400+ lumens): Stop guessing if that’s a black wire or a dust-covered green one. CRI 90+ gives true color under bad lighting – your eyes will thank you.
When the job’s precise, use the gear that’s sharp, tested, and proven – because your fingers are not expendable.
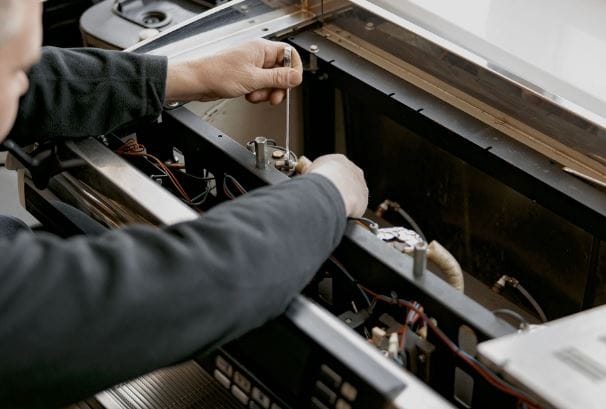
Create a Clean Exit Strategy: How to Cut Without Causing More Problems
Let’s set the scene: You’re under a desk, wedged between two filing cabinets, flashlight clenched in your teeth like some Mission Impossible sequel, and the cords are a tangled jungle. What do you do? If your instinct is “yank and hope” – stop. Hope isn’t a strategy. It’s a liability.
Here’s the pro method, minus the chaos:
- Power down everything. No “standby” mode here. Yank the plugs – both wall and device side. Ever get shocked by a TV that’s supposedly off? That’s why.
- Test the line. That little voltage tester? Use it like Gordon Ramsay uses a thermometer. Test at the plug, mid-cord, and near the fray. If it lights up – back away slowly.
- Pick your cut point. At least 6 inches away from damage or plugs, ideally where the cord sheath is clean. Think of it like surgery: cut where there’s healthy “tissue.” If a damaged cord is permanently attached to a device, consult a qualified electrician or replace the entire unit. DIY cord removal may void warranties or pose legal risks.
- Cut zip ties first – cords last. This ain’t amateur hour. Double-check the breaker box. When in doubt, turn off the entire circuit, not just the appliance. Use your pliers and work from the plug backwards. Go slow. Twist gently. If resistance feels wrong – stop and reassess.
Move like a surgeon, not a sledgehammer. Clean cuts save lives, circuits, and your sanity (source).
Detangling Terrors: Zip-Tie Clutter Doesn’t Need to Be a Horror Show
Zip ties were invented by a Boeing engineer in 1958. Know why? Because plane wiring needed order – not chaos. Fast forward 60 years, and half the homes in America look like someone zip-tied spaghetti behind the TV. But hey – bless the effort, right?
Here’s how to unravel the madness – without becoming part of it:
- Document the layout: Snap wide-angle photos before the first cut. Label ports. Heck, record a walk-through video. Future-you (and your therapist) will thank you.
- Snip ties one at a time: Like Jenga, except if it collapses, it takes your router down with it. Start with the easiest-to-access and work toward the deep knots.
- Group by function and current: Don’t bundle a 12-amp heater cord with an HDMI line. That’s how you get signal interference – and fried gear. Keep data lines (Ethernet, USB) separated by at least ½ inch from anything drawing over 8 amps.
Instead of zip ties, use:
- ½-inch Velcro wraps (rated for 1,000 uses): Reusable, repositionable, and they don’t cut into insulation. Imagine tying a shoelace instead of cinching a zip tie.
- Cable raceways (1.5-inch ABS with adhesive backing): Like drywall duct tape for cables – clean, discreet, and easier than explaining why your wall now has holes.
Good cable management isn’t OCD – it’s operational safety with aesthetic flair.
What to Do with Removed Cords: Don’t Toss – Sort with Purpose
You’ve done the hard work. The cords are out, the ties are cut, and there’s a pile of potential…what now? Tossing everything into a dusty storage bin is just hitting snooze on the fire hazard.
Let’s sort smart:
- Recycle anything damaged or aged-out. Cut the ends off, roll the cord, zip it in a bag, and drop it at an e-waste facility. Each cord can contain 0.08 lbs of copper – don’t landfill that.
- Repurpose what still works. Got a heavy-duty 14-gauge extension cord? Label it and coil it properly. Follow the over-under method like stagehands do – minimizes memory twist and tangling.
- Donate the tech you’ve moved beyond. That drawer full of USB-B, VGA, and mystery power bricks? Schools, robotics clubs, and local shelters often need them. One Chromebook charger can make a difference to a student.
Don’t just clean – curate. Give each wire a future that serves instead of risks.
Final Note: Prevention Is the New Power Move
Let’s get ahead of the next deep clean. Because let’s be honest – you don’t want to keep reacting to cord chaos like it’s a surprise every time. “Oh, look – another melted power bar under the recliner.” No. We’re better than that now.
Your seasonal checklist, now with muscle:
- Pull out every large appliance and inspect what’s been hiding for months. (Spoiler: it’s not just crumbs and dog toys.)
- Look for signs of pinching – if a table leg’s sitting on a cord, it’s not resting, it’s crushing.
- Use your voltage tester liberally. That $25 tool could prevent a $2,500 insurance claim.
- Replace any cord that fails the twist-and-tug test. (30° flex, 5 lb pull – any failure, it’s out.)
Also – stop buying flimsy cords.
- Choose UL-listed, braided jackets, 14 AWG or thicker, and strain relief ends rated for 10,000+ bends.
- Avoid anything under $8 per 6 feet. If it’s cheaper than your lunch, it’s not designed to survive your outlet.
Safety doesn’t happen by accident. Make cord care part of your system – and deep cleans will start revealing confidence, not chaos.