How to Clean a Grill After Using a Fire Extinguisher: A Definitive Safety and Restoration Guide
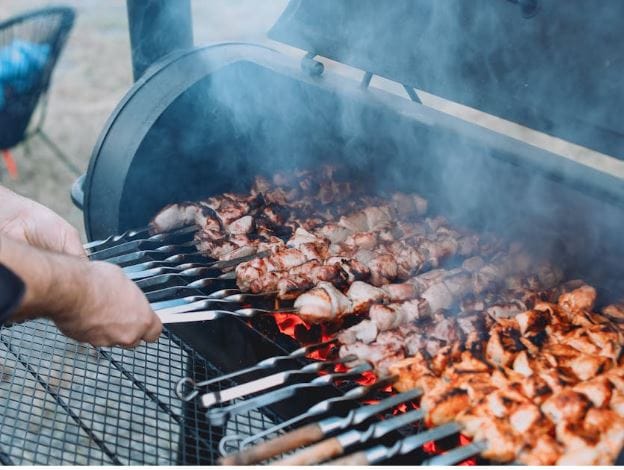
A grease flare-up on the grill that escalates into a full-blown fire is a pitmaster’s nightmare. When a fire extinguisher is deployed to save your property (and potentially lives), the immediate danger is neutralized. However, a secondary crisis emerges: your grill is coated in a fine, chemical powder that renders it completely unusable and hazardous.
Cleaning a grill after using a fire extinguisher is not like a standard deep clean. The residue is corrosive, toxic if ingested, and requires a specific chemical neutralization process.
This guide provides a professional, step-by-step protocol for restoring a grill exposed to monoammonium phosphate (ABC dry chemical)—the most common residential extinguisher agent.
Table of Contents
- Critical Safety & Identification: Know Your Chemical
- The Corrosion Clock: Why Speed Matters
- Phase 1: Dry Gross Decontamination
- Phase 2: Chemical Neutralization Protocol
- Phase 3: Degreasing and Passivation
- Phase 4: High-Temperature Burn-Off (For Non-Powder Coated Surfaces)
- Special Considerations by Grill Surface
- The “Clean vs. Replace” Financial Matrix
1. Critical Safety & Identification: Know Your Chemical
Before touching the grill, identify the class of extinguisher used. The cleaning protocol changes drastically depending on the agent.
| Extinguisher Class | Agent | Residue Characteristics | Grill Restoration Feasibility |
|---|---|---|---|
| ABC Dry Chemical | Monoammonium Phosphate | Fine, yellow/white powder; corrosive; melts and adheres to hot surfaces. | Restorable, but difficult. Requires immediate chemical neutralization. |
| BC Dry Chemical | Sodium/Potassium Bicarbonate | White powder; mildly alkaline; less corrosive than ABC. | Restorable. Easier cleaning than ABC; still requires thorough removal. |
| CO₂ (Carbon Dioxide) | Compressed Gas | No residue. It’s a gas that dissipates. | No residue cleaning required. Check for cold-shock thermal damage to ceramic parts. |
| Class K (Wet Chemical) | Potassium Acetate/Citrate | Saponifying liquid soap; creates a thick foam blanket. | Restorable. Heavy degreasing required. Very slippery. |
Warning: If a halogenated “Halon” or Halotron “clean agent” was used (common in commercial kitchens but rare residentially), ventilate the area well. These gases displace oxygen and can create toxic byproducts when heated. The residue is minimal but requires ventilation.
Professional Note: This guide focuses overwhelmingly on ABC Dry Chemical residue, as it represents 90% of residential grill fire incidents due to grease fires (Class B) occurring near electrical components (Class C) or solid combustibles (Class A).
2. The Corrosion Clock: Why Speed Matters
Monoammonium phosphate is hygroscopic (it attracts moisture) and becomes highly corrosive when wet. When the powder contacts the microscopic pores of stainless steel or cast iron and then draws humidity from the air, it forms phosphoric acid.
The Timeline:
- 0–2 Hours: Powder is dry. Brushing and vacuuming are effective.
- 2–24 Hours: Ambient humidity begins reacting with powder. Surface staining begins on stainless steel.
- 24+ Hours: Visible rust bloom and pitting appear on untreated carbon steel, cast iron, and even surgical-grade stainless.
Action Protocol: You should begin dry removal within one hour of discharge.
3. Phase 1: Dry Gross Decontamination
Do not introduce water yet. Water activates the corrosive properties of ABC powder instantly.
Required PPE:
- N95 or P100 respirator (powder silica and ammonium salts are fine particulate lung irritants).
- Chemical splash goggles (not just safety glasses).
- Nitrile gloves.
Procedure:
- Ventilation: Move the grill outdoors to an open area (driveway). Do not clean inside a garage.
- Component Dismantling: Remove grates, flavorizer bars, burner tubes, and grease tray. A pile of powder hiding in the grease trap will ruin the restoration.
- High-Volume Air Purge:
- Use an air compressor with a blow gun nozzle (max 30 PSI to avoid aerating the powder too aggressively) or a leaf blower.
- Blow out the entire firebox, focusing on corners, seams, and the back of the control panel.
- HEPA Vacuuming:
- Do not use a standard shop vac without a HEPA filter and bag. Standard filters will aerosolize the fine chemical dust, spreading it through the neighborhood and into your lungs.
- Vacuum the firebox, all components, and the ground surrounding the grill.
4. Phase 2: Chemical Neutralization Protocol
ABC powder is acidic when it reacts with humidity. To neutralize it, we must use a mild base. However, strong alkalis (like oven cleaner/liquid sodium hydroxide) can damage aluminum burner housings. We must use a buffered, gentle solution.

The Professional Mix:
Mix in a dedicated pump sprayer or bucket:
- 1 Gallon Warm Water
- 1 Cup White Distilled Vinegar (5% Acetic Acid) – Acts as a mild acidic buffer to prevent flash rust on steel while cutting the phosphate.
- 1 Tablespoon Baking Soda – Initially neutralizes the slurry, creating a very mild alkaline wash that attacks the fatty acid salts formed by the fire and the extinguisher.
Alternative Commercial Solution:
- Chemspec DFC-105 (Dry Foam Cleaner) – Specifically designed for dry chemical fire extinguisher residue cleanup. If this is available, disregard homemade mixes and follow label instructions.
Application Process:
- Saturate: Spray the neutralizer liberally on all powdered surfaces inside the firebox and on the removed parts.
- Dwell Time: Allow 5–7 minutes of dwell time. You will see a slight chemical reaction (fizzing/foaming) as the crusted phosphate is broken down. Do not let it dry on the surface.
- Agitation: Scrub with a nylon bristle brush. Do not use steel wool or brass brushes yet; you will grind the phosphate crystals into the grain of the metal, creating permanent scratches.
- Rinse: Rinse with low-pressure clean water. Crucial: Do not spray water into the burner tube inlets or the gas valves (if electronic).
5. Phase 3: Degreasing and Passivation
The extinguisher residue often mixes with burnt grease to form a sticky, lacquer-like substance. The neutralization step removed the salt, but the polymerized grease remains.
- Degreasing Agent: Use a professional-grade degreaser (such as Zep Purple or Simple Green HD Pro). Apply, let dwell for 10 minutes, and scrub.
- Stainless Steel Passivation:
- If your grill is stainless steel, the fire extinguisher has likely stripped the passive chromium oxide layer, leaving it vulnerable to rust.
- After degreasing, wipe down stainless steel surfaces with a citric acid passivation gel (Surfox 101 or Citrisurf). This re-establishes the corrosion-resistant layer. Rinse with distilled water.
6. Phase 4: High-Temperature Burn-Off
After manually cleaning, a thermal “sacrificial” burn-off is mandatory to volatilize any remaining chemical trace from the firebox and grates.
- Reassemble Grill: Reinstall burners, flavorizers, and grates.
- Ventilation: Open the lid. Run the grill on HIGH.
- Soak Time: Leave the grill at maximum temperature (500°F+) for 45–60 minutes.
- Safety Note: Expect light smoke and a mild chemical smell. This is the remaining ammonium phosphate subliming. Keep children and pets away.
- Re-Cleaning: After cooling, the interior will likely have a white “dusting.” This is the dead, inert residue. Wipe this down with a damp microfiber cloth and a light coat of cooking oil on the steel to create a new seasoning barrier.
7. Special Considerations by Grill Surface
| Component/Surface | Specific Risk | Cleaning Modification |
|---|---|---|
| Cast Iron Grates | Deep porosity absorbs chemicals. | After neutralization, boil grates in a pot of water (if removable) or steam clean. Re-season with 3 cycles of oil baking. If they had deep rust pre-fire, replace them. |
| Ceramic Briquettes | Porous like a sponge. | Recommendation: Discard and replace. You cannot fully purge the chemical from the porous ceramic. Heating may cause them to crack or release toxic fumes. |
| Infrared Burners | The ceramic honeycomb/fiber mesh traps fine dust. | Gently blow compressed air backwards through the burner (from the outside-in). Do not scrub the ceramic face; it will crumble. High-temp burn-off is mandatory. |
| Gas Manifold/Valves | Corrosion on brass threads, leading to gas leaks. | Never spray liquid into the valve stems. Wipe stems with an acid-free electrical contact cleaner. Perform a soapy water leak test on all junctions before standard use. |
| Paint/Powder Coat Lid | Chemical adhesion to exterior finish. | Wash immediately with pH-neutral car wash soap. The powder contains mild abrasives that will dull a clear coat left on dry. |
8. The “Clean vs. Replace” Financial Matrix
In a professional restoration context, labor is the primary cost. Evaluate whether the grill’s value justifies the 6-8 hours of labor required to restore it safely.
| Scenario | Extinguisher Type | Action | Rationale |
|---|---|---|---|
| Budget Charcoal Kettle ($150) | ABC Dry Chem | Scrap & Replace | The cost of cleaners, PPE, and time exceeds replacement value. Pitting in thin enamel is unrecoverable. |
| Mid-Tier Gas Grill ($500–$800) | ABC Dry Chem | Restore | Viable if caught early. Budget for new ceramic briquettes and igniters. |
| Premium Built-In ($3,000+) | ABC Dry Chem | Professional Restoration | Focus on passivation to prevent long-term rust. Replace gas flex hoses entirely. |
| Any Grill | CO₂ | Clean & Use | No residue. Inspect for thermal shock only. |
Final Verification: The “Taste and Smell” Test
After cleaning and burn-off, place a few slices of plain white bread on the grates and toast them at medium heat. Smell the bread. If you detect any acrid, metallic, or “chemical” odor, repeat the degreasing and burn-off phase. Do not cook food until the grill is scent-neutral.
Disclaimer: This guide is for informational restoration purposes. If the fire damaged the gas regulator, hoses, or structural integrity of the grill, consult a certified gas technician before use.