Can I Use a Magic Eraser on Leather? The Definitive, Evidence-Based Answer
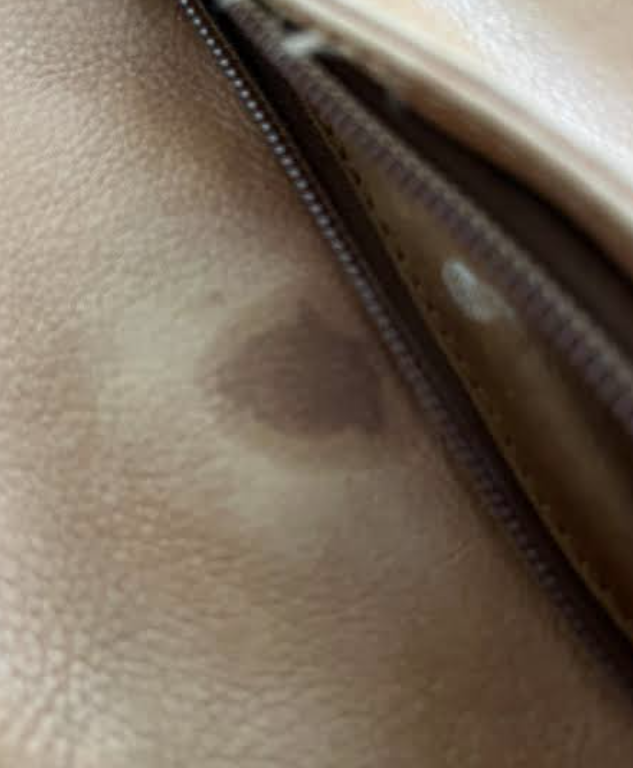
Direct Answer: No. You should never use a Magic Eraser on leather. While the melamine foam sponge may appear soft and damp, its microscopic structure functions as an ultra-fine abrasive—comparable to 3,000 to 5,000-grit sandpaper . When applied to leather, it does not simply “lift” dirt; it mechanically shaves away the protective top-coat, the pigment layer, and eventually the dye complex itself . The immediate result often looks like success because the stain disappears, but the structural damage to the leather’s finish is permanent and typically becomes visibly apparent only weeks later under different lighting .
The Science Behind the Damage: Why “Magic” Equals Abrasion
Understanding why Magic Erasers are incompatible with leather requires looking at both materials at a microscopic level.
What Is a Magic Eraser?
Magic Erasers are made from melamine foam, a formaldehyde-melamine-sodium bisulfite copolymer . During manufacturing, the resin is cured into an open-cell foam structure. At the microscopic level, the struts surrounding the air pockets harden into structures almost as hard as glass . When you dampen the sponge and apply friction, these rigid microscopic filaments act like a windshield wiper dragging across a surface—scraping away anything softer than themselves .
What Is Leather?
Leather is not a single, uniform material. Finished leather—the type used for most sofas, car seats, and handbags—typically consists of three critical layers:
- The Top-Coat: A clear or lightly tinted polyurethane-acrylic film (usually 10 to 30 microns thick) that provides protection against abrasion, stains, and wear .
- The Pigment Layer: Opaque color particles bound to the hide by a soft polymer binder .
- The Dye Complex: The color that penetrates the actual fibers of the hide (especially critical in aniline and semi-aniline leathers) .
The “magic” of the eraser is that it is harder than the soil it removes but (supposedly) softer than the surface being cleaned . However, leather’s protective top-coat is softer than melamine foam. Consequently, the eraser cannot distinguish between a scuff mark and the factory finish.
The Three-Stage Failure Progression on Leather
Damage from a Magic Eraser on leather is not random; it follows a predictable, layered progression depending on how much pressure and friction is applied .
| Stage | What Is Removed | Visual Result | Reversibility |
|---|---|---|---|
| Stage 1: Top-Coat Removal | The clear polyurethane-acrylic protective film. | A matte, dull patch appears where the surrounding leather was satin or glossy. The stain is gone, but so is the sheen. | Difficult. Requires professional re-lamination of the top-coat. |
| Stage 2: Pigment Removal | The opaque color layer beneath the top-coat. | A visibly paler, fibrous-looking patch appears where the dyed fibers underneath are exposed. | Moderate to Difficult. Requires color matching and refinishing. |
| Stage 3: Dye Complex Damage | The dyed grain fibers themselves (common on aniline leathers). | The surface character is permanently changed; the grain pattern is disturbed, and the color looks uneven and raw. | Severe. Often requires replacement or extensive professional restoration. |
Source: Analysis of melamine foam damage progression by leather restoration specialists .
The insidious nature of this damage is that it mimics success. In the first week, the cleaned area may look acceptable in soft living room lighting. By week three or four, as raking sunlight or angled lamps reveal the different sheen, the matte zone becomes obvious. By month two or three, the exposed substrate collects dust and oils at a different rate than the protected surrounding finish, causing the damaged area to darken and become even more conspicuous .
Comparison: Magic Eraser vs. Appropriate Leather Cleaning Methods
To understand why the eraser is the wrong tool, it helps to compare it against methods that are actually designed for leather.
What Should You Use Instead? A Step-by-Step Guide
If you have a stain on leather, the correct approach depends on the type of leather and the nature of the stain. Here is the professional protocol.
Step 1: Identify the Leather Type
Check the care tag or manufacturer documentation. Most consumer leather falls into three categories:
- Finished/Pigmented: Has a protective coating. Most resistant to stains .
- Suede/Nubuck: Soft, napped surface. Requires special brushes and cleaners; never use standard leather cleaners or water .
- Aniline/Unfinished: Very absorbent, no protective coating. Stains easily. Requires professional-grade products .
Step 2: The “Golden Rule”—Test First
Before applying any product to a visible area, test it on a hidden spot (inside hem, underside of a cushion, or back of a panel). Wait for it to dry completely to ensure no discoloration occurs .
Step 3: The Safe Cleaning Routine (for Finished Leather)
- Dust: Wipe with a soft, dry microfiber cloth to remove loose debris.
- Damp Wipe: Dampen a soft white cloth with distilled water (tap water can leave mineral spots). Wring it out until it is barely moist. Gently wipe the surface .
- Dry: Blot with a dry cloth and let it air dry away from heat or sunlight .
- Condition: Apply a dedicated leather conditioner with a soft cloth to restore natural oils and prevent cracking .
Step 4: For Stubborn Stains
Use a dedicated leather cleaner. Apply a small amount to a soft cloth (never directly to the leather), work it gently in a circular motion, and wipe away residue with a clean damp cloth .
What to Do If You Already Used a Magic Eraser
If the damage is recent (within minutes), stop immediately and do not apply more pressure. If the top-coat has been stripped (visible as a matte patch), the leather is now vulnerable to water, oils, and UV damage. Do not attempt to “fix” it by applying more eraser or household products. Consult a professional leather restoration specialist. Depending on the depth of the damage (Stage 1 vs. Stage 3), they may be able to re-laminate the top-coat or refinish the pigment . Delaying professional assessment allows the exposed substrate to collect contamination, which makes restoration more difficult and costly.
Frequently Asked Questions (FAQ)
1. Can I use a Magic Eraser on faux leather or vegan leather?
No. The risks are nearly identical to genuine leather. Faux leather (polyurethane or PVC) also relies on a top-coat and pigment layer to provide its appearance and durability. The abrasive melamine foam will scuff and remove the surface finish of faux leather just as readily, leaving dull, permanently scratched patches that cannot be conditioned or restored . For faux leather, use a damp microfiber cloth with a mild detergent, buffing gently in small circles .
2. The Magic Eraser seemed to work and the stain is gone. Is the leather actually damaged if I can’t see it?
Yes, it is almost certainly damaged. The stain disappearing is the result of the abrasive shaving away the surface layer that the stain was sitting on—not a chemical lifting of the dirt . The damage is often invisible under soft, ambient indoor lighting for the first few weeks. However, the stripped area will have a different sheen (usually matte) compared to the surrounding finish. Under direct sunlight or angled lamps, this difference will become obvious. Furthermore, without the protective top-coat, that specific area will age differently, absorbing oils and dirt unevenly and potentially fading faster under UV exposure .
3. Can I fix the damage if I’ve already used a Magic Eraser on my leather?
It depends on the depth of the damage, but it is not a DIY fix. If only the top-coat (Stage 1) was removed, a professional leather restorer may be able to re-apply a matching top-coat lamination. If the pigment (Stage 2) or dye complex (Stage 3) was removed, the repair requires color matching, pigment re-application, and refinishing . Do not attempt to fix it with household conditioners or dyes, as these can trap contamination or create uneven color. The best course of action is to stop using the eraser immediately, keep the area dry and free of dirt, and consult a professional leather specialist for an assessment. The earlier the damage is addressed, the less extensive (and expensive) the restoration will be .