How to Clean Your Spectre Air Filter for Peak Performance
If you’ve invested in a Spectre performance air filter, you already know it is designed to outlast disposable paper filters and improve engine airflow. However, to keep your engine breathing freely and maintain that slight edge in performance, regular cleaning is non-negotiable. Unlike paper filters that get tossed in the bin, a Spectre HPR (High Performance Replacement) filter is reusable, but only if you treat it right.
This guide compiles official instructions and expert tips to walk you through the process, ensuring you don’t accidentally damage your filter or harm your engine’s mass airflow (MAF) sensor.
Why Cleaning Matters (And How Often to Do It)
A dirty air filter is the enemy of performance. As dirt and debris accumulate, they starve your engine of air, which can lead to decreased fuel economy, sluggish acceleration, and even rough idling .
Recommended Service Intervals:
- Standard Inspection: Every 7,000 miles or during routine manufacturer maintenance .
- Maximum Interval: Never exceed 25,000 miles without servicing, even in clean conditions .
- Severe Conditions: If you live in a dusty or harsh environment, inspect your filter much more frequently .
What You’ll Need
Before you start, gather the necessary tools and materials. Using the correct products is crucial to avoid damaging the delicate gauze material of the filter.
- Screwdriver: To open the air box housing .
- Spectre Cleaning Solution: Specifically the Accu-Charge Kit (HPR4820) or similar cleaner .
- Spectre Filter Oil: To re-coat the filter after drying .
- Warm Water: For rinsing .
- Safety Gear: Dust mask and eye protection to avoid inhaling loose particles .
Step-by-Step Cleaning Instructions
Follow these steps carefully. Rushing the process—especially the drying and oiling stages—is the most common reason for filter failure or engine sensor issues.
Step 1: Removal and Dry Debris
First, remove the filter from your vehicle by opening the air box housing with a screwdriver . Gently tap the filter against the inside of a trash can to loosen and remove external dirt particles. Tap with the dirty side facing down to force debris out rather than deeper into the pleats .
Step 2: Apply Cleaner
Evenly spray the Spectre Air Filter Cleaner over the entire surface of the filter media. Allow the solution to soak in for about 10 minutes . This dwell time is essential for the cleaner to break down the oil and trapped dirt without you having to scrub aggressively .
Step 3: The Rinse (Crucial Direction Matters)
Rinse the filter with cool or warm water.
- Flow Direction: Always rinse from the clean side to the dirty side. This pushes contaminants out the way they came in .
- Pressure Warning: Do not use high-pressure sprayers or concentrated hose nozzles. High pressure can tear the gauze or damage the wire mesh . A low-flow garden hose or a gentle sink sprayer is ideal. Continue rinsing until the water runs clear .
Step 4: Dry the Filter (Be Patient!)
After rinsing, gently shake off excess water. You can pat it with a clean, lint-free towel.
- Air Dry: Place the filter in a warm area or in direct sunlight to speed up drying .
- Time: Drying can take anywhere from 6 to 14 hours, sometimes overnight. The filter must be 100% dry before oiling .
- Warning: Never use a heat gun, hair dryer, or heater to force the drying process, as this can shrink or crack the filter media .
User Experience Insight: One user reported their filter still being wet after 14 hours of air drying, plus additional time with a heater and hair dryer. They emphasized that you cannot rush this step, and you should not operate the vehicle with a wet filter .
Step 5: Apply Oil (Less is More)
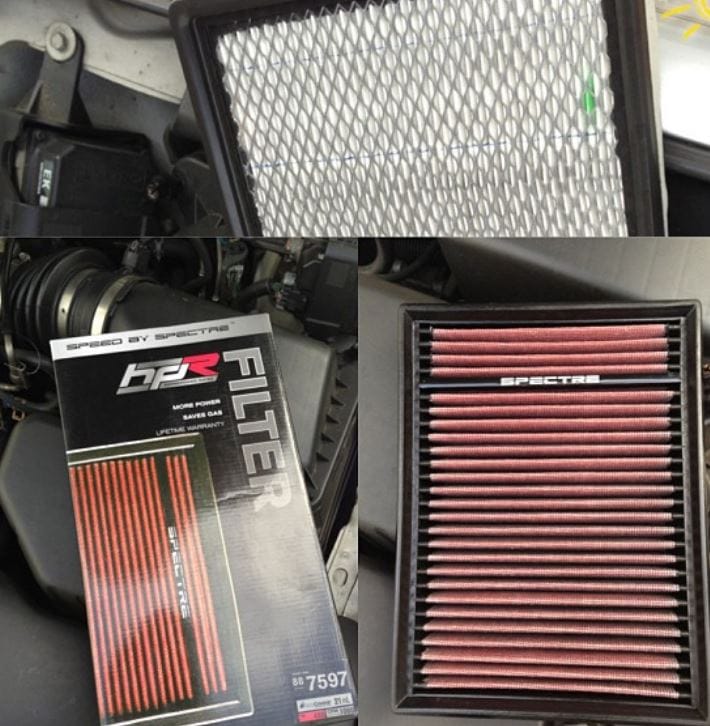
Once the filter is completely dry, it’s time to re-oil. Identify your filter part number or size to determine the required oil amount (refer to the chart in the official guide) .
- Application: Spray the Spectre filter oil evenly across each pleat.
- Avoid Over-Oiling: Do not apply more oil than recommended. Over-oiling can saturate the filter, causing a decrease in airflow and potentially coating your MAF sensor with oily residue, which leads to poor engine performance .
- Clean Up: Wipe away any overspray from the filter lid, base, or nameplate .
Step 6: Re-Install
After allowing the oil to penetrate for about 20 minutes , carefully place the filter back into the housing compartment, close the lid, and secure it with screws .
Comparison: Spectre HPR vs. Other Filter Types
To help you understand where the Spectre filter stands, here is a comparison between the reusable Spectre HPR filters and standard filters.
Spectre HPR vs. Disposable Paper Filters
Spectre HPR vs. K&N Filters
Common Mistakes to Avoid
Learning from others’ errors can save you from a costly engine repair or a wasted filter.
- Using the Wrong Products: Do not use gasoline, industrial solvents, or degreasers. Only use a dedicated filter cleaner .
- Over-Oiling: This is the #1 mistake. Excess oil gets sucked into the intake, dirtying the throttle body and ruining the Mass Air Flow (MAF) sensor. A quick, even spray is all you need .
- Using Compressed Air: Never use pressurized air to blow a filter dry or clean it. It will create micro-tears in the media, ruining the filter’s ability to trap fine particles .
- Incomplete Drying: Installing a wet filter can cause your engine to run poorly and will cause the oil to not adhere properly .
Signs You Need to Clean Your Filter Immediately
Don’t always wait for the mileage interval. Clean your Spectre filter immediately if you notice any of the following :
- Reduced Fuel Economy: You find yourself visiting the gas station more often.
- Loss of Horsepower: The engine feels sluggish or unresponsive when you hit the gas.
- Unusual Sounds: The engine might cough or stumble, or you might hear a “popping” sound.
- Check Engine Light: Dirt buildup can sometimes trigger sensors.
- Black Smoke: Insufficient air causes rich fuel mixtures, leading to black smoke from the exhaust.
Conclusion
Cleaning your Spectre air filter is a straightforward DIY task that takes about 20 minutes of hands-on time, plus drying time. By following the manufacturer’s steps—gentle rinsing, thorough drying, and conservative oiling—you can ensure your vehicle enjoys the benefits of increased airflow and filtration efficiency for many years. Always remember to consult your vehicle’s owner’s manual and the specific instructions for your Spectre filter model to ensure the best results