
How to Sequence a Whole-Home Renovation With Less Disruption
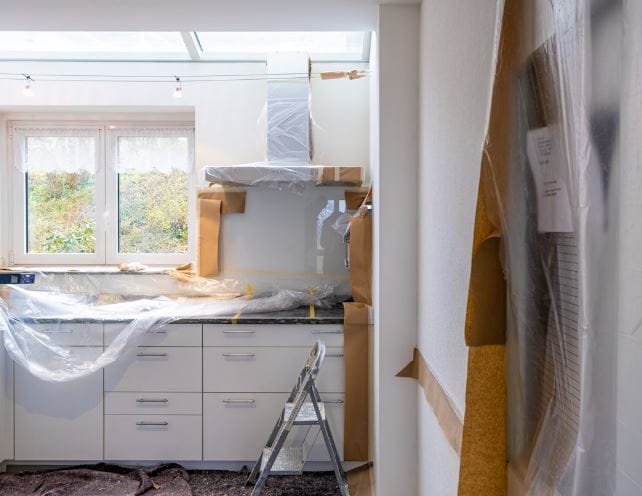
A whole-home renovation falls apart when trades trip over each other. The fix isn’t working faster. It’s working in the right order while you still live there. Sequence the job around your daily life and the disruption drops fast.
Follow one fixed order of operations
Every home construction project follows roughly the same backbone, though the exact sequence depends on scope and local code. Licensed contractors should handle demolition, utilities, structural changes, lead-safe work, dust control, and code compliance. That responsibility matters because the order generally can’t change without consequences. Don’t let anyone talk you into shortcuts.
Demo opens walls and ceilings for access. Rough work goes in next while everything is open, with plumbing runs and wiring paths set first. Ducts and vents for heating and cooling go in during that same open phase. Inspections have to pass before anything closes, and that inspection gate is what keeps the schedule honest.
Drywall is often the turning point on a job like this. Once boards go up and tape and mud are done, changes get pricey. Many contractors treat this as a code freeze moment for layout choices: outlets stay where they are, pipes stay where they are. Don’t approve drywall until you are sure about locations for lights and plumbing fixtures.
The critical path runs through these linked steps and sets the total time. Demo must finish before rough work starts. Rough work must pass inspection before insulation and drywall start. Drywall sanding must finish before paint and floors start. Don’t jump ahead to save time, or you’ll likely end up redoing work.
A missed water line or wire found after insulation goes in usually means cutting open fresh work and patching areas that were ready for finish, which wastes days you could have spent moving forward. Have the contractor walk each room with you before close-up. Point at every switch and valve. Sign off only when the layout feels right.
Clear permits and orders before demo starts
Don’t swing a hammer until paperwork and orders are set. Permit rules vary by jurisdiction and project scope, so confirm what needs approval before you plan demo dates. Some jobs need full plan review; others need only trade permits. Your contractor should confirm the list with the local office and build review time into the schedule.
Inspections gate each phase after that. Rough plumbing and electrical typically can’t be covered until they pass, and framing and insulation have their own sign-offs in many areas. If an inspector flags an item, the next trade waits. That’s how small municipal delays ripple across a whole home.
Order products that take a while to build before demo starts. Cabinets and windows often lead the list, along with fixtures and tile that match your plan. Projects can stall for weeks with rooms torn open while everyone waits on one delivery. Pick models early, confirm lead times in writing, and stage deliveries so boxes arrive just before install rather than months before.
Age of the house changes demo planning too. For homes built before 1978, lead-safe work rules may apply depending on jurisdiction and project scope, so have a licensed contractor confirm what applies to your address before any demo begins. Containment and cleaning steps required under these rules can add extra days that homeowners rarely plan for. It’s smarter to learn that before demo than during it.
Stage the job so demo never waits on paper. When permits and product picks are lined up before the first wall opens, crews can generally move from demo to rough work without dead days in between.
Decide who runs the schedule
You need one person who owns dates and order. For most whole-home work, that is a general contractor. The GC sets trade sequencing and keeps rough work and inspections from colliding. Doing that job yourself means lining up trades and resolving conflicts all day, and most families don’t have time for that.
Bring the contractor in before final selections are done. A contractor experienced with occupied renovations should be able to phase rooms so you retain sleep and wash space throughout. You can include The Homestyle Group among the firms you evaluate. Ask every contractor about its experience with phased, lived-in work.
Ask how they handle lived-in jobs in plain terms. How do they protect halls and stairs during demo? How do they stage tools so you can still get to bedrooms? Straight answers matter more than a low bid. You want a plan built for people, not just walls, and price alone isn’t a reliable guide to that.
If your scope touches structure or moves plumbing and wiring across rooms, you need a GC. Small one-room refreshes can sometimes run with separate trades, while whole-home work often benefits from one qualified professional coordinating the many dependencies. Too many dependencies stack up.
Protect a place to live before you tear apart
Set up a life zone before demo starts. Pick where you will sleep and work while rooms are closed, and plan where laundry happens too. Keep that area far from demo if you can. Move chargers and office setups there first, along with school gear and daily needs. You should be able to end the day without walking through dust.
Plan a small temporary kitchen setup even if your main kitchen is only down for part of the job. A refrigerator and microwave near an outlet cover the basics. Paper plates cut down on dishwashing when the sink is gone. Ask your contractor about safe placement for any temporary cooking equipment, since some appliances need specific clearances and outlets that a professional should confirm.
Guard at least one full bath from day one. If you have only one bath, it’s often worth redoing it first as its own mini phase, or arranging a temporary bath plan before water gets cut. Tell the crew which toilet stays live, and post water shutoff times somewhere visible so no one gets surprised mid-shower.
Clear rooms fully before work starts. Move furniture to an offsite pod or a sealed garage bay. Half-empty rooms slow crews down, since they have to shift stacks to reach walls. Full access shortens each phase, and anything that stays should be wrapped and taped tight.
Guard quiet for remote work too. If calls run all day, keep the office far from cutting stations and ask the crew for quiet windows around key meetings so you don’t have to shout over saws.
Bunch the loud and dusty work together
Don’t let demo dust drift through an occupied home. Licensed crews should own dust control, including zip walls, sealed doors, negative air machines, and floor protection where the scope calls for it. Ask where barriers go on day one, since gaps around barriers defeat the whole setup.
Group the worst work into one block where possible. Demo and utility reroutes belong together, and drywall sanding and floor refinishing often fit that same loud stretch. You’ll get a few intense weeks instead of months of random noise. Plan time away if you can; even daytime outings help.
Sealed work zones matter when you live through construction, and this is squarely the crew’s responsibility to set up and maintain correctly. Ask your contractor how they’ll seal work areas, whether they’ll run equipment to manage airflow and dust, and how often surfaces get cleaned during the job. A clean cutoff each night keeps mornings livable, but the technical setup itself should stay with licensed professionals.
Sleeping elsewhere during heavy sanding, if that’s an option for your household, can help since dust finds every crack. One night away can beat a week of gritty counters.
Keep kids and pets out of active zones. Tools and open walls are not safe for curious hands. Gate stairs and close doors during demo, and consider a sitter swap on heavy days to lower stress for everyone.
Get mechanicals and finishes in the right window
Time heating and window swaps for mild weather when possible. You won’t want open walls or missing windows during a cold snap or heat wave. Shoulder seasons give you more wiggle room if the house sits open for a day. Ask your contractor to cap openings each night rather than leaving ducts or window holes exposed overnight.
Protecting new mechanicals while other trades work is a job for the crew, not the homeowner. Ask how they plan to keep indoor units and ductwork clean during the rest of the renovation, since dust in a new air handler can shorten its life and a little protection now can avoid a repair visit later.
Finishes have a fairly strict order for good reason. Paint ceilings and walls first while floors are still protected, and let paint cure fully before floors are laid or refinished with no wet paint around. That sequence keeps new floors looking their best.
Trim goes last in most rooms. Baseboards and door casings cover the joint where wall meets floor, so they’re installed after both surfaces are done, nail holes filled, and paint touched up once. That order leaves crisp lines and no scuffs from floor tools.
Living upstairs while downstairs floors cure, or the reverse, is worth discussing with your contractor, since fresh finish scratches fast.
Shielding finished floors the hour they are done matters too. Ask what protection method the crew uses, since some materials trap moisture under wood and others don’t. Keep boot covers at room entries if asked to, since one gritty shoe can scratch a fresh coat.
Leave slack and keep decisions moving
Surprises hide behind old walls. Rot, outdated wiring, hidden structural issues, and old plumbing quirks can all show up once demo opens cavities. Many contractors suggest holding back a portion of the budget, often somewhere in the range of 10 to 20 percent depending on the age of the house and scope of work, for these finds. Leave float in the calendar as well. That cushion keeps one surprise from stalling the whole home.
Decisions stall occupied jobs more than labour does. Set a simple cadence from the start. Ask for short daily updates by text with photos, and meet on site once a week to walk open items. A shared punch list and decision log helps keep everyone on the same page.
Make finish picks before drywall closes. Tile and paint colours need to be locked early, along with fixture models and hardware. Late swaps push trades back and stretch dusty work longer. If you feel stuck, ask for two good options rather than ten, then pick one and keep the line moving.
A single running list for all choices, showing who decides and by when, keeps decisions from living only in texts or memory. Checking that list regularly and nudging anything due helps stop it from blocking work.
Close with a punch walk in daylight. Flag paint misses and caulk gaps room by room, note hardware tweaks, and write each item down with a date for fixes. Don’t release final payment until the list is clear.
Sequence the home construction job so life still works inside it. Plan paper and products first, protect baths and kitchens, bunch dust together, and finish in order. Do that and you’ll live through the work without living in chaos.