The Definitive Guide: How to Get Transmission Fluid Out of Clothes
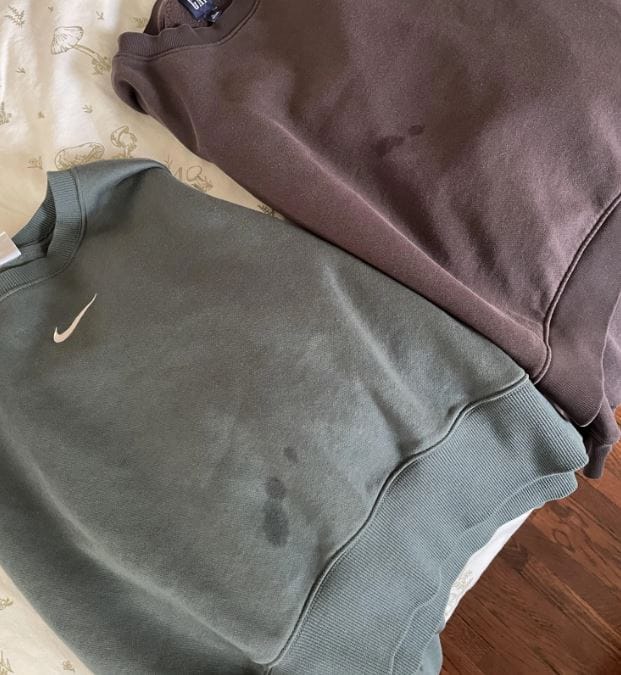
Transmission fluid stains are among the most challenging laundry problems a vehicle enthusiast or professional mechanic can face. This specialized lubricant, formulated with base oils and additives designed to withstand extreme temperatures and pressure, possesses a unique chemistry that allows it to bond tenaciously with fabric fibers . Unlike standard cooking oil, the bright red dyes found in many Automatic Transmission Fluids (ATF) can act like a permanent marker if not addressed promptly, while the oil base ensures deep penetration into both natural and synthetic materials .
This comprehensive guide provides a professional, step-by-step approach to salvaging your garments, comparing the efficacy of various household and commercial solutions.
Understanding the Enemy: Why Transmission Fluid is So Stubborn
To effectively combat a stain, one must first understand its composition. Transmission fluid is a complex blend of base oils and performance-enhancing additives . It is engineered to be thick, resistant to breakdown from heat and evaporation, and to provide superior lubrication . This viscosity allows it to seep deep into the microscopic spaces within fabric weaves, making it significantly more difficult to remove than water-based or lighter oil stains .
Furthermore, the friction modifiers and specialized dyes in the fluid are designed to be stable and long-lasting. These components create a stubborn stain that resists ordinary laundry detergents . The key to removal lies in using substances that can break down these oil-based compounds and lift them from the material without setting them further .
Phase 1: The Golden Hour – Immediate Action Protocol
The single most critical factor in stain removal is speed. The longer transmission fluid sits, the deeper it penetrates and the more likely it is to become permanent. Follow this immediate action protocol the moment a spill occurs.
1. Absorb Excess Fluid
- Blot, Do Not Rub: Use clean paper towels or a shop rag to gently blot the stained area . Rubbing will force the fluid deeper into the fabric and spread the stain.
- Work Inward: Begin blotting from the outside edges of the stain and work your way toward the center to prevent spreading .
- Absorbent Powders: For a more aggressive initial absorption, liberally sprinkle the stain with cornstarch, baking soda, or talcum powder . These powders act like a sponge, drawing the oil out of the fabric.
2. Remove the Absorbent
Let the powder sit for at least 15-30 minutes . Once it has clumped, gently scrape it off with a dull knife or the edge of a credit card and brush away any remaining residue .
Phase 2: The Deep Clean – Targeted Stain Removal Methods
After addressing the fresh spill, you can proceed with more intensive cleaning. The following methods are ranked by the type of agent used. Always check the garment’s care label and test any solution on an inconspicuous area first.
The Degreaser Approach: Dish Soap and Laundry Detergent
Dish soaps, particularly those known for cutting grease (like Dawn), contain powerful surfactants designed to break down oils. Heavy-duty liquid laundry detergents are also formulated for tough stains.
- Pre-Treat: Apply a generous amount of dish soap or liquid laundry detergent directly onto the stain .
- Work In: Gently work the soap into the fabric using your fingers, a soft-bristled toothbrush, or a cloth . Ensure the entire stained area is saturated.
- Let it Sit: Allow the pre-treatment to penetrate for at least 15-30 minutes. For older stains, you can leave it for several hours .
The Solvent Approach: Rubbing Alcohol and WD-40
For stubborn, set-in stains, a solvent that can dissolve the oil is often required.
- Rubbing Alcohol: Apply a generous amount of rubbing alcohol to the stain with a clean cloth. It is a strong solvent that breaks down the fluid and then evaporates quickly .
- WD-40: This multi-use product can also break down the oil. Apply a small amount to the stain (test on a hidden area first), let it soak for a few hours, and then work in some detergent with your fingers .
Caution: Solvents can be harsh. Always test for colorfastness and fabric compatibility on a hidden seam before application.
Phase 3: The Wash Cycle – The Moment of Truth
Once you have pre-treated the garment, it is time for the wash.
- Separate the Garment: Wash the stained item separately to prevent any residual oil or dye from transferring to other clothes .
- Choose the Hottest Water Safe for the Fabric: Hot water is significantly more effective at dissolving and rinsing away oil than cold water . However, always defer to the care label to prevent shrinking or damage.
- Add Extra Cleaning Power: Use a heavy-duty laundry detergent. For an extra boost, you can add one cup of white vinegar (to help neutralize odors) or one cup of baking soda to the wash cycle .
Phase 4: The Critical Step – Inspection and Drying
The final stage is where many people make a fatal error that permanently sets the stain.
- Inspect Before Drying: After the wash cycle is complete, carefully examine the stained area while the garment is still wet .
- Air Dry: If any trace of the stain remains, do not put the garment in the dryer. The heat from the dryer will set the stain permanently, making it nearly impossible to remove .
- Repeat if Necessary: If the stain persists, hang the item to air dry. Once dry, repeat the entire pre-treatment and washing process. It may take several attempts for older or heavy stains .
Comparison of Stain Removal Agents
Special Considerations: Odor and Delicate Fabrics
- Removing the Smell: Transmission fluid has a distinct, pungent odor. To remove it, add a cup of white vinegar to the wash cycle. For persistent smells, soak the garment in a solution of one part vinegar to four parts water before washing .
- Delicate Fabrics: For silk, wool, or other delicate materials, avoid harsh solvents and hot water. Use a gentle dish soap or baby shampoo, and always wash in cold water .
Prevention
The best strategy is prevention. When working with your vehicle, designate specific “work clothes” that you don’t mind getting stained. Wearing protective gloves and an apron can also shield your clothing from unexpected spills . By acting quickly and using the right techniques, you can effectively remove stubborn transmission fluid stains and keep your wardrobe looking its best.