How to Make Black Soap: A Complete Guide to Traditional African Black Soap
Black soap, also known as African black soap or Alata Samina in Ghana, is a traditional West African cleansing product made from plant-based ingredients that have been used for generations. Unlike commercial soaps that rely on synthetic additives and purified sodium hydroxide, authentic black soap derives its alkalinity from the ash of burnt plant materials—typically plantain skins, cocoa pods, and palm leaves—combined with unrefined oils and shea butter.
This guide covers the traditional production method, the chemistry behind it, and practical considerations for making black soap at home.
What Makes Black Soap Different?
The defining characteristic of authentic African black soap is its alkali source. While conventional soap uses commercially produced sodium hydroxide (lye), traditional black soap uses potash derived from plant ash. This ash contains potassium salts that, when dissolved in water, create an alkaline solution capable of saponifying oils into soap.
The result is chemically closer to a soft potassium soap than a hard sodium bar. The final product typically ranges from tan and caramel brown to dark charcoal grey—it is rarely uniform jet black. A bar that is perfectly glossy black has likely been dyed or loaded with artificial colorant.
Key ingredients in traditional black soap:
| Ingredient | Role in the Soap |
|---|---|
| Plantain skins (peels) | Roasted to ash for alkali; adds iron, vitamins A and E |
| Cocoa pods | Roasted to ash; contributes color and antioxidants |
| Palm tree leaves or bark | Additional ash source for alkali |
| Shea butter | Conditioning fat; softens and moisturizes |
| Palm kernel oil | Adds cleansing power and stable lather |
| Coconut oil | Sometimes added for extra bubbly lather |
Notably absent from traditional recipes: synthetic fragrance, artificial dye, lab-made lye, and preservatives.
The Traditional Production Process
Traditional black soap production is a slow, hands-on process typically carried out by artisans who have inherited the craft. The process has remained largely unchanged for centuries and consists of five main stages.
Stage 1: Drying the Plant Material
The process begins with collecting plantain skins, cocoa pods, and palm leaves. These materials are laid out in the sun until completely brittle. Using green plantain peels is preferred because they are richer in the minerals that create potash.
Why this matters: Proper drying ensures complete combustion in the next stage. Incomplete burning leaves black charcoal bits that result in harsh, lower-quality soap.
Stage 2: Burning to Ash
The dried plant material is burned or roasted in a clay oven or open pot until it reduces to a fine ash. The color of the ash—ranging from greyish-white to dark—depends on the roasting duration and temperature. Slow, controlled burning at lower temperatures produces a finer, lighter ash that yields gentler soap.
Critical detail: Avoid black, sooty charcoal. This indicates incomplete combustion and will produce a harsh soap with unpredictable pH.
Stage 3: Leaching the Alkali
The cooled ash is packed into a container with small holes at the bottom (traditionally a clay pot) over a collection vessel. Water is slowly poured over the ash, percolating through and extracting the alkaline compounds. The resulting dark, tea-colored liquid is the natural lye solution.
Chemistry note: A study comparing extraction methods found that ash extract exhibited a pH of 13.6 with a concentration of 0.21M, while biochar extract (produced at 600°C in a furnace) showed pH 11.5 and 0.14M concentration. The ash method produces a stronger alkali.
Stage 4: Saponification
The ash-lye solution is combined with heated palm kernel oil and sometimes coconut oil. The mixture is stirred continuously over low heat for 30–45 minutes as saponification occurs—the chemical reaction between alkali and fat that creates soap.
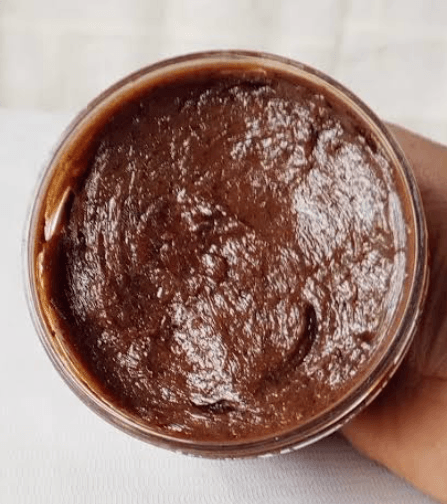
The mixture thickens, darkens, and eventually reaches a consistency described as “chocolate pudding.” The intensity of the fire determines how dark the final soap becomes. Some producers prefer a deep black color, while others aim for a lighter brown.
Once the desired texture is achieved, raw shea butter is added off-heat. This step, known as superfatting, preserves shea butter’s moisturizing properties that would otherwise be damaged by prolonged cooking.
Stage 5: Curing and Molding
The hot soap paste is scooped onto parchment-lined trays or into wooden molds and pressed firmly. It is then left to cure in a dry, well-ventilated place for at least two weeks. During curing, saponification completes, excess water evaporates, and the soap’s pH mellows, resulting in a harder, gentler bar.
After curing, the soap is cut into bars or molded into round balls. Traditional producers often shape it by hand once cooled, giving each piece a rustic, uneven appearance that distinguishes authentic black soap from factory-made imitations.
Comparison: Traditional vs. Modern Home Recipes
There are two primary approaches to making black soap at home. Understanding the differences helps you choose the right method for your needs.
| Feature | Traditional Ash-Based Method | Modern Activated Charcoal Method |
|---|---|---|
| Alkali source | Plant ash (potash) | Sodium hydroxide (lye) |
| Color source | Natural from roasted plant ash | Activated charcoal powder |
| Key ingredients | Plantain skins, cocoa pods, palm kernel oil, shea butter | Coconut oil, palm oil, shea butter, coconut carbon/charcoal |
| Production time | Several days (drying + burning + leaching) plus 2 weeks curing | 24–48 hours saponification plus 4–6 weeks curing |
| Equipment needed | Fire-safe pots, leaching container | Stainless steel pot, stick blender, molds |
| Consistency | Variable—depends on ash strength | Consistent if using a soap calculator |
| Skill level | Advanced (unpredictable alkali strength) | Beginner to intermediate |
| pH control | Impossible to measure precisely | Calculated through saponification values |
| Authenticity | Traditional West African method | Modern approximation |
| Best for | Those committed to traditional craft | Home soap makers wanting consistent results |
The modern method produces a soap that looks similar and offers deep-cleansing charcoal benefits, but it is not chemically identical to traditional black soap. As one soap-making guide notes: “You can’t easily replicate authentic ash-based African black soap in a typical home kitchen”.
Safety Considerations
Soap making involves caustic materials regardless of which method you choose.
When working with traditional ash lye:
- Wear gloves and eye protection—the alkaline solution is caustic
- Work in a well-ventilated area away from children and pets
- The ash solution cannot be measured precisely, making pH control difficult
When working with sodium hydroxide:
- Always add lye to water, never water to lye
- The mixture will heat up significantly—set aside to cool
- Wear protective goggles (NaOH can cause permanent eye damage) and gloves
- Work in a well-ventilated room because of fumes
Understanding the Final Product
Physical Characteristics
Authentic traditional black soap has a distinctive appearance and texture:
- Color: Dark brown to black with lighter speckles or flecks—never uniform jet black
- Texture: Soft, crumbly, sometimes greasy or sticky; can be broken apart by hand
- Scent: Mild, earthy, smoky, or nutty from roasted botanicals—not perfumed
- Appearance: Rustic and uneven due to hand-molding
pH and Skin Considerations
Black soap runs alkaline, often with a pH around 9–10. This is normal for real soap but higher than skin’s natural pH of approximately 5.5. Used too frequently or left on too long, it can leave skin dry or tight, especially for those with already-dry skin.
Practical usage tips:
- Lather in hands rather than rubbing the bar directly on facial skin
- Start with once-every-other-day use to allow skin to acclimate
- Always follow with moisturizer
- Perform a patch test before full application
Frequently Asked Questions
Can I make black soap without burning plant materials?
Yes. The modern method uses sodium hydroxide and activated charcoal to approximate the appearance and cleansing properties of traditional black soap. However, this produces a different product chemically—it will not contain the trace minerals and antioxidants from plant ash.
How long does black soap last?
Properly cured black soap stored in a cool, dry place can last for months. Because it contains glycerin, it can absorb moisture and soften if left exposed. Store on a draining soap dish or wrap tightly for long-term storage.
Why does my black soap have a white film?
A thin white film on the surface is not mold—it is common with glycerin-rich soaps and can be wiped off or ignored. It does not affect quality.
Is black soap good for acne?
Black soap’s gentle exfoliation from ash particles, combined with its antibacterial and anti-inflammatory properties, makes it popular for oily and acne-prone skin. However, its high pH can be drying, so moderation and moisturizing are essential.
Can I use black soap on my hair?
Yes. Black soap is sometimes used as a shampoo alternative, particularly for dandruff, due to its antifungal properties. However, it can be drying to hair and scalp, so follow with a conditioner or oil treatment.
Summary
Making black soap connects you to a centuries-old West African tradition that transforms agricultural byproducts into a versatile cleansing product. The traditional method—drying plantain peels and cocoa pods, burning them to ash, leaching the alkali, and cooking with oils and shea butter—produces a soap with a unique character that cannot be fully replicated by modern shortcuts.
For those seeking a consistent, controllable home project, the modern charcoal-based method offers a practical alternative that captures the deep-cleansing spirit of black soap without the unpredictability of ash-derived alkali. Whichever path you choose, understanding the chemistry and respecting the safety requirements will help you create a product worth using.