How to Clean Foam Floor Tiles? Maintenance, Methods, and Modern Solutions
The Definitive Guide to Deep Cleaning Foam Floor Tiles: Maintenance, Methods, and Modern Solutions
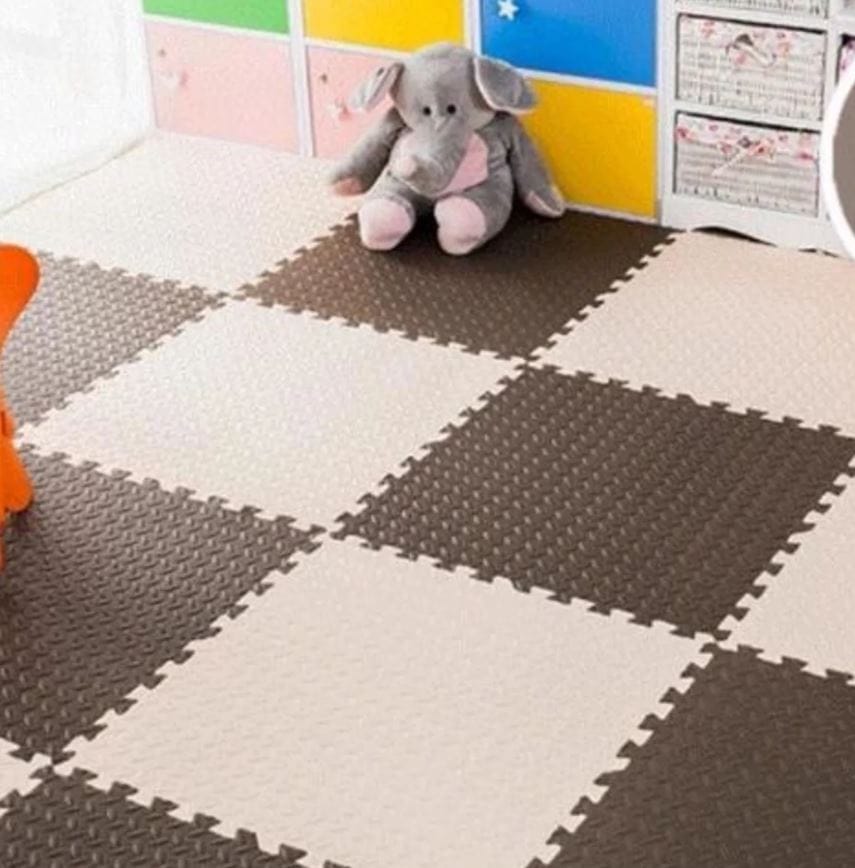
Foam floor tiles are the unsung heroes of modern homes. They cushion our joints during workouts in the home gym, provide a soft landing for toddlers in the playroom, and reduce fatigue for those who stand for long hours in workshops. However, their textured surface and interlocking nature make them magnets for dust, sweat, and bacteria. If you’ve noticed a musty smell in your gym or discoloration in your play mat, you’re likely wondering: what is the best way to clean foam floor tiles without damaging them?
This comprehensive guide dives deep into the chemistry of foam, the mechanics of maintenance, and the modern cleaning solutions that can extend the life of your flooring. We will move beyond simple soap-and-water routines to explore antimicrobial treatments, low-foam industrial techniques, and comparative analyses of cleaning tools.
The Anatomy of Foam: Why Cleaning Matters
Before we scrub, it’s crucial to understand what we are cleaning. Most foam floor tiles are made from EVA (Ethylene-Vinyl Acetate) or Polyethylene foam . These are closed-cell foams, meaning they are non-absorbent. This is a double-edged sword.
- The Good: Liquids sit on the surface rather than soaking in immediately, giving you time to wipe up spills.
- The Bad: Because they are non-absorbent, dirt and body oils sit on the surface and can accumulate in the microscopic texture of the tile, leading to a slippery film or stubborn, ground-in stains.
Understanding this “closed-cell” nature dictates our entire cleaning strategy: We must clean the surface thoroughly without forcing moisture into the seams.
The Cleaning Arsenal: Tools vs. Solutions
To achieve a professional-level clean, you need to distinguish between your mechanical tools (for removing debris) and your chemical tools (for sanitizing).
Mechanical Cleaning Tools
- Vacuum with Soft Brush: Essential for daily maintenance. The brush attachment agitates the surface to loosen dust without the beating action of a rotating bar, which can fray the foam edges .
- Microfiber Mop: Ideal for damp mopping as it traps dirt effectively and is gentle on the surface .
- Non-Abrasive Scrubber: For spot stains, a soft nylon brush or rag is necessary. Avoid Scotch-Brite style pads, as they can tear the foam .
Chemical Cleaning Solutions
Using the wrong chemical can degrade the foam, causing it to become brittle or discolored. Here is a breakdown of cleaner types and their suitability for foam:
For deep cleaning, the market offers advanced formulations. For instance, industrial brands like Zep offer “Low-Foam” industrial cleaners (diluted at ratios like 1:64 for vinyl) that are designed to rinse residue-free, which is vital for foam because sticky residue attracts more dirt .
Step-by-Step Deep Cleaning Protocol
To optimize for Google’s “People Also Ask” features, let’s structure the cleaning process into a definitive sequence.
Phase 1: Dry Soil Removal
Never introduce water to a dirty floor. Water turns dust into mud, which then settles into the textured surface.
- Sweep or Vacuum: Use a soft brush attachment to get into the corners and along the seams where interlocking tiles meet. This is the most critical step for allergy sufferers, as foam can harbor dust mites .
Phase 2: Solution Application
- Mix Your Solution: In a bucket, mix warm water with a few drops of mild dish soap. For a deeper clean, you can use a specialized floor cleaner diluted according to the manufacturer’s instructions .
Phase 3: The Damp Mopping Technique
- Mop, Don’t Soak: Dip your microfiber mop into the solution and wring it out until it is damp, not dripping. The golden rule of foam tile cleaning is moisture control. Excess liquid will seep through the interlocking seams and pool underneath the tiles. Because the subfloor (usually concrete or wood) is absorbent, this trapped water becomes a breeding ground for mold and mildew .
- Mop in Sections: Work in small areas, using a figure-eight motion to lift dirt.
Phase 4: The “Seam” Dilemma
- Address the Grime in the Gaps: This is where foam tiles differ from sheet flooring. Dirt loves to hide in the grooves of the puzzle-piece edges.
- Use a soft toothbrush or a small nylon brush dipped in your cleaning solution to gently scrub along the seams.
- Immediately blot this area with a dry towel to wick away the dirty, dissolved grime.
Phase 5: Extraction and Drying
- Rinse (If Necessary): If you used soap, you should go over the floor with a damp mop containing just clean water to remove any soapy residue. Soap residue acts as a “dirt magnet” .
- Towel Dry: Use clean, dry towels to absorb as much moisture from the surface as possible. This reduces drying time and prevents moisture migration to the seams.
- Air Circulation: Place fans around the room to ensure the tiles are completely dry before heavy foot traffic resumes. Drying typically takes 2-4 hours for the surface, but longer if moisture got underneath .
Advanced Cleaning: The Foam Cleaner Revolution
While traditional mopping works, a new category of products is gaining traction for deep cleaning textured surfaces: Foam Cleaners.
What is a Foam Cleaner?
Unlike liquid sprays that run off, foam cleaners are aerated solutions that expand upon application. They are designed to cling to vertical or textured surfaces .
Why Use Foam on Tiles?
- Dwell Time: Because foam sits on the surface without dripping, it has more time to break down oily residues and embedded dirt .
- Controlled Application: You can spray foam specifically on a stain or along a seam without saturating the entire tile.
- Versatility: Many foam cleaners (like Tuff Stuff or Bardahl) are safe for fabrics, plastics, and ceramics, making them perfect for multi-surface cleaning .
Application Method for Foam Cleaners
- Spray the foam directly onto the stained area or seam.
- Allow it to sit for 30 seconds to a few minutes to lift the dirt .
- Agitate gently with a soft brush.
- Wipe away the residue with a clean, damp cloth. Because foams are designed to encapsulate dirt, they often require less rinsing than liquid soaps.
Note: Always check the label to ensure the foam cleaner is suitable for plastics or coated surfaces to avoid chemical reactions .
Maintenance Schedule Comparison
To keep your floors ranking high in appearance (and your home smelling fresh), follow this maintenance schedule based on usage:
| Frequency | Task | Tools Required | Time Estimate |
|---|---|---|---|
| Daily | Spot sweeping / Quick wipe | Cordless vacuum / Dry mop | 5 mins |
| Weekly | Damp mop with mild detergent | Microfiber mop, Bucket, pH-neutral soap | 15-20 mins |
| Monthly | Deep Clean / Disassembly | Soft brush, Foam cleaner, Towels | 30-40 mins |
| Quarterly | Seam cleaning / Disinfection | Steam cleaner (low setting) or Disinfecting spray | 30 mins |
Disassembly: The Nuclear Option
If your foam tiles are heavily soiled or if you suspect mold underneath, you must disassemble them. This is the most labor-intensive method, but sometimes it is the only way to ensure hygiene .
- Number the Tiles: Before lifting, use masking tape to label the back of each tile with its location. This makes reassembly much easier.
- Lift and Wash: Take the tiles outside. Hose them down and scrub them with a soft brush and cleaning solution.
- Sun-Dry: Prop the tiles up against a wall in the sun. UV rays act as a natural disinfectant. Ensure they are 100% dry before snapping them back together.
Common Mistakes That Ruin Foam Tiles
- Using Steam Mops Incorrectly: While a low-setting steam cleaner can sanitize, high heat and excessive moisture can delaminate the foam or warp the tiles. If you use steam, keep the head moving constantly and follow up with a dry towel.
- Using “Scrubbing” Vacuums: The rotating brush on an upright vacuum can chew up the edges of foam tiles, creating fuzz and fraying .
- Power Washing: While hosing down tiles is fine, using a pressure washer can blast water into the closed cells, potentially weakening the structure over time.
Conclusion
Cleaning foam floor tiles doesn’t have to be a pain. By understanding the material—primarily closed-cell EVA foam—you can tailor your approach to be effective yet gentle. The key takeaways are simple: remove dry soil first, use minimal moisture, and never let water pool underneath the tiles.
Whether you opt for a traditional damp mop with mild soap or experiment with modern clinging foam cleaners, regular maintenance is the secret to longevity. Implement the weekly routine outlined above, and your floors will remain a safe, clean, and vibrant foundation for your activities.