The Ultimate Guide on How to Clean Silhouette Shades: A Step-by-Step Guide for Pristine Window Treatments
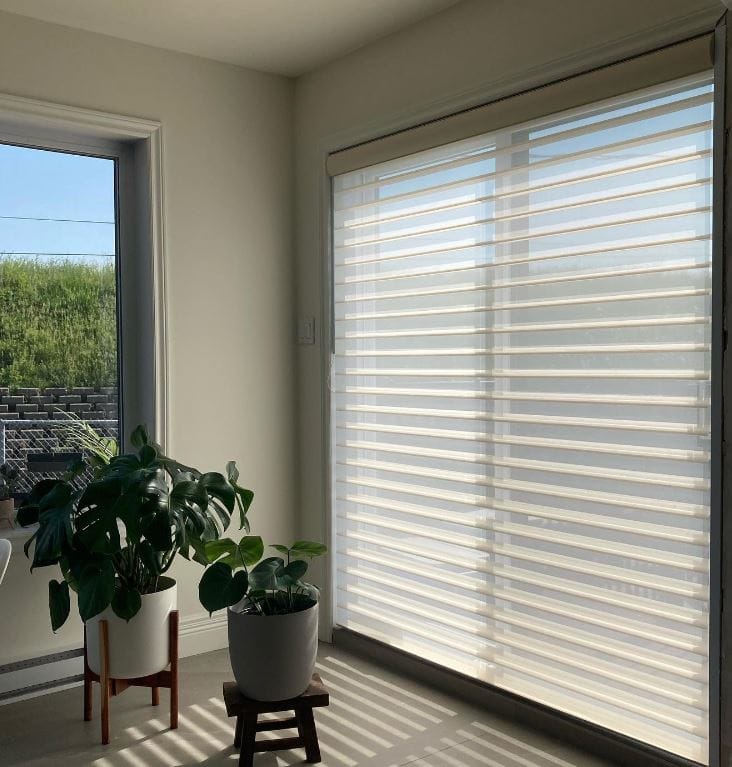
Silhouette shades are a pinnacle of window fashion, known for their unique design of soft fabric vanes suspended between two sheer panels. They beautifully diffuse light while offering privacy, making them a worthwhile investment for any home. However, their delicate construction requires a specific cleaning approach to maintain their beauty and functionality. This comprehensive guide will walk you through everything you need to know about how to clean Silhouette shades, from quick weekly dusting to deep cleaning methods, ensuring your shades remain in pristine condition for years to come.
Why Proper Cleaning is Essential for Silhouette Shades
Before diving into the “how,” it’s important to understand the “why.” Regular maintenance not only keeps your shades looking fresh but also protects your investment.
- Aesthetics: Dust and grime can dim the sheer panels, turning a soft glow into a dingy haze .
- Longevity: Proper care prevents fabric deterioration and maintains the integrity of the delicate vanes.
- Hygiene: Regular cleaning removes allergens like dust and pet dander, contributing to better indoor air quality.
At a Glance: Quick Cleaning Comparison
To help you choose the best method for your needs, here is a quick comparison of the most common cleaning techniques.
| Cleaning Method | Frequency | Tools Needed | Best For | Risk Level |
|---|---|---|---|---|
| Dusting | Weekly | Feather duster, microfiber cloth | Everyday maintenance, preventing buildup | Very Low |
| Vacuuming | Monthly | Handheld vac with soft brush attachment | Removing light dust and debris | Low |
| Compressed Air/Cool Dryer | As needed | Canned air or hair dryer (cool setting) | Blowing dust out from between vanes | Low |
| Spot Cleaning | As needed | Soft cloth, lukewarm water, mild detergent | Small stains and marks | Low to Moderate |
| Full Immersion (DIY) | As needed (with caution) | Bathtub/bucket, mild detergent, water | Thorough cleaning of non-delicate fabrics | Moderate |
| Professional Cleaning | Every 1-2 years | Specialized ultrasonic or dry-cleaning equipment | Heavy soiling, delicate fabrics, room-darkening shades | Very Low (done by pros) |
Routine Cleaning: The First Line of Defense
The best way to clean Silhouette shades is to prevent heavy dirt buildup in the first place. Routine cleaning is simple, quick, and safe.
1. Gentle Dusting
Start with the most straightforward method. Use a feather duster or a soft, dry microfiber cloth to gently wipe the front and back of the shades . Lightly sweep across the fabric vanes and sheer panels to remove surface dust. Avoid pressing hard, as this can bend the vanes or stretch the fabric .
2. Vacuuming with Care
For a slightly deeper clean, a vacuum cleaner is your best friend.
- Tool: Use a handheld vacuum or the hose of your regular vacuum with a soft brush attachment .
- Setting: Ensure the suction is set to the lowest possible setting to prevent warping or pulling the delicate fabric .
- Technique: Gently run the brush over both sides of the shades, moving from top to bottom. Pay attention to the top and bottom edges where dust collects .
3. The “Air” Method
For hard-to-reach dust nestled between the vanes, you can use air.
- Compressed Air: A can of compressed air (like the kind used for electronics) can effectively blow dust out .
- Hair Dryer: You can also use a hair dryer on the cool setting only. Hold it at an angle and blow from the middle of the shade outwards to the sides .
Warning: Never use a hair dryer on a warm or hot setting, as heat can damage and warp the fabric .
Tackling Stains: How to Spot Clean Silhouette Shades
Accidents happen. If you encounter a stain, acting quickly and gently is key to successful spot cleaning.
What You’ll Need:
- Soft, clean white cloths or sponges (white prevents color bleeding)
- Lukewarm water
- A mild detergent (like dish soap) or a non-synthetic soap powder
Step-by-Step Spot Cleaning Process:
- Prepare the Solution: Mix a small amount of mild detergent with lukewarm water .
- Dampen, Don’t Soak: Dip your cloth into the solution and wring it out thoroughly. The cloth should be just damp, not wet .
- Blot the Stain: Gently dab or blot the stained area. Do not rub, as rubbing can fray the fabric, spread the stain, or damage the delicate vanes .
- Rinse (If Necessary): If you used a detergent, dampen a fresh cloth with plain water and gently blot the area to remove any soapy residue.
- Air Dry: Allow the area to air dry completely before adjusting the vanes or raising the shade .
For Tougher Stains:
- You can add a small amount of white vinegar to the water for extra cleaning power .
- For mold or mildew, spray the area with a solution of equal parts water and white vinegar, let it sit for a few minutes, and then blot dry .
Deep Cleaning Methods: When Routine Isn’t Enough
Over time, your shades may accumulate ingrained dirt that dusting and spot cleaning can’t fix. At this point, you have two options: a careful DIY approach or professional cleaning.
DIY Full Immersion Cleaning
Some manufacturers, like Luxaflex, suggest that ingrained dirt can be removed by immersing the shades . Proceed with extreme caution and only if you are sure your fabric type allows it. Some delicate fabrics (like ‘Bon Soir’ or ‘Matisse’) should never be wet-cleaned .
- Preparation: Fill a bathtub or large basin with lukewarm water and a small amount of mild detergent .
- Immersion: Gently submerge the fabric part of the shade. Crucially, do not let the top headrail get wet, as this can damage the internal operating mechanism .
- Soak and Swish: Let it soak for 15–20 minutes. Gently swish the fabric in the water, but avoid scrubbing .
- Rinse: Drain the soapy water and refill with clean lukewarm water to rinse away all detergent.
- Drying: This is a vital step. Raise the shade slightly to let excess water drain, then fully lower it and close the vanes completely. Allow it to dry thoroughly in this position before touching or operating it . Do not use heat to speed up the process .
The Professional Touch
For most homeowners, especially those with expensive or delicate shades, professional cleaning is the safest and most effective deep-cleaning method .
- Ultrasonic Cleaning: This method uses sound waves in a water-based solution to gently and thoroughly clean the fabric without aggressive scrubbing. It’s highly effective for standard fabrics .
- Injection/Extraction (Dry Cleaning): For room-darkening shades (which are often laminated and water-soluble), professionals use a specialist dry-cleaning solvent to avoid delaminating the fabric .
Comparison of Deep Cleaning Methods:
Crucial “Dos and Don’ts” for Cleaning Silhouette Shades
To ensure you never accidentally damage your shades, keep these essential tips in mind.
The “Dos”
- DO test any cleaning solution on a small, hidden area first .
- DO use white cloths to prevent color transfer onto your shades .
- DO blot stains gently; patience is your best tool .
- DO consult your owner’s manual or manufacturer for specific care instructions for your fabric type.
- DO consider professional cleaning once every one to two years for a thorough refresh .
The “Don’ts”
- DON’T use harsh chemicals, bleach, or abrasive cleaners .
- DON’T rub the fabric vigorously, as this can cause fraying and permanent damage .
- DON’T use electrostatic dusters (like Swiffer) or paper towels, which can snag the fabric .
- DON’T submerge the headrail or any mechanical parts in water .
- DON’T use heat (irons, hair dryers) on the fabric to dry or remove wrinkles .
- DON’T attempt to remove the shades from the mounting brackets yourself unless you are a trained professional, as this can damage the mechanism .
Conclusion: Maintain the Beauty of Your Silhouette Shades
Learning how to clean Silhouette shades doesn’t have to be complicated. By incorporating regular, gentle dusting into your routine and addressing stains promptly with the blotting technique, you can keep your shades looking their best for the long haul. For a more profound restoration, professional cleaning services offer a safe and effective solution to bring back that “like-new” appearance, ensuring your investment continues to beautify your home for years to come