The Ultimate Guide to Cleaning an Electrostatic Air Filter: Boost Efficiency & Save Money
Unlike disposable fiberglass or pleated filters, electrostatic air filters are a reusable, eco-friendly solution for your HVAC system. They use self-charging electrostatic fibers to attract and trap dust, pollen, and other airborne particles. However, their biggest advantage—reusability—is also their main maintenance requirement. A dirty electrostatic filter can reduce HVAC efficiency by up to 15%, increase energy bills, strain your system, and severely degrade your indoor air quality.
This comprehensive guide will walk you through the correct, safe, and effective method to clean your filter, ensuring it functions like new for years to come.
Step-by-Step Guide: How to Clean an Electrostatic Air Filter
Frequency: Clean your filter every 1-3 months, depending on household factors like pets, allergies, and local air quality.
Tools & Materials You’ll Need:
- Vacuum cleaner with a brush attachment
- Mild liquid dish soap or a non-bleach, non-abrasive household cleaner
- A large sink, bathtub, or hose
- Soft-bristle brush (optional)
- Clean, dry towels
- A safe space for air-drying (out of direct sunlight)
The Cleaning Process
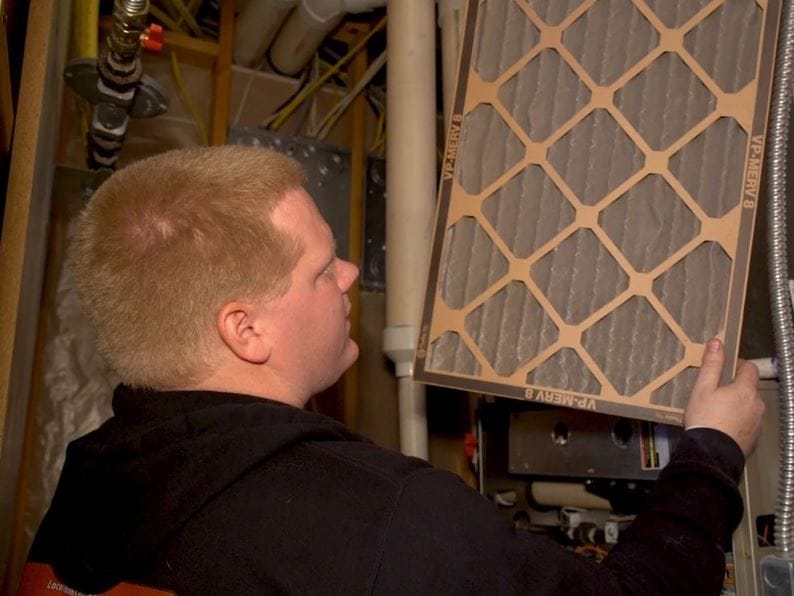
Step 1: Safety First & Filter Removal
- Turn off your HVAC system at the thermostat.
- Locate the filter slot (typically in the return air duct).
- Carefully remove the electrostatic filter, noting the direction of airflow arrows on the frame.
Step 2: Initial Dry Vacuum
- Take the filter outside or to a well-ventilated area.
- Using the brush attachment on your vacuum, gently but thoroughly vacuum both sides of the filter. This removes loose, dry debris and makes the wet wash more effective.
Step 3: Wet Wash & Rinse
- Fill a sink or tub with warm water and add a small amount of mild dish soap. Avoid harsh chemicals, bleach, or abrasive cleaners, as they can damage the electrostatic fibers.
- Submerge the filter and agitate the water. Let it soak for 5-10 minutes for a deep clean.
- Gently scrub with a soft-bristle brush if needed for stubborn grime. Never twist, bend, or wring the filter media.
- Drain the dirty water and refill with clean, cool water.
- Rinse the filter thoroughly until the water runs clear, ensuring all soap residue is removed. A gentle spray from a hose works perfectly.
Step 4: Drying Thoroughly
- This is the most critical step. The filter must be 100% completely dry before reinstallation.
- Gently shake off excess water.
- Place the filter on clean towels in a well-ventilated area, propping it up to allow air to circulate on all sides.
- Allow 24-48 hours for complete drying. Do not use heat sources like hair dryers or place it in direct sunlight, as this can warp the frame or media.
Step 5: Reinstallation
- Once bone-dry, carefully place the filter back into the slot, ensuring the airflow arrows point toward the HVAC blower motor (typically into the duct).
- Turn your HVAC system back on.
Electrostatic Filter vs. Disposable: A Quick Comparison
| Feature | Electrostatic Air Filter | Standard Disposable Filter |
|---|---|---|
| Initial Cost | Higher upfront cost | Very low upfront cost |
| Long-Term Cost | Very low (one-time purchase) | Continual recurring cost |
| Eco-Friendliness | High (reusable for years) | Low (adds to landfill waste) |
| Maintenance | Requires regular cleaning | Requires regular replacement |
| Efficiency (MERV) | Typically MERV 8-10 (good) | Varies (MERV 1-13) |
| Best For | Cost-conscious, eco-friendly homeowners | Those preferring zero maintenance |
Cleaning Solutions Comparison: What’s Safe for Your Filter?
| Cleaning Agent | Safe to Use? | Notes & Recommendations |
|---|---|---|
| Mild Dish Soap | Yes | Ideal choice. Effectively cuts grease and grime without residue. |
| White Vinegar Solution | Yes, with caution | Good for odor removal. Use a diluted mix (1 part vinegar to 3 parts water). Rinse thoroughly. |
| Baking Soda Paste | No | Abrasive and can get lodged in fibers, potentially harming efficiency. |
| Bleach or Ammonia | No | Too harsh. Will degrade the electrostatic fibers and frame over time. |
| Harsh Degreasers | No | Can leave chemical films that impair the electrostatic charge. |
| Plain Water | Yes | Sufficient for light cleaning between deeper washes. |
Pro Tips for Maximum Filter Performance & Longevity
- Establish a Schedule: Mark your calendar to check your filter every month. Clean it when visible dirt covers 50% of the surface.
- Keep a Spare: Consider buying two filters. You can rotate them—one in use while the other is cleaning/drying—ensuring no downtime for your HVAC.
- Record Maintenance: Keep a simple log (on the filter frame or in a notes app) with your cleaning dates to track your schedule.
- Seal the Slot: Ensure the filter fits snugly in its slot with no gaps around the edges, which can let unfiltered air bypass the system.
Troubleshooting Common Issues
- Filter Still Seems Dirty After Washing: Soak longer and use gentle water pressure from a hose to flush deeply embedded particles.
- Musty Odor After Cleaning: Incomplete drying can cause mildew. Ensure the filter is fully dry next time. A light vinegar rinse can help eliminate existing odors.
- Reduced Airflow After Reinstallation: Double-check that the filter is completely dry and installed in the correct direction.
Conclusion: A Small Task for Big Benefits
Cleaning your electrostatic air filter is a simple, cost-effective DIY task that pays significant dividends. It extends the life of your HVAC system, lowers your energy consumption, and ensures your family breathes cleaner, healthier air. By following this guide and maintaining a regular cleaning schedule, you’ll maximize your investment and enjoy optimal indoor comfort year-round.
Disclaimer: Always refer to your filter manufacturer’s specific care instructions, as some models may have unique requirements. This guide is intended for general, permanent electrostatic filters and may not apply to all hybrid or disposable electrostatic models.