Ultimate Post-Renovation Cleaning Checklist: Restore Your Home’s Sparkle
When the dust settles after a renovation project, we’re often left with a mess that seems overwhelming. Those beautiful new countertops, freshly painted walls, and upgraded fixtures are hidden beneath layers of construction debris, dust, and packaging materials. Getting your newly renovated space truly move-in ready requires a systematic approach to post-construction cleaning.
We’ve tackled numerous post-renovation cleanups and learned that having a comprehensive checklist makes all the difference. Without a proper plan, it’s easy to miss critical areas or use cleaning methods that might damage your new installations. The right approach not only restores the sparkle to your refreshed space but also eliminates potentially harmful construction residue that could affect your family’s health.
Why Post-Renovation Cleaning Is Essential
Post-renovation cleaning removes construction dust that contains harmful particles including silica, wood dust, and chemical residues. These microscopic particles settle everywhere—inside cabinets, on window sills, and even in your HVAC system—posing serious health risks if left unaddressed.
A thorough cleaning protects your investment by preventing damage to new installations. Construction debris like metal shavings, nails, or concrete dust can scratch freshly installed hardwood floors, damage new appliances, or clog drains. By eliminating these materials, you’re extending the life of your renovation work.
According to the team from Ultra Cleaning, many homeowners underestimate how much residual dust and debris can remain even after contractors finish. They emphasize that professional cleaning ensures not just surface-level tidiness, but deep sanitation that preserves the integrity of your space.
Professional-level cleaning also reveals issues needing correction before they become expensive problems. During the cleaning process, you’ll spot uneven paint jobs, loose fixtures, or improperly installed materials that contractors might’ve missed during the final walkthrough.
Most importantly, proper cleaning transforms your renovated space from a construction zone into a livable home. The difference between a dusty, debris-filled area and a gleaming, spotless room is dramatic—it’s the final step that truly completes your renovation project and allows you to fully enjoy your updated space.
Post-renovation cleaning also removes allergens and irritants that accumulate during construction. Many people experience unexplained allergic reactions after renovations due to lingering dust and chemical residues, making thorough cleaning essential for creating a healthy living environment.
Creating Your Post-Renovation Cleaning Checklist
A well-organized cleaning checklist is your roadmap to restoring order after renovation chaos. By breaking down the cleaning process into manageable tasks, you’ll ensure no area is overlooked and your newly renovated space shines in all its glory.
Essential Cleaning Supplies You’ll Need
Post-renovation cleaning requires specific tools to tackle construction residue effectively. Stock up on microfiber cloths that trap fine dust particles without scratching surfaces. Include heavy-duty vacuum cleaners with HEPA filters to capture microscopic debris. Add all-purpose cleaners, glass cleaners, and specialized surface cleaners (granite, wood) for different materials. Don’t forget buckets, mops with microfiber pads, scrub brushes, and magic erasers for stubborn marks. Extension dusters help reach ceiling corners and light fixtures where dust accumulates during construction work.
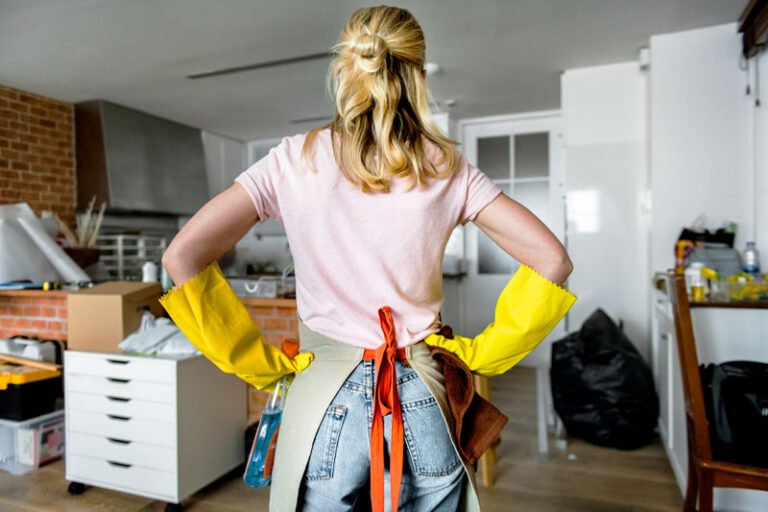
Safety Equipment for Post-Renovation Cleanup
Proper safety gear protects you from harmful construction residues during cleanup. Always wear N95 respirator masks to filter airborne particles and prevent inhalation of silica dust. Invest in chemical-resistant gloves to shield your skin from harsh cleaning agents and construction chemicals. Use safety goggles to keep dust and cleaning splashes away from your eyes. Consider knee pads for floor cleaning comfort during extended scrubbing sessions. Keep first aid supplies nearby for quick response to minor injuries like cuts from hidden construction debris or glass fragments left behind by workers.
Step-by-Step Cleaning Process for Different Areas
Post-renovation cleaning requires a methodical approach to tackle different areas of your home effectively. We’ve broken down the cleaning process by specific areas to ensure nothing gets overlooked as you transform your construction zone back into a beautiful living space.
Dealing With Construction Dust
Construction dust removal forms the foundation of post-renovation cleaning. Start by working from top to bottom:
- Vacuum thoroughly – Use a vacuum with HEPA filtration to capture fine particles from all surfaces including light fixtures and vents.
- Wipe surfaces – Dampen microfiber cloths with water to trap dust rather than redistribute it.
- Air purification – Run air purifiers with HEPA filters for 48-72 hours to catch airborne particles.
- Duct cleaning – Consider professional HVAC duct cleaning to remove dust that’s settled in your ventilation system.
Cleaning Walls and Ceilings
Walls and ceilings collect significant dust during renovations but require gentle cleaning techniques:
- Dust removal – Use a microfiber mop or extended duster to collect loose dust from ceilings and walls.
- Spot cleaning – Test cleaning solutions on an inconspicuous area before applying to the entire surface.
- Painted surfaces – Clean with a solution of warm water and mild dish soap (1 tablespoon per gallon).
- Textured ceilings – Use a dry cleaning sponge (chemical sponge) for popcorn or textured ceilings to avoid damage.
- Baseboards – Wipe with microfiber cloths and use cotton swabs for corners and crevices.
Floor Restoration Techniques
Different flooring materials need specific cleaning approaches after renovation:
- Hardwood floors – Vacuum with a soft brush attachment, then clean with a hardwood-specific cleaner.
- Tile flooring – Remove grout haze with a commercial remover or vinegar solution (1:4 with water).
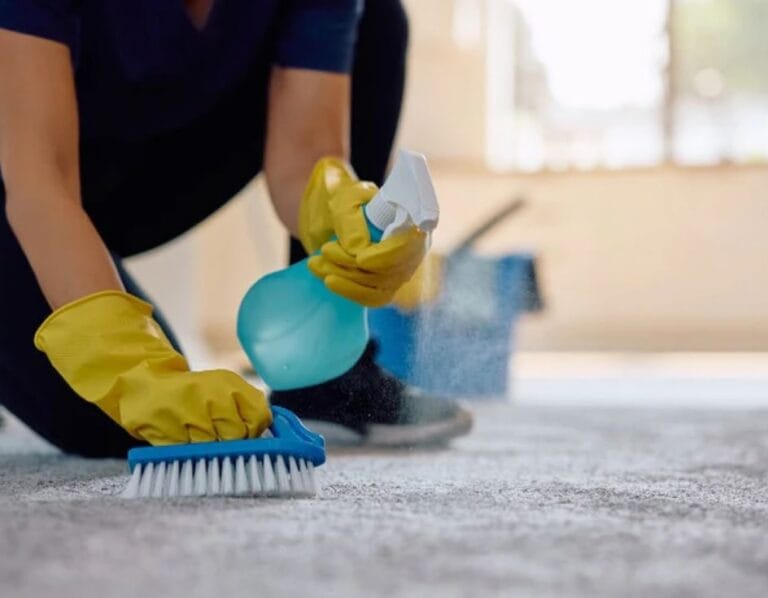
- Carpet cleaning – Vacuum multiple times in different directions, followed by professional steam cleaning.
- Luxury vinyl – Clean with a pH-neutral cleaner to remove construction residue without damaging the finish.
- Concrete floors – Use a shop vacuum followed by mopping with a pH-neutral cleaner to protect sealants.
Window and Glass Cleaning
- Initial dust removal – Brush window tracks and frames with a dry brush to loosen debris.
- Frame cleaning – Wipe frames with a damp microfiber cloth to remove construction dust.
- Glass cleaning – Apply a 1:1 solution of white vinegar and water or commercial glass cleaner.
- Streak prevention – Clean in a Z-pattern using a microfiber cloth or crumpled newspaper.
- Window treatments – Vacuum blinds, shades, and curtains with an upholstery attachment or have them professionally cleaned.
Tackling Specific Renovation Messes
Renovation projects create unique cleaning challenges beyond standard dust and debris. Each type of renovation work leaves behind specific messes that require targeted cleaning approaches and specialized techniques.
Paint Spills and Splatters
Paint spills demand immediate attention using specific removal methods based on the paint type. For fresh latex paint, blot with warm soapy water and a microfiber cloth. Oil-based paint spills respond to mineral spirits applied with a clean rag. On hard surfaces, a plastic scraper removes dried paint without damaging the underlying material. For carpet, dab (don’t rub) spills with rubbing alcohol, then blot with clean water. Test any solvent on an inconspicuous area first to prevent discoloration or damage to the surface.
Adhesive and Caulk Residue
Adhesive residue yields to targeted solvents and proper application techniques. Remove tape residue with cooking oil or commercial adhesive removers like Goo Gone on non-porous surfaces. Soften stubborn caulk remnants with rubbing alcohol applied to a cloth for 5-10 minutes before gently scraping with a plastic putty knife. Dried construction adhesives often require commercial citrus-based solvents. Apply the appropriate solvent, let it sit briefly, then wipe away with a clean cloth, repeating as needed for complete removal.
Handling Leftover Construction Materials
Leftover materials require organized sorting and proper disposal to complete your renovation cleanup. Separate usable items like extra tiles, paint, and hardware into clearly labeled containers for future touch-ups. Contact local recycling centers for proper disposal of recyclable materials like metal scraps, cardboard, and certain plastics. Arrange special pickup for large debris piles exceeding regular trash limits. Donate unused but still-good materials to organizations like Habitat for Humanity ReStore, turning your renovation leftovers into community resources while clearing your space.
When to Consider Professional Post-Renovation Cleaning
Post-renovation cleaning often presents challenges beyond standard housekeeping. Professional cleaning services offer specialized equipment and expertise for particularly demanding situations. Here’s when to consider calling in the pros:
Extensive Renovations
Large-scale renovations generate significant amounts of dust and debris that permeate every corner of your home. Professional cleaners bring commercial-grade equipment including:
- Industrial HEPA vacuums that capture 99.97% of particles as small as 0.3 microns
- Specialized air scrubbers to filter airborne contaminants
- High-powered extraction systems for embedded dust
Multi-room renovations or whole-house remodels typically benefit from professional attention due to the sheer volume of cleanup required.
Hazardous Materials Exposure
Renovations involving older homes may disturb hazardous materials requiring specialized handling:
- Lead paint (common in homes built before 1978)
- Asbestos (found in older insulation, flooring, and ceiling materials)
- Mold remediation following water damage repairs
Professional cleaners receive training in proper containment and disposal protocols for these dangerous substances, protecting your family’s health.
Time Constraints
Post-renovation cleaning typically takes 3-5 times longer than regular cleaning. If you’re facing:
- Tight move-in deadlines
- Work commitments limiting available cleaning time
- Special events scheduled in the renovated space
Professional teams can complete in hours what might take days for an individual, with multiple cleaners working simultaneously throughout the space.
Specialized Surfaces
Newly installed luxury materials often require specific cleaning methods to prevent damage:
- Natural stone countertops (marble, granite, quartz)
- Custom cabinetry with specialty finishes
- Handcrafted tile work with delicate grout
- Hardwood flooring with specific maintenance requirements
Professionals know exactly which products and techniques protect these investments while removing construction residue.
Maintaining Your Newly Renovated Space
After completing your post-renovation cleanup, maintaining that pristine condition requires ongoing attention. Regular maintenance prevents the accumulation of dust and keeps your renovated spaces looking fresh for years to come.
Creating a Maintenance Schedule
A consistent cleaning schedule preserves your renovation investment. Break down maintenance tasks into daily, weekly, and monthly categories for manageable upkeep:
- Daily tasks: Wipe down countertops, sweep high-traffic areas, and clean spills immediately
- Weekly tasks: Vacuum with a HEPA filter, dust all surfaces, and clean bathroom fixtures
- Monthly tasks: Deep clean floors, wipe down walls, and inspect for any issues with new installations
Proper Care for New Materials
Different renovation materials require specific cleaning approaches to maintain their appearance and longevity:
- Quartz countertops: Clean with mild soap and water, avoiding abrasive cleaners that damage the surface
- Hardwood floors: Sweep regularly and use manufacturer-recommended cleaners, applying furniture pads to prevent scratches
- Fresh paint: Dust walls gently with microfiber cloths and clean marks with a soft sponge and mild cleaner
- New grout: Seal grout lines within 72 hours of installation, then clean with pH-neutral cleaners to prevent discoloration
Early Problem Detection
Regular maintenance helps identify potential issues before they become serious problems. During your cleaning routine, look for:
- Water stains or discoloration that might indicate leaks
- Cracks in caulking or grout that need resealing
- Loose fixtures or hardware that require tightening
- Uneven wear patterns in flooring that could signal installation problems
By incorporating these maintenance practices into your routine, you’ll extend the life of your renovation and continue enjoying your refreshed space for years to come.
Conclusion
Tackling post-renovation cleaning doesn’t have to be overwhelming with the right approach. We’ve shared a comprehensive checklist to help you transform your construction zone back into a beautiful home while protecting your health and investment.
Remember that proper cleaning removes potentially harmful construction residues and reveals any issues needing attention before they become costly problems. Whether you decide to tackle the cleaning yourself or hire professionals depends on your specific situation.
The real secret to maintaining your newly renovated space is establishing good cleaning habits from day one. With regular maintenance and the right cleaning techniques your renovation will continue to shine for years to come. Now it’s time to put away those cleaning supplies and truly enjoy your refreshed space!
Frequently Asked Questions
Why is post-renovation cleaning important?
Post-renovation cleaning is crucial because it removes potentially harmful construction dust containing silica and chemical residues that pose health risks. It protects your investment by preventing damage to new installations from debris and helps identify issues needing correction before they become costly problems. Proper cleaning transforms a construction zone into a livable, healthy home by eliminating allergens and irritants that may cause allergic reactions.
What supplies do I need for post-renovation cleaning?
Essential supplies include microfiber cloths that trap dust effectively, a heavy-duty vacuum with HEPA filter for construction debris, all-purpose cleaners, glass cleaners, wood cleaners, appropriate floor cleaners, scrub brushes, extension dusters for high surfaces, and buckets. Don’t forget safety equipment like N95 respirator masks, chemical-resistant gloves, safety goggles, and knee pads to protect yourself during cleanup.
How do I create an effective cleaning checklist?
Create your checklist by breaking down the cleaning process into manageable tasks by room or surface type. Start with broad areas (ceilings, walls, floors) and move to specific fixtures and details. Include every surface that needs attention, noting any special cleaning requirements for materials like natural stone or hardwood. A systematic checklist ensures no area is overlooked and helps track your progress.
What’s the best way to remove construction dust?
Start by using a HEPA vacuum to capture loose dust from all surfaces before wiping. Work from top to bottom—ceilings, walls, then floors—to prevent redistributing dust. Use microfiber cloths slightly dampened with water for most surfaces. For stubborn dust, use appropriate cleaners for specific materials. Avoid feather dusters which scatter rather than remove dust. Air purifiers can help capture airborne particles during the cleaning process.
When should I hire professional cleaners?
Consider professionals for extensive renovations that generated significant debris, projects involving hazardous materials like lead or asbestos, when you’re facing time constraints, or when dealing with specialized surfaces requiring expert care. Professional cleaners offer commercial-grade equipment, expertise in handling hazardous materials, and efficiency that ensures your newly renovated space is thoroughly cleaned and ready for use.
How do I clean different types of flooring after renovation?
For hardwood floors, vacuum with a soft brush attachment, then use a manufacturer-approved wood cleaner. For tile, remove grout haze with appropriate cleaners and buff dry. Vacuum carpet thoroughly with a HEPA vacuum, followed by professional steam cleaning to remove embedded dust. For laminate or vinyl, use a microfiber mop with a mild cleaner approved for these surfaces. Always follow manufacturer guidelines to avoid damage.
How can I maintain my newly renovated space?
Create a maintenance schedule with daily, weekly, and monthly tasks tailored to different materials. Use appropriate cleaners for specific surfaces like quartz countertops or hardwood floors. Regular maintenance prevents dust accumulation and helps detect early problems like leaks before they become serious. Proper upkeep preserves your investment and extends the life of your renovations, keeping your refreshed space looking beautiful for years.
How do I clean paint spills and adhesive residue?
For fresh paint spills, blot immediately with a damp cloth. For dried paint, use a plastic scraper followed by appropriate solvents (water for latex, mineral spirits for oil-based). Remove adhesive residue with commercial adhesive removers, or try alternatives like warm soapy water, vinegar solutions, or specialized products for specific adhesives. Always test cleaning solutions on an inconspicuous area first to prevent surface damage.