How to Grow and Care for Alocasia ‘Dragon Scale’: The Ultimate Guide
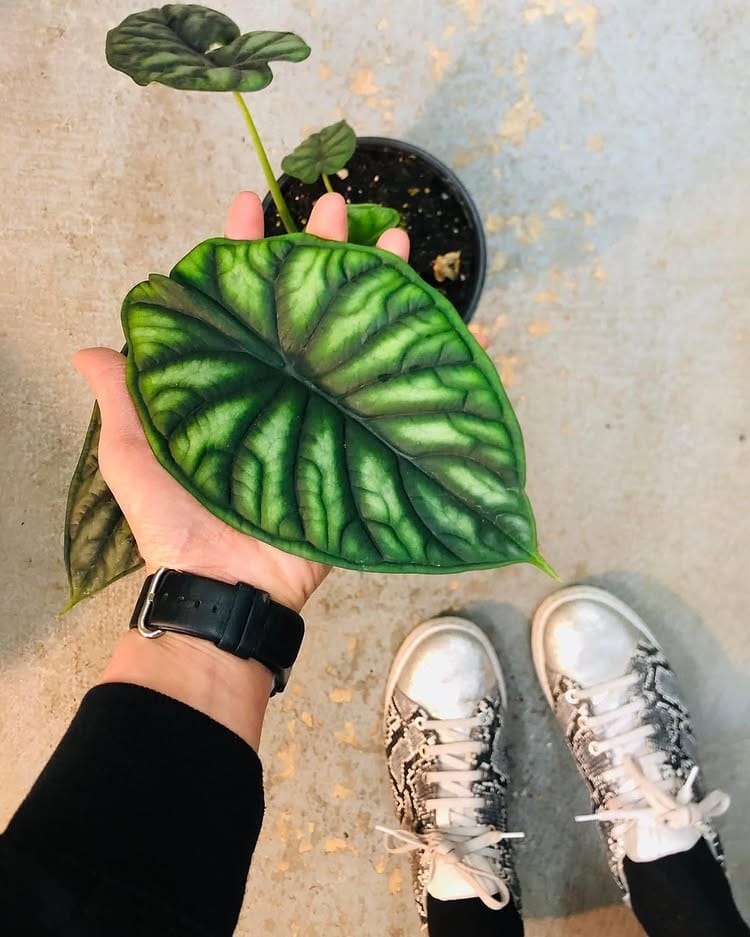
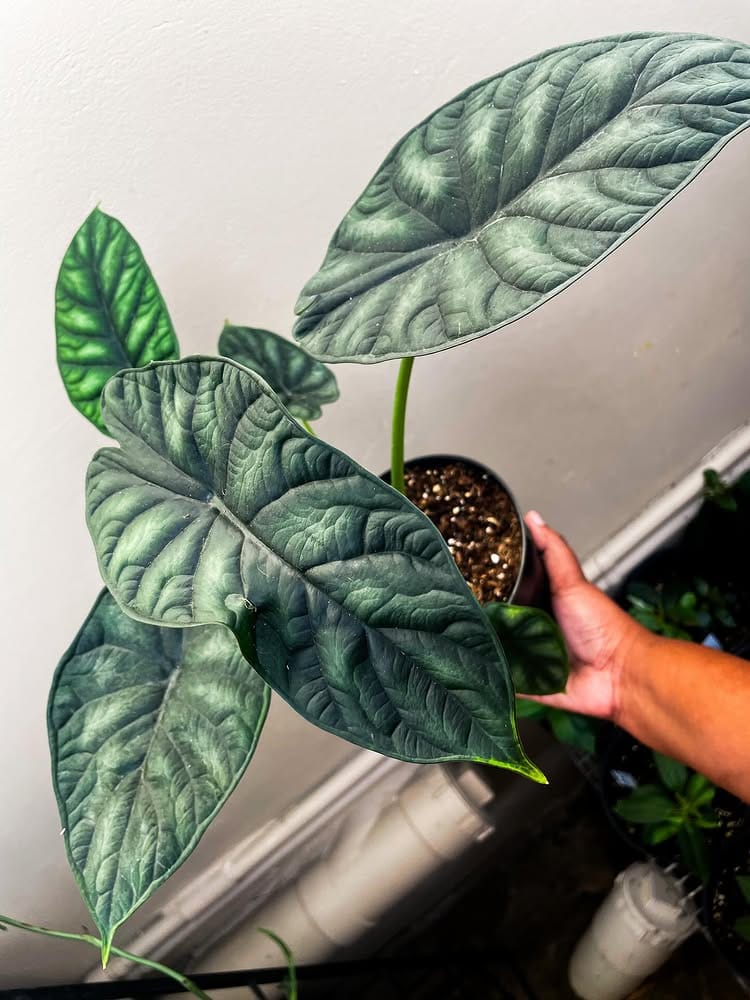
The Alocasia ‘Dragon Scale’ is more than just a houseplant; it’s a living sculpture. A member of the Araceae family, this breathtaking plant is celebrated for its stunning, textured foliage that remarkably resembles the mythical scales of a dragon. Each deep green, shield-shaped leaf is adorned with intricate, raised venation in a lighter, silvery-green, creating a mesmerizing 3D effect.
While its beauty is undeniable, the ‘Dragon Scale’ has a reputation for being a somewhat finicky houseplant. But fear not! With the right knowledge, you can successfully cultivate this exotic beauty. This guide will walk you through every step to ensure your Alocasia not only survives but thrives.
The Ideal Environment: Mimicking the Jungle Floor
To understand how to care for your Alocasia ‘Dragon Scale’, it helps to imagine its natural habitat: the warm, humid, and dappled-light understory of Southeast Asian rainforests. Replicating these conditions is the key to success.
Light Requirements: Bright but Indirect is Best
Direct sunlight is the enemy of the ‘Dragon Scale’. Its delicate leaves are prone to scorching, which manifests as crispy, brown patches. However, too little light will cause it to become leggy and lose its vibrant coloration.
- Ideal Setup: Place it near an east-facing window where it can enjoy gentle morning sun. A south or west-facing window is also suitable, but ensure the plant is shielded by a sheer curtain or placed several feet back from the window.
- Signs of Poor Lighting:
- Too much light: Scorched, pale, or yellowing leaves.
- Too little light: Stretched stems, small new leaves, and loss of the characteristic silvery patterning.
Humidity & Temperature: Creating a Tropical Microclimate
This is arguably the most critical aspect of ‘Dragon Scale’ care. As a tropical plant, it demands high humidity.
- Humidity: Aim for 60% humidity or higher.
- Temperature: Maintain a consistent temperature between 65°F – 80°F (18°C – 27°C). Avoid cold drafts and sudden temperature fluctuations.
How to Increase Humidity:
- Use a humidifier (the most effective method).
- Place the plant on a pebble tray filled with water.
- Group it with other humidity-loving plants.
- Avoid misting as a primary solution, as it can lead to fungal issues on the leaves if overdone.
Quote from a Plant Enthusiast:
“Many people struggle with Alocasia ‘Dragon Scale’ because they treat it like a common Pothos. The single biggest game-changer for me was investing in a small humidifier for my plant shelf. The difference in leaf size and sheen was immediate and dramatic.” — Morgan R., Houseplant Collector
The Fundamentals of Watering and Soil
Getting water and soil right prevents the most common issues: root rot and dehydration.
The Perfect Pour: Watering Your ‘Dragon Scale’
The ‘Dragon Scale’ prefers to be kept consistently moist but never soggy. Think of a well-wrung sponge.
- Technique: Water thoroughly when the top 1-2 inches of soil feel dry to the touch. Pour water evenly over the soil until it runs freely from the drainage holes. Always empty the cache pot or saucer afterward to prevent the plant from sitting in water.
- Water Quality: These plants can be sensitive to chemicals in tap water. Using distilled, filtered, or rainwater can prevent tip burn and build-up.
The Foundation: A Well-Draining Soil Mix
A dense, moisture-retentive potting mix is a death sentence for Alocasia bulbs. They need a chunky, airy substrate that allows for oxygen to reach the roots.
Recommended DIY Soil Mix Recipe:
- 2 parts regular potting soil
- 1 part orchid bark (for aeration)
- 1 part perlite or pumice (for drainage)
- A handful of horticultural charcoal (to keep the soil fresh)
Alocasia ‘Dragon Scale’ vs. Similar Plants
It’s easy to confuse the ‘Dragon Scale’ with its popular cousins. Here’s a quick comparison.
H3: ‘Dragon Scale’ vs. ‘Silver Dragon’ vs. ‘Black Velvet’
| Feature | Alocasia ‘Dragon Scale’ | Alocasia ‘Silver Dragon’ | Alocasia ‘Black Velvet’ |
|---|---|---|---|
| Primary Leaf Color | Deep, metallic green | Silvery-white | Almost black, velvety |
| Venation Color | Light, silvery-green | Dark green | Striking white |
| Texture | Heavy, leathery, 3D scales | Smoother, less textured | Soft, plush velvet |
| Care Difficulty | Intermediate | Intermediate | Intermediate |
| Key Trait | Textured, reptilian scales | Iridescent, moon-like surface | Dramatic, dark contrast |
Seasonal Care and Common Challenges
Your care routine should adapt with the seasons. Alocasia ‘Dragon Scale’ often enters a dormancy period in the fall and winter when light levels and temperatures drop.
Dormancy: Don’t Panic!
During dormancy, your plant may stop producing new leaves and could even drop one or two. This is normal.
- Adjust Care: Reduce watering significantly, allowing the soil to dry out more between waterings. Stop fertilizing entirely until you see signs of new growth in the spring.
- What to Expect: “It’s heartbreaking to see a leaf yellow and die, but if it’s winter, it’s likely just going to sleep, not dying. Focus on keeping the bulb healthy in the soil, and it will reward you with vigorous growth come spring.”
Troubleshooting Common Problems
| Symptom | Likely Cause | Solution |
|---|---|---|
| Yellowing Leaves | Overwatering, poor drainage, or natural dormancy. | Check soil moisture, ensure pot has drainage, adjust watering for season. |
| Brown, Crispy Leaf Edges | Low humidity or chemical build-up from tap water. | Increase humidity with a humidifier, switch to filtered/rain water. |
| Drooping Leaves | Underwatering or a sudden change in environment. | Water if soil is dry, ensure stable temperature and light. |
| Pests (Spider Mites) | Dry, stagnant air. | Wipe leaves with neem oil or insecticidal soap; increase humidity. |
The Rewards: Propagation and Long-Term Joy
Once you’ve mastered its care, you might want to create more of these magnificent plants.
How to Propagate via Corm Division
The best way to propagate an Alocasia ‘Dragon Scale’ is by separating the underground corms (baby bulbs) from the mother plant during repotting.
- Gently remove the plant from its pot during the active growing season (spring).
- Brush away soil to reveal the root system and the main bulb.
- Locate the small, round corms attached to the main root structure.
- Carefully separate them, ensuring each has some roots.
- Plant the corms in a small pot with a moist, well-draining mix, cover lightly, and place in a warm, humid location. Patience is key, as they can take several weeks to sprout.