The Definitive Guide to How to Clean an Awning: Pro Techniques for Every Material
Awnings are the unsung heroes of our outdoor living spaces. They provide essential shade, protect our patio furniture from UV damage, and can significantly reduce indoor cooling costs. However, because they are constantly exposed to the elements—sun, rain, bird droppings, tree sap, and urban pollution—they are magnets for dirt and biological growth .
Learning how to clean an awning properly is not just about curb appeal; it is a critical part of home maintenance that can double the lifespan of your investment. Using the wrong technique or harsh chemicals can lead to faded fabric, voided warranties, and even structural damage .
In this comprehensive 1500-word guide, we will move beyond the basic “soap and water” advice. We will provide a structural approach to cleaning every type of awning, compare cleaning solutions, and give you a seasonal maintenance schedule to keep your awning looking brand new.
The Preparation Phase: Safety and Supply Checklist
Before you climb a ladder or mix any solutions, you must assess your specific situation. Jumping straight into scrubbing without preparation is the most common DIY mistake .
1. Safety First
Most residential awnings sit 8 to 10 feet off the ground . If you need a ladder, ensure it is rated for your weight plus the weight of your supplies. For awnings on second-story windows or commercial buildings, it is best to call a professional who has the right safety equipment like scissor lifts .
2. Initial Debris Removal
Never start cleaning a dry, dirty awning. Using a brush on dry dirt can grind abrasive particles into the fabric fibers. Instead, use a soft-bristled brush or a broom to gently sweep away loose leaves, cobwebs, and dust. You can also use a leaf blower or a vacuum cleaner on a low setting for a quick dry removal .
3. The “Spot Test” Rule
This is non-negotiable. Apply your chosen cleaning solution to a small, hidden corner of the awning (usually the underside corner). Wait 10-15 minutes to check for discoloration or damage before proceeding .
Essential Supplies Checklist
To make this easy, here is a table of the tools you will need based on the intensity of the clean:
Material-Specific Cleaning Protocols
Not all awnings are created equal. The method you use depends entirely on whether you have acrylic, vinyl, canvas, or aluminum. Using a vinyl cleaning method on a natural canvas awning can ruin it instantly.
1. How to Clean Solution-Dyed Acrylic Awnings (e.g., Sunbrella)
Acrylic is the premium choice for residential awnings because the color runs through the entire fiber, making it resistant to fading and relatively easy to clean .
- The Method: Start by hosing down the awning to wet the fabric. Mix a solution of mild soap (like dish soap) and lukewarm water. Apply it with a soft brush and scrub gently. Let the solution soak into the fabric for about 10-15 minutes—do not let it dry on the surface. Rinse thoroughly until all soap residue is gone .
- Mildew Treatment: If you see mildew, acrylic can handle a diluted bleach solution (one cup of bleach per gallon of water). Apply it carefully, let it sit for up to 15 minutes, and rinse abundantly .
2. How to Clean Vinyl and Acrylic-Coated Fabrics
These are common on retractable awnings and RV awnings because they are durable and water-resistant. They are less breathable than acrylic, so cleaning is generally easier, but they require caution with tools.
- The Method: Vinyl is plastic-based, so avoid harsh solvents or petroleum-based cleaners that can make it brittle . A simple dish soap and water solution works best. For stubborn stains on an RV awning, products like the Camco Awning Cleaner are specifically formulated to remove road grime and tree sap without damaging the vinyl coating .
- Pro Tip: Avoid stiff brushes. Use a soft cloth or sponge on vinyl to prevent scratching the surface finish .
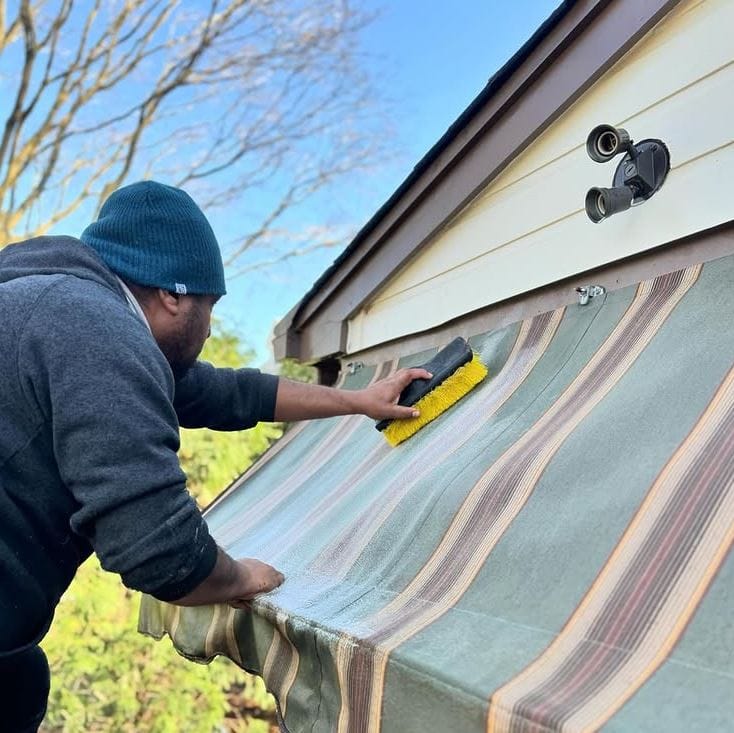
3. How to Clean Natural Fiber and Canvas Awnings
Canvas has a classic look but is the most high-maintenance material. It absorbs water, which makes it prone to mildew .
- The Method: Never use bleach on untreated canvas. Bleach breaks down the natural fibers. Instead, stick to a mild soap solution. For mildew, use a specialty canvas cleaner or a white vinegar and water mix (1:4 ratio) .
- Critical Rule: Canvas must be completely dry before you retract it. Rolling up a damp canvas awning is a guaranteed way to create a smelly, mildewed mess .
4. How to Clean Metal and Aluminum Awnings
Metal awnings are sturdy and often fixed in place. They don’t absorb stains, but they do oxidize.
- The Method: Wash with car wash soap and water. For oxidation (the chalky, white residue), use an aluminum polish or a baking soda paste. After cleaning, applying a coat of automotive wax will protect the finish and make future cleaning much easier .
Deep Cleaning: Tackling Stubborn Stains
Sometimes, routine cleaning isn’t enough. Here is how to handle specific contaminants.
Tree Sap and Pitch
Sap is sticky and difficult. Do not scrape it off, as you might tear the fabric.
- Soften the Sap: Apply a small amount of rubbing alcohol or a specific sap remover to a cloth.
- Dab and Lift: Gently dab the sap. It should start to dissolve and lift away.
- Wash: Clean the area with your regular soap solution to remove any alcohol residue .
Bird Droppings
Bird droppings are acidic and can bleach fabrics if left too long.
- Remove Excess: Gently scrape off the solid waste.
- Soak: Apply a mixture of dish soap and water directly to the spot. Let it sit to soften the residue.
- Blot: Blot the area with a clean cloth until the stain lifts .
Grease and Cooking Sprays
If your awning is near a grill, grease stains are inevitable.
- For Fabric: Use a small amount of acetone on a clean cloth for acrylic fabrics, or use a strong dish soap (like Dawn) that cuts grease. Rinse immediately .
- For Vinyl: A magic eraser-type melamine sponge can work wonders on grease without chemicals, but use it gently .
The Professional Approach: To Pressure Wash or Not?
This is the most debated topic in awning care. A pressure washer can save time, but it is incredibly risky.
The Risk: Using too much pressure (over 1,500 PSI) or a nozzle that is too narrow (less than 45 degrees) can rip fabric, tear seams, or “frost” the material by delaminating the layers .
The Safe Method: If you must use a pressure washer:
- Keep the pressure below 300 PSI for fabric (if you don’t have a gauge, don’t risk it) .
- Use a 45-degree fan nozzle.
- Stand at least 12-18 inches away from the fabric.
- Never use a pressure washer on delicate canvas or old awnings.
For most homeowners, a garden hose with a high-pressure nozzle is sufficient.
Comparison of Awning Cleaning Products
Choosing the right cleaner can be overwhelming. Here is a comparison of popular options based on real-world reviews and expert recommendations:
Post-Cleaning: Drying and Protection
Cleaning is only half the battle. How you handle the awning afterward determines how long the results last.
The Golden Rule: Dry Before Retracting
This cannot be stressed enough. Mildew and mold need moisture to thrive. If you retract a wet awning, you are sealing that moisture in a dark environment, creating a perfect breeding ground for decay . If your awning gets wet from rain, extend it again as soon as the sun comes out to let it dry completely .
Applying a Protectant
For fabric awnings (especially acrylic and canvas), applying a fabric sealer or protectant is a game-changer.
- Benefits: Sealers restore oils, provide UV protection, and create a barrier that prevents dirt from penetrating the fibers .
- Application: Apply the sealer with a pump sprayer, working from the top down. For cloth, capillary action will help draw the sealer through the fabric .
Seasonal Maintenance Schedule
Consistency is key to avoiding deep cleaning marathons. Use this schedule to keep your awning in top shape year-round .
Conclusion
Learning how to clean an awning is a straightforward process that boils down to three core principles: use the right method for your material, avoid harsh chemicals unless specified, and never store it wet.
Whether you are sprucing up a vinyl RV awning for a camping trip or maintaining a premium acrylic patio cover, regular care will ensure your outdoor space remains comfortable and inviting for years to come. By following the steps in this guide, you protect your investment and enhance the beauty of your home.