The Ultimate Guide: How to Clean Lanai Screens Like a Pro for Crystal-Clear Views
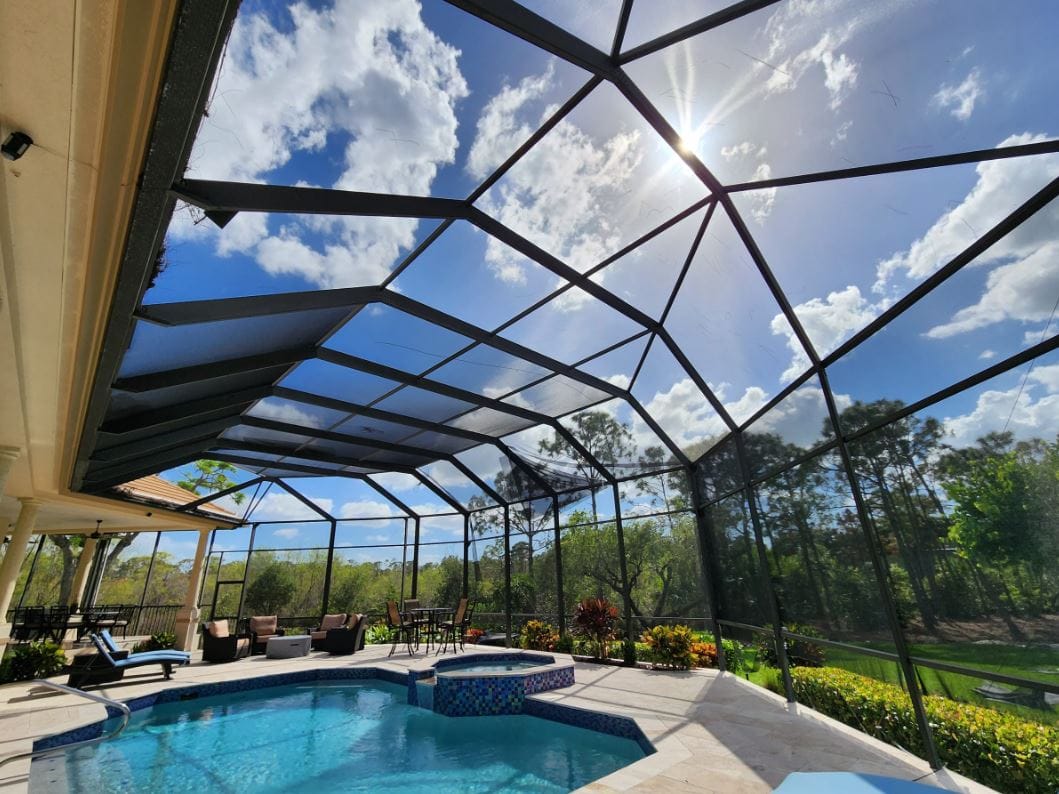
Your lanai is the perfect retreat—a place to enjoy your morning coffee or evening breeze without worrying about bugs. However, dust, pollen, and humidity can turn those clear screens into a blurry, grimy mess. In Florida and other humid climates, knowing how to clean lanai screens isn’t just about aesthetics; it’s about protecting your investment and ensuring your outdoor space remains inviting .
This guide will walk you through every step, from simple rinses to tackling tough mold, ensuring your screens stay sparkling all year long.
Why Cleaning Your Lanai Screens Matters
Before we dive into the “how,” let’s look at the “why.” Dirty screens aren’t just an eyesore; they can cause functional problems. Understanding these benefits will motivate you to stick to a routine.
Preparation: Gather Your Supplies
Cleaning your lanai screens doesn’t require fancy equipment, but using the right tools is crucial to avoid damage . Here’s what you’ll need:
- Garden Hose: With an adjustable spray nozzle.
- Soft-Bristled Brush: A brush with an extendable handle is ideal for high areas .
- Cleaning Agents: Mild dish soap and distilled white vinegar.
- Bucket: For mixing your cleaning solution.
- Microfiber Cloths or Soft Sponges: For frames and spot cleaning .
- Lint Roller: Surprisingly effective for removing light pollen and lint before washing .
- Safety Gear: Gloves and safety glasses (optional but recommended) .
The Step-by-Step Process to Clean Lanai Screens
Follow these steps to restore your screens to a like-new condition.
Step 1: Remove Loose Debris
Start by removing furniture from the lanai floor to protect it and give you space to work . Use a soft-bristled brush, a dry sponge, or a vacuum with an upholstery attachment to gently sweep away cobwebs, leaves, and loose dirt from both sides of the screen . You can also use a leaf blower for quick debris removal from the floor and roof area .
Step 2: Choose and Mix Your Cleaning Solution
Selecting the right cleaner depends on the level of grime. Avoid harsh chemicals like bleach unless absolutely necessary, as they can damage screens and harm plants .
Step 3: Wash the Screens
- Apply the Solution: Starting from the top, spray or wipe your chosen cleaning solution onto the screens. If using soap, dip your soft brush in the bucket and gently scrub in a circular or vertical motion . For vinegar solutions, spray liberally.
- Let it Dwell: Allow the solution to sit for a few minutes to break down the dirt and kill mold spores, but don’t let it dry on the screen .
- Scrub Gently: For stubborn spots, use a soft brush or an old toothbrush for precision . Remember: Aggressive scrubbing or abrasive tools can tear the mesh .
Step 4: Rinse Thoroughly
Use your garden hose with a gentle spray nozzle to rinse all soap and residue away. Work from the top down to ensure even cleaning . Avoid pressure washers—even on a low setting, they can easily stretch, tear, or pop the screen material out of its tracks . If you must use one, keep it at the lowest setting and a safe distance .
Step 5: Dry and Inspect
Allow the screens to air dry completely. This prevents water spots and moisture buildup that could lead to future mold growth . While they dry, this is the perfect time to inspect the screen for small tears, holes, or loose frames. Addressing these issues immediately can prevent expensive repairs later .
What to Avoid: Common Cleaning Mistakes
Many homeowners accidentally damage their screens by using the wrong techniques. Here’s what not to do :
- High Pressure: Never use a power washer on a high setting directly against the screen.
- Harsh Chemicals: Avoid bleach-heavy cleaners that can weaken fibers and harm landscaping.
- Abrasive Tools: Say no to steel wool, hard scrub brushes, or rough pads that can scratch.
- Direct Sunlight: Avoid cleaning on a scorching hot day, as cleaning solutions can evaporate too quickly and leave streaks .
- Forgetting the Frames: Don’t neglect the aluminum frames and tracks; mold grows there too. Wipe them down with your vinegar solution .
Maintenance: How to Keep Screens Cleaner for Longer
Consistency is key. Here’s a simple schedule to follow to reduce the need for deep cleaning.
- Monthly: Give your screens a quick rinse with the garden hose to remove pollen and loose dirt .
- Quarterly: Do a full cleaning with the mild soap and soft brush method .
- As Needed:
Frequently Asked Questions
Q: Can I use bleach to clean my lanai screens?
A: It’s generally not recommended as a first choice. Bleach can damage the screen material and discolor aluminum frames. It is also highly toxic to nearby plants . If you have severe mold, try a vinegar solution first, or use bleach very sparingly as a spot-treatment, ensuring you rinse the area immediately and thoroughly .
Q: How often should I clean my lanai screens?
A: For most homes, a thorough cleaning every three to six months is sufficient. However, if you live near the coast (salt spray), in a wooded area (pollen and sap), or have a pool (chemicals splashing), consider cleaning monthly .
Q: Is it safe to use a pressure washer on lanai screens?
A: It is risky. While some professionals use them on a very low, wide setting, most experts advise against it for the average homeowner. The force is likely to stretch the mesh, creating sags or tears. A garden hose with a nozzle provides plenty of pressure for effective cleaning .
Q: What is the best natural cleaner for lanai screens?
A: A 50/50 mix of white vinegar and water is widely regarded as the best natural cleaner. It kills mold and mildew, cuts through grime, and is safe for pets and plants (though you should still rinse plants afterward) .
By following these steps and tips, you can ensure that your lanai remains a clean, comfortable, and beautiful extension of your home for years to come.