The Ultimate Guide to Cleaning Your RV Roof: Protect Your Investment
Your RV’s roof is its first line of defense against the elements. A clean roof prevents costly damage from UV degradation, water pooling, and biological growth. This comprehensive, step-by-step guide will show you how to properly clean your RV roof, extending its lifespan and maintaining your vehicle’s value.
Why Regular RV Roof Cleaning is Non-Negotiable
Neglecting your RV roof can lead to a cascade of expensive problems:
- Leaks & Water Damage: The #1 cause of RV deterioration.
- Mold & Mildew: Health hazards that degrade roofing materials.
- UV Damage: Causes cracking, brittleness, and fading.
- Reduced Resale Value: Visible roof neglect significantly lowers market price.
Industry experts recommend a thorough cleaning at least twice a year—at the start and end of your primary camping season.
Step 1: Safety First & Preparation
What You’ll Need:
- Sturdy ladder with stabilizers
- Non-slip shoes with good traction
- Safety harness (for steep roofs)
- Weather forecast: Choose a cool, overcast day to prevent cleaner from drying too fast.
Golden Rule: Never walk directly on your RV roof if you can avoid it. Use plywood or roof walker pads to distribute weight, especially on rubber (EPDM) or fiberglass roofs.
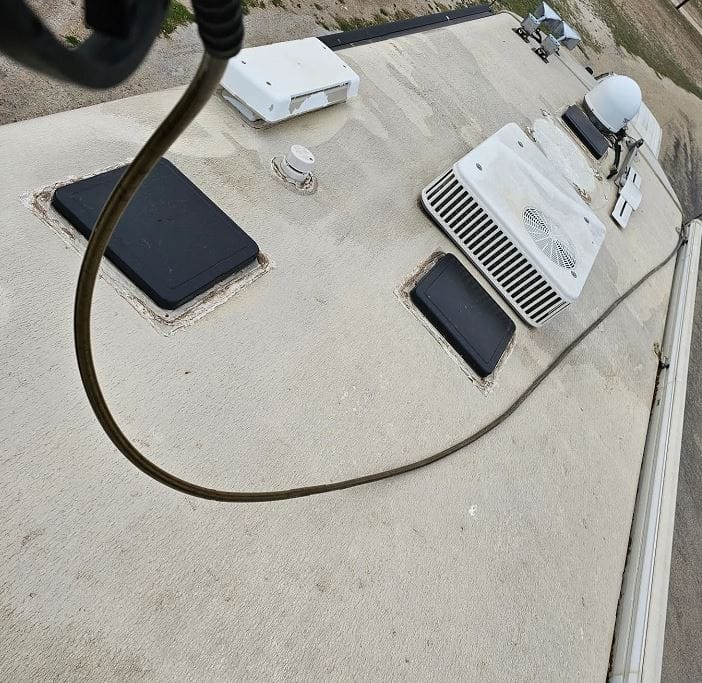
Step 2: Identify Your Roof Material
This is the most critical step. Using the wrong cleaner can permanently damage your roof. Check your owner’s manual or use this guide:
Table 1: RV Roof Material Identification
| Material | Appearance/Texture | Common In |
|---|---|---|
| EPDM Rubber | Black or grey, smooth rubbery surface. | Travel Trailers, Fifth Wheels |
| TPO (Thermoplastic Polyolefin) | White or light grey, smooth membrane. | Modern Trailers & Motorhomes |
| Fiberglass/Aluminum | Hard, rigid, often painted white. | Older Trailers, Class A Motorhomes |
| PVC | Similar to TPO, seams are often heat-welded. | Higher-end Models |
| Metal (Aluminum/Steel) | Rigid, corrugated or ribbed panels. | Vintage Campers, Some Truck Campers |
Step 3: Choose the Correct Cleaner & Tools
Table 2: Cleaner Recommendations by Roof Type
| Roof Material | Recommended Cleaner | What to AVOID | Best Tool |
|---|---|---|---|
| EPDM Rubber | Mild dish soap (Dawn), dedicated EPDM cleaner (like Dicor). | Petroleum-based, abrasive, bleach (in high concentrations). | Soft bristle brush, microfibre mop. |
| TPO/PVC | RV-specific TPO cleaner, mild soap, diluted Simple Green. | Acetone, strong solvents, abrasive pads. | Soft brush or non-abrasive pad. |
| Fiberglass/Gel Coat | Fiberglass cleaner/restorer, marine-grade soap. | Harsh acids, gritty compounds. | Long-handled soft brush. |
| Metal | Car wash soap, diluted vinegar for stains. | Wire brushes, strong acid that promotes rust. | Soft cloth or sponge. |
Universal Warning: Avoid pressure washers. The high PSI can force water under seals, around vents, and damage the roofing material itself. Use a low-pressure garden hose for rinsing.
Step 4: The Step-by-Step Cleaning Process
1. Dry Brush: Gently sweep off all loose debris, leaves, and twigs.
2. Apply Cleaner: Working in manageable sections (e.g., 10×10 ft), apply your chosen cleaner with a sprayer or mop. Never let the cleaner dry on the surface.
3. Gentle Scrubbing: Using your soft brush or mop, agitate the solution. Focus on areas with visible stains, black streaks (which are often algae/tree sap), or around vents.
4. Rinse Thoroughly: Rinse each section completely with a steady flow of clean water before moving on. Ensure all soap residue is gone.
5. Inspect Seals & Vents: Once clean, this is the perfect time to inspect all roof seals, vents, and AC units for cracks or gaps. Re-caulk with a self-leveling RV roof sealant (like Dicor Self-Leveling Lap Sealant) if needed.
6. Final Rinse & Dry: Give the entire roof a final rinse. Allow to air dry or gently pat dry with a soft, absorbent cloth.
Step 5: Protection & Preventative Maintenance
Cleaning alone isn’t enough. Applying a protectant is key.
*Table 3: Post-Clean Protection Options*
| Product Type | Best For | Key Benefit | Application Frequency |
|---|---|---|---|
| UV Protectant Spray | EPDM, TPO, PVC | Shields from sun damage, prevents drying/cracking. | Every 6 Months |
| Liquid Roof Coating | All, especially older roofs. | Forms a new, seamless protective layer; can restore. | 3-5 Years |
| Wax/Sealant (Paste) | Fiberglass, Gel Coat. | Adds shine, protects gloss coat. | 2-3 Times/Year |
Pro Tip: Consider installing RV roof covers or parking in the shade to drastically reduce UV exposure and debris accumulation between cleanings.
Common Mistakes to Avoid
- Using Bleach or Abrasives: They degrade materials and void warranties.
- Ignoring the Manual: Always follow your RV manufacturer’s guidelines.
- Skipping the Rinse: Soap residue attracts more dirt.
- Walking Carelessly: One misstep can cause a costly puncture or crack.
- Forgetting the Gutters: Clear roof gutters to ensure proper water drainage.
Conclusion: An Hour of Prevention Saves Thousands
A systematic, bi-annual RV roof cleaning is the single most effective maintenance task you can perform. By identifying your material, using the correct cleaners, and following a safe process, you protect your home-on-wheels from decay. A clean, well-maintained roof ensures you’re ready for adventure, not sidelined by preventable repairs.