The Complete Guide to How to Clean a Breech Plug: Step-by-Step Instructions for Optimal Performance
A clean breech plug is the heartbeat of a reliable, accurate, and safe muzzleloader. Neglecting this critical component can lead to misfires, difficult cleaning, corrosion, and even dangerous pressure issues. Whether you’re a seasoned black powder hunter or new to traditional firearms, mastering breech plug maintenance is an essential skill. This comprehensive, SEO-optimized guide will walk you through everything you need to know to clean your breech plug effectively, ensuring your firearm performs flawlessly season after season.
Understanding Your Breech Plug: Types and Materials
Before diving into the cleaning process, it’s crucial to identify what type of breech plug you have, as materials and designs vary.
Common Breech Plug Types:
- Traditional Threaded Plug: Common in older and custom rifles.
- Quick-Disconnect Plug: Found in many modern in-line muzzleloaders.
- Patent Breech Plug: Features a smaller, recessed flash channel.
Most modern plugs are made from stainless steel or hardened chrome-molybdenum steel. Some feature nitride coatings or other treatments for easier cleaning and corrosion resistance.
Table 1: Breech Plug Types & Cleaning Considerations
| Plug Type | Common Materials | Key Cleaning Focus | Potential Challenges |
|---|---|---|---|
| Traditional Threaded | Steel, Stainless Steel | Threads, Flash Hole | May seize if not lubricated |
| Quick-Disconnect | Coated Steel, Stainless | Seal surfaces, Internal channel | O-rings/seals can degrade |
| Patent Breech | Various | Small, recessed flash channel | Channel clogging hard to see |
Essential Tools and Supplies for Effective Cleaning
Gathering the right tools before you start is half the battle. Using improper tools can damage the plug’s critical surfaces.
Must-Have Cleaning Kit:
- Breech plug wrench or specific tool (NEVER use ill-fitting tools)
- Brass picks or dental tools (non-sparking, won’t damage metal)
- Small wire brushes (.22 caliber or specific breech plug brushes)
- Pipe cleaners or ultra-small brushes for flash channels
- Gun solvent/cleaner designed for black powder or pyrodex residue
- Rust preventative/protectant (e.g., Birchwood Casey Barricade)
- Thread lubricant/anti-seize compound (high-temperature rated)
- Ultrasonic cleaner (optional but highly effective)
- Safety glasses and nitrile gloves
Step-by-Step: How to Clean a Breech Plug Thoroughly
Follow this detailed process after every shooting session—do not let fouling sit.
Step 1: Safe Removal from the Firearm
Ensure the firearm is completely unloaded. Use the correct wrench and turn counter-clockwise. If the plug is stuck, do not force it. Apply a penetrating solvent like Kroil and let it sit for several hours. Always pull the wrench toward you to maintain control and prevent hand injury.
Step 2: Initial Debris Removal
Wipe off external fouling with a solvent-dampened cloth. Use a pick to clear the flash hole of any immediate obstruction. Soak the plug in warm, soapy water if you’ve used black powder (water is an excellent black powder solvent). For synthetic propellants like Pyrodex or Triple Seven, use the manufacturer’s recommended solvent.
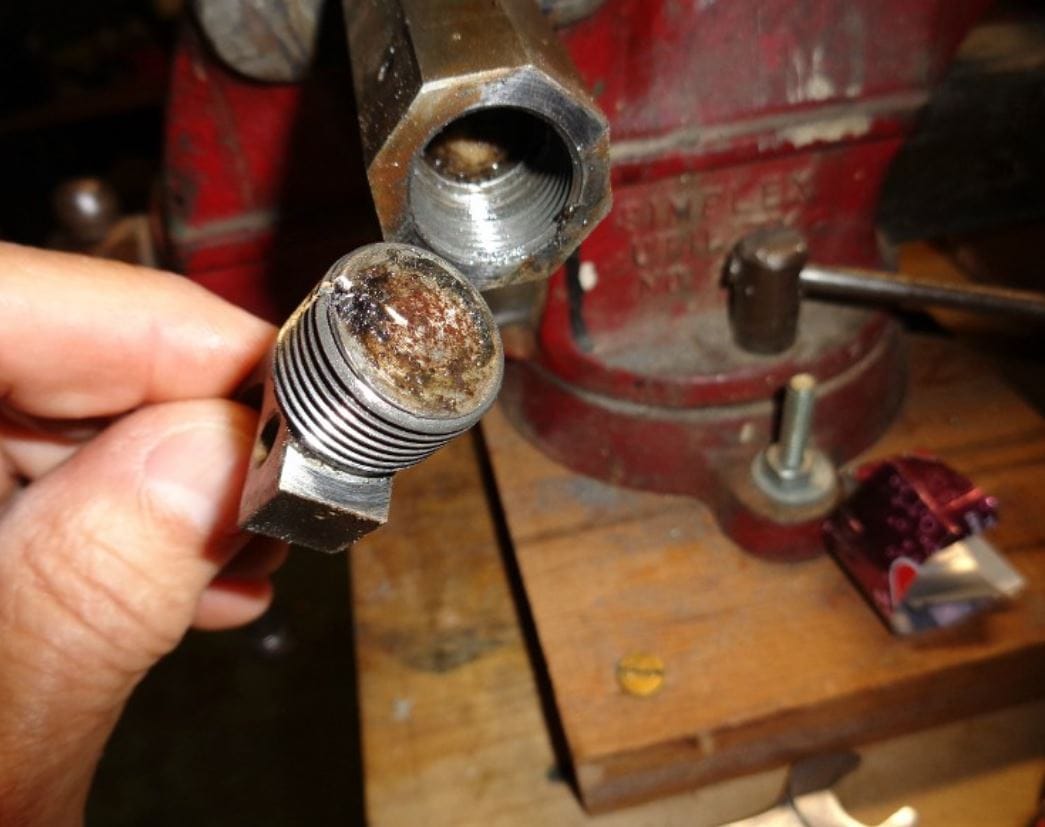
Step 3: Deep Cleaning the Flash Channel
This is the most critical step. The flash channel is the small passage from the nipple or primer seat to the main charge.
- Soak: Submerge the plug in solvent for 15-30 minutes.
- Scrub: Use a dedicated breech plug brush or a .22 caliber bronze brush on a rod, running it in and out of the channel.
- Pick: For stubborn carbon, use a brass pick to gently scrape the channel walls. Avoid steel tools that can scratch and create future fouling points.
- Pipe Cleaners: Saturated pipe cleaners are excellent for final polishing of the channel.
Step 4: Cleaning the Primer Seat/Nipple and Threads
- Primer Seat/Nipple: For 209 primer systems, scrub the cup with a small brush. For nipple systems, ensure the vent hole is completely clear.
- Threads: Clean rifle threads AND plug threads with a toothbrush and solvent. Fouling here is a primary cause of seized plugs.
Step 5: Drying, Inspection, and Lubrication
- Dry Thoroughly: Use compressed air, then a dry cloth. Ensure no moisture remains in the flash channel.
- Inspect: Hold the plug to a light source. You should see a perfect circle of light through the flash hole and channel. Check for cracks, wear, or thread damage.
- Lubricate Threads: Apply a thin film of high-temperature anti-seize (e.g., Permatex Copper Anti-Seize) to the plug’s threads. This prevents galling and ensures easy removal next time. Avoid lubricating the primer seat or flash channel.
Step 6: Reinstallation and Storage
Hand-tighten the plug into the rifle, then use the wrench for a final snug fit—do not overtighten. Store the firearm in a cool, dry place.
Table 2: Solvent Guide by Propellant Type
| Propellant Used | Recommended Primary Solvent | Alternative/Special Notes |
|---|---|---|
| Black Powder | Hot water with dish soap | Dries quickly; oil immediately after |
| Pyrodex® | Black powder solvents or Birchwood Casey Muzzleloader Cleaner | More corrosive than BP; clean ASAP |
| Triple Seven® | Water or dedicated solvents | Less corrosive; but still requires prompt cleaning |
| Blackhorn 209® | Hoppe’s #9 or other nitro solvents | NOT water-soluble; requires specific solvents |
Pro Tips and Troubleshooting Common Problems
Problem: Seized or Stuck Breech Plug
- Solution: Apply penetrating oil. Use a heat gun on the rifle’s breech area (not the plug) to expand the metal. Ensure you’re using the correct wrench for maximum leverage without stripping.
Problem: Persistent Carbon Ring in Barrel at Plug Interface
- Solution: This common “carbon ring” can affect accuracy. Use a fouling scraper or specific carbon ring removal tool after each cleaning.
Problem: Consistent Firing Delays or Misfires
- Solution: This is almost always a partially clogged flash channel. Use an ultrasonic cleaner for a deep clean. Consider replacing the plug if problems persist—they are consumable parts.
The Ultrasonic Cleaning Advantage
For the deepest clean, an ultrasonic cleaner is a worthwhile investment. Use a solution of 50% water, 50% Simple Green or dedicated ultrasonic fluid. Run for 8-10 minutes. The cavitation action will remove fouling from microscopic pores. Dry and oil immediately after.
Maintenance Schedule: How Often to Clean Your Breech Plug
- After Every Use: Basic cleaning (Steps 1-5) is mandatory.
- Every 25-50 Shots: Perform a deep clean with channel picks and brushes.
- Seasonally/Annually: Disassemble and inspect fully, even if not used. Replace O-rings on quick-disconnect models.
Conclusion: Safety and Performance Start with a Clean Plug
A meticulously cleaned breech plug ensures reliable ignition, preserves accuracy, and safeguards both the shooter and the firearm. By integrating this cleaning ritual into your shooting routine, you transform maintenance from a chore into a cornerstone of responsible ownership. Bookmark this guide, assemble your tools, and give your breech plug the care it deserves. Your next successful, safe hunt depends on it.
Disclaimer: Always consult your firearm’s owner’s manual for manufacturer-specific instructions. Safety first—ensure the firearm is unloaded before any maintenance.