The Ultimate Guide: How to Clean Rubber Ink Stamps for a Perfect Impression Every Time

A clean stamp is a happy stamp! Whether you’re a seasoned crafter, a dedicated scrapbooker, or just someone who loves the tactile feel of a rubber stamp, proper cleaning is the secret to preserving your collection and ensuring a crisp, clear impression every time. Neglecting this crucial step can lead to muddy colors, damaged stamps, and a shorter lifespan for your favorite tools.
This definitive guide will walk you through everything you need to know, from quick clean-ups to deep cleaning methods, complete with product comparisons and pro tips.
Why Cleaning Your Rubber Stamps is Non-Negotiable
Before we dive into the “how,” let’s understand the “why.” Regular cleaning is not just about aesthetics; it’s about maintenance and performance.
Jane Doe, a professional cardmaker and instructor, emphasizes: “I see so many crafters with beautiful, expensive stamps that are ruined because they were never properly cleaned. Dried ink clogs the fine details, and mixing colors leads to a murky, unusable mess. Five minutes of cleaning can add years to your stamp’s life.”
The primary reasons to clean your stamps are:
- Prevent Color Contamination: The most obvious reason. You don’t want red ink mixing with your next yellow project.
- Preserve Stamp Detail: Dried ink can build up in the grooves of your stamp, especially photopolymer or deeply etched rubber, making it difficult to get a sharp image.
- Extend Stamp Lifespan: Ink residue can degrade the rubber or polymer over time, causing it to become brittle or cracked.
Your Stamp Cleaning Toolkit: Essential Supplies
You don’t need a lot to get started. Here’s a breakdown of the essential tools for your cleaning station.
| Essential Tool | Purpose |
|---|---|
| Stamp Cleaner Solution | Specially formulated to break down ink without damaging the stamp. |
| Water & Mild Soap | A gentle, readily available option for dye-based inks. |
| Lint-Free Cloths/Microfiber | For wiping away ink and moisture without leaving fibers behind. |
| Soft-Bristled Brush | Gently agitates and cleans intricate details without scratching. |
| Stamp Cleaning Pad | A textured surface to work the cleaner into the stamp. |
Step-by-Step: How to Clean Your Rubber Stamps
Follow this simple, effective process for a perfectly clean stamp every time.
Step 1: The Initial Wipe-Down
Immediately after stamping, before the ink has a chance to dry, take a damp lint-free cloth or a baby wipe and gently wipe the surface of the stamp. This removes the majority of the wet ink and is your first line of defense against color mixing.
Step 2: Apply Your Chosen Cleaner
Spray a small amount of your chosen stamp cleaner directly onto the stamp’s surface or onto a dedicated stamp cleaning pad.
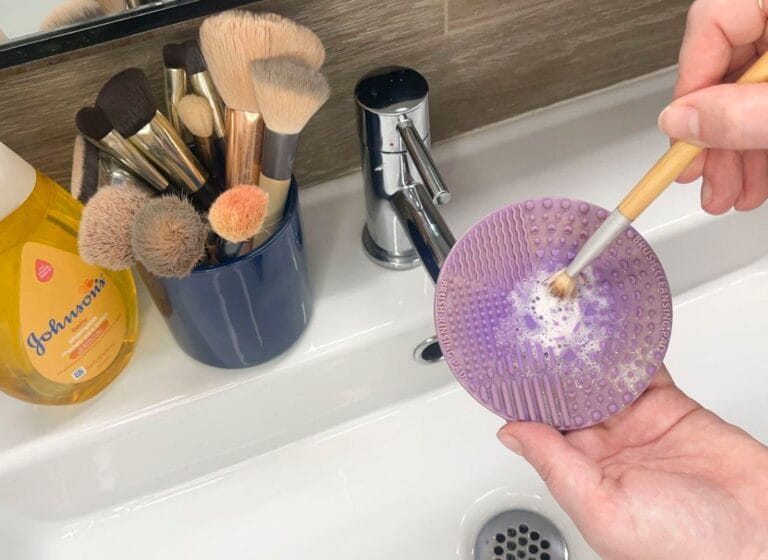
Step 3: Scrub Gently
Gently scrub the stamp on the cleaning pad or use a soft-bristled brush in a circular motion. Pay close attention to any finely detailed areas. The goal is to lift the ink out of the grooves, not to grind it in deeper.
Step 4: Wipe and Dry
Use a clean, dry, lint-free cloth to thoroughly wipe the stamp. Ensure no moisture or cleaner residue remains. Let the stamp air dry completely face-up before storing it. Storing a damp stamp can promote mold growth.
Choosing Your Cleaner: A Detailed Comparison
Not all inks are created equal, and neither are all cleaning methods. The best cleaner for you depends on the type of ink you use most often. The table below provides a clear comparison.
| Cleaning Method | Best For | Pros | Cons |
|---|---|---|---|
| Commercial Stamp Cleaner | All ink types, especially pigment and solvent-based. | Highly effective, often conditioning, safe for stamps. | Can be more expensive than DIY options. |
| Mild Soap & Water | Dye-based inks only. | Inexpensive, readily available, non-toxic. | Ineffective on permanent inks, water can warp wood blocks. |
| Baby Wipes | Quick clean-up of dye inks. | Very convenient and fast. | Can leave lint, not a deep clean, may contain lotions. |
| Rubbing Alcohol | Stubborn, dried-on ink stains. | Powerful solvent for tough jobs. | Can dry out and damage rubber stamps over time. Use sparingly! |
A Note from an Expert: “While baby wipes are great for a quick ‘on-the-go’ clean during a crafting session, I always do a final clean with a proper stamp cleaner at the end of my day. This ensures my stamps are conditioned and completely free of any residue that could build up,” advises John Smith, owner of The Crafty Corner.
Tackling Tough Stains and Dried-On Ink
Found an old, neglected stamp in the back of your drawer? Don’t despair! For dried-on ink, you may need to give it a spa treatment.
- Soak: Apply a generous amount of commercial stamp cleaner and let it sit on the stamp for 5-10 minutes to soften the dried ink.
- Scrub: Use a soft-bristled brush to gently work the loosened ink out of the grooves. Be patient and avoid using anything abrasive.
- Repeat: You may need to repeat the process for heavily stained stamps.
Pro Tips for Stamp Longevity
- Clean Immediately: The golden rule. It’s much easier to clean wet ink than dried ink.
- Never Soak Wood-Mounted Stamps: Submerging a wood-mounted stamp in water can dissolve the adhesive and warp the block.
- Store Properly: Keep stamps flat and out of direct sunlight to prevent the rubber from curing and becoming brittle.
- Condition Occasionally: Some commercial cleaners also contain conditioners to keep the rubber supple.
Conclusion: A Little Care Goes a Long Way
Cleaning your rubber ink stamps is a simple, quick habit that pays massive dividends. It protects your investment, ensures your projects look their best, and keeps your crafting experience enjoyable. By assembling a simple toolkit and following these steps, you can keep your entire stamp collection in pristine condition for a lifetime of beautiful creations.