How to Clean a Canvas Boat Cover: A Complete Step-by-Step Guide
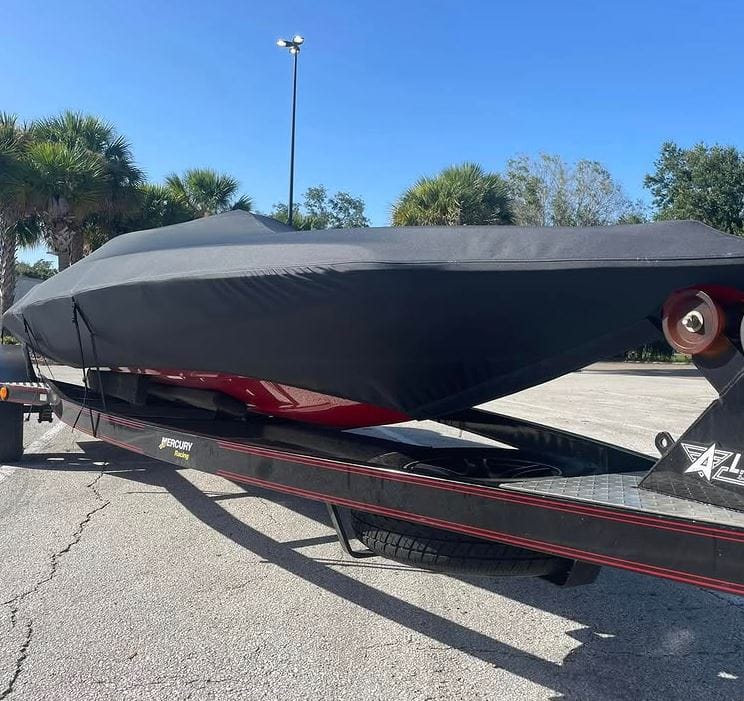
Keeping your canvas boat cover clean isn’t just about aesthetics—it’s essential for preventing mold, mildew, UV degradation, and premature wear. A well-maintained cover protects your valuable investment. This SEO-optimized guide provides a structural, easy-to-follow process for cleaning your canvas boat cover, ensuring it lasts for seasons to come.
Why Regular Cleaning is Crucial
Dirt, pollen, bird droppings, and organic debris trap moisture against the canvas fibers. This moisture leads to mold and mildew growth, which can stain fabric, cause foul odors, and significantly weaken the material. Furthermore, abrasive grime can accelerate UV degradation, making the fabric brittle. Regular cleaning maintains water repellency, structural integrity, and appearance.
Pre-Cleaning Checklist & Material Identification
Before you begin, identify your cover material. “Canvas” often refers to either cotton duck canvas or modern synthetic marine fabrics (like polyester with acrylic or polyurethane coating). The cleaning method varies slightly.
Quick Identification:
- Natural Cotton Canvas: Feels heavier, may become stiff when dry, often used on classic boats.
- Synthetic Marine Fabric: Lighter, stays flexible, usually has a subtle plastic-like coating on the underside.
Supplies You’ll Need:
- Soft-bristle brush (nail brush or boat brush)
- Mild, non-detergent soap (like Dawn dish soap, 303 Fabric Cleaner, or Star brite Marine Cleaner)
- Garden hose with spray nozzle
- Soft cloths or sponges
- White vinegar or specialized mildew remover (avoid bleach)
- A large, flat area for cleaning (driveway, lawn)
- 303 Fabric Guard or similar water repellent (for after cleaning)
Step-by-Step Cleaning Instructions
Step 1: Initial Dry Brushing & Preparation
Remove the cover from the boat and shake it out vigorously. Lay it flat on a clean surface. Use a soft-bristle brush to dry brush all surfaces, loosening and removing dried dirt, leaves, and cobwebs. This prevents creating mud during the wet wash.
Step 2: Pre-Treat Stains & Mildew
For mildew (black/green spots) or stubborn stains like bird droppings, pre-treat.
- For Mildew: Create a solution of 1 cup white vinegar to 1 gallon warm water. Apply directly to mildewed areas with a sponge and let it soak for 15 minutes.
- For General Stains: Apply a small amount of mild soap directly to the stain and gently work it in with your fingers.
Step 3: The Main Wash
- Fill a bucket with cool or lukewarm water (never hot) and add your chosen cleaner. Follow product instructions for dilution.
- Wet the entire cover with a garden hose.
- Using a soft-bristle brush or sponge, work the soapy solution over the cover in sections using a circular motion. Focus on heavily soiled areas but avoid excessive scrubbing on coated synthetics.
- Pay special attention to seams and stitching, where dirt accumulates.
Step 4: Thorough Rinsing
This is a critical step. Soap residue attracts dirt and can break down coatings.
- Rinse the cover thoroughly from top to bottom with a strong stream of clean water.
- Run your hand over the fabric—if it feels slick, soap remains. Rinse until the water runs completely clear.
Step 5: Drying & Re-Proofing
- Natural Canvas: Hang over a railing or clean line to air dry completely. Ensure it is fully dry before storage to prevent mildew.
- Synthetic Fabrics: Can be dried with a clean towel to remove excess water and then air-dried.
- Re-Proofing: Once 100% bone dry, apply a UV-protectant water repellent like 303 Fabric Guard. This restores the cover’s critical beading ability and UV resistance. Apply evenly per product instructions.
What NOT to Do: Common Cleaning Mistakes
| Mistake | Why It’s Harmful |
|---|---|
| Using Household Detergent | Contains whiteners & additives that strip waterproofing and leave residues. |
| Using a Pressure Washer | High pressure can force water through seams, damage fabric weave, and delaminate coatings. |
| Using Bleach or Harsh Chemicals | Degrades fabric fibers, weakens stitching, and voids manufacturer warranties. |
| Machine Washing & Drying | Aggressive agitation and heat can destroy fabric coatings, shrink canvas, and damage seams. |
| Storing While Damp | The #1 cause of mold and mildew, leading to permanent stains and rot. |
| Brushing Vigorously on Dry Fabric | Can grind dirt deeper into the fibers, acting as an abrasive. |
Maintenance Schedule & Product Comparison
A regular schedule prevents deep cleaning from becoming overwhelming.
| Frequency | Task | Recommended Product |
|---|---|---|
| After Each Use | Shake off debris. Wipe off bird droppings immediately with a damp cloth. | Plain Water |
| Monthly (In Season) | Light hose-down to remove dust, pollen, and surface dirt. | Plain Water |
| Twice Per Season | Full wash as per steps above, with inspection for wear/tear. | 303 Fabric Cleaner or Star brite Marine Cleaner |
| End of Season | Full wash, complete dry, and application of water repellent before storage. | 303 Fabric Cleaner followed by 303 Fabric Guard |
Popular Cleaner Comparison Table
| Product | Best For | Key Benefit | Consideration |
|---|---|---|---|
| 303 Fabric Cleaner | All marine fabrics & canvas. | Excellent on oil/stains, rinses clean, prepares for 303 Guard. | Slightly higher cost, but highly effective. |
| Star brite Premium Cleaner | Heavy mildew & tough stains. | Powerful enzymatic action on organic stains. | Ensure thorough rinsing. |
| Dawn Dish Soap (Original) | Light soil & grease on a budget. | Readily available, cuts grease well. | Can be slightly drying; must rinse extremely thoroughly. |
| Simple Green (Diluted) | General grime on synthetic fabrics. | Biodegradable, all-purpose. | Avoid on natural canvas; test on inconspicuous area first. |
Conclusion
Cleaning your canvas boat cover is a straightforward but vital maintenance task. By avoiding harsh chemicals and abrasive tools, committing to thorough rinsing and drying, and reapplying a water-repellent treatment, you dramatically extend your cover’s life. A clean, well-maintained cover ensures your boat stays protected, dry, and ready for your next adventure on the water.
Pro Tip: Always check your boat cover manufacturer’s care instructions first, as their guidelines supersede general advice. Following their recommendations also preserves your warranty.