How to Clean a Fabric Recliner and Make It Look New
There’s nothing quite like sinking into your favorite fabric recliner after a long day. But over time, that cozy throne can start to look a little… well, grimy. Between spilled snacks, pet hair, body oils, and general dust, fabric recliners are magnets for dirt.
Cleaning a fabric recliner isn’t just about aesthetics; it prolongs the life of the furniture and ensures your relaxation spot is hygienic. However, if you grab the wrong cleaner or scrub too hard, you could ruin the fabric for good.
In this guide, we’ll walk you through exactly how to clean a fabric recliner, from deciphering the code on the tag to removing stubborn stains.
Step 1: Decode The Tag (The “Upholstery Code”)
Before you mix any soap or water, you must check the manufacturer’s tag. Usually tucked underneath the cushion or behind the chair, these codes tell you what cleaning method is safe.
| Code | Cleaning Method | What It Means |
|---|---|---|
| W | Water-based cleaning | You can use water, mild detergent, or foam-based cleaners. This is the most common for fabric recliners. |
| S | Solvent-based cleaning | You cannot use water. Water can cause shrinking or staining. Use a dry-cleaning solvent or mild alcohol-based cleaner. |
| WS | Water or Solvent | You have options. Either water-based or solvent-based cleaners are safe. |
| X | Vacuum Only | This fabric is extremely delicate. Do not use any liquid or solvent. Only vacuum or brush lightly. Call a professional. |
Step 2: Gather Your Supplies
Depending on the tag, you will need a selection of the following:
- Vacuum with crevice tool and upholstery brush attachment
- Two microfiber cloths (white is best to avoid dye transfer)
- Soft-bristled brush (like a nail brush or old toothbrush)
- Baking soda (for deodorizing)
- Distilled white vinegar (for spot cleaning)
- Mild dish soap (like Dawn)
- Rubbing alcohol (for “S” coded fabrics)
- Enzyme cleaner (if you have pets)
Step 3: The Cleaning Process (Step-by-Step)
Phase 1: The Dry Clean (Vacuuming)
No matter what the tag says, you always start dry. Remove the cushions if possible.
- Use the crevice tool to get into the cracks where crumbs and coins hide. This is especially important for recliners because of the moving parts and seams.
- Switch to the upholstery brush and vacuum the entire surface, including the back and arms.
- If you have pets, use a rubber glove or a squeegee to gather embedded hair before vacuuming.
Phase 2: The Deodorizer (Baking Soda)
Fabric absorbs odors over time.
- Sprinkle a liberal layer of baking soda over the entire chair.
- Let it sit for at least 20 minutes (longer if you have smoke or pet smells).
- Vacuum it all up thoroughly.
Phase 3: Deep Cleaning Based on Your Fabric Code
If your tag says “W” (Water Safe):
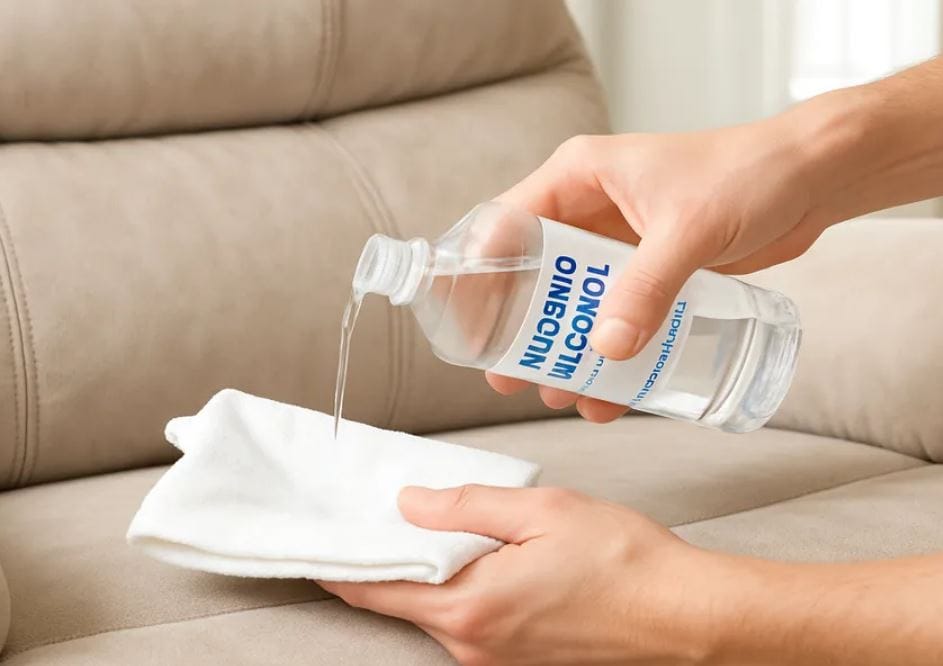
- Mix Solution: In a bowl, mix warm water with a few drops of mild dish soap. Alternatively, mix equal parts water and white vinegar.
- The “Damp, Not Wet” Rule: Dip a microfiber cloth into the solution and wring it out until it’s just damp. If the fabric gets soaking wet, it can lead to mold in the foam padding.
- Wipe: Gently wipe down the fabric. For textured fabric, use a soft brush in a circular motion.
- Rinse: Dampen a second cloth with plain water and wipe away any soap residue (soap attracts dirt if left behind).
- Dry: Allow the chair to air dry completely before using it.
If your tag says “S” (Solvent Only):
- Test First: Apply rubbing alcohol to a hidden area (like the back) to ensure it doesn’t discolor the fabric.
- Application: Dampen a cloth with rubbing alcohol or a specialized dry-cleaning solvent.
- Blot: Gently blot the dirty areas. Do not rub vigorously, as this can damage solvent-only fabrics.
- Air Dry: The alcohol will evaporate quickly, leaving the fabric dry.
Step 4: The Comparison Table: Spot Cleaning Common Stains
Different stains require different tactics. Here is how to handle common recliner accidents:
| Stain Type | Cleaning Agent | Method |
|---|---|---|
| Food & Grease | Dish Soap Solution | Blot with a damp soapy cloth, then blot with a dry towel to lift the grease. |
| Ink / Pen | Rubbing Alcohol | Dab with a cotton ball soaked in alcohol. Don’t rub, as it spreads the ink. |
| Red Wine | White Vinegar & Water | Blot the wine first, then apply the vinegar solution to neutralize the color. |
| Pet Urine | Enzymatic Cleaner | Soak the area. Enzymes break down the proteins in urine, removing the smell. |
| Coffee / Soda | Cold Water & Mild Soap | Blot immediately. Club soda can also work due to its carbonation. |
Step 5: Bonus Tips for Recliner Maintenance
Because recliners have moving parts, they require a slightly different approach than a standard sofa.
- Don’t Forget the Mechanism: While cleaning the fabric, use your vacuum to remove dust and pet hair from the metal reclining mechanism and the floor underneath. Buildup here can cause squeaking.
- Prevent “Sweat Stains”: The headrest and armrests often darken due to body oils. Wipe these areas down monthly with your “W” or “S” safe solution to prevent permanent yellowing.
- Fluff the Cushions: If your cushions are removable, flip and rotate them while the fabric dries to ensure even wear and drying.
When to Call a Professional
Sometimes, DIY just won’t cut it. You should consider hiring a professional steam cleaning service if:
- The tag says “X” .
- The stains are large or have set in for months.
- The chair has a musty smell that won’t go away (indicating mold deep in the foam).
- The recliner is an heirloom or very expensive.
Final Thoughts
Cleaning a fabric recliner doesn’t have to be a daunting task. By checking the upholstery code, vacuuming regularly, and treating stains immediately, you can keep your favorite chair looking fresh for years.
Quick Recap Checklist:
- Check the tag (W, S, WS, or X).
- Vacuum everything (cracks, arms, mechanism).
- Deodorize with baking soda.
- Deep clean according to the code.
- Spot clean stains immediately.
- Let it dry fully.
Have a specific stain you’re battling? Leave a comment below, and we’ll help you out!