How to Insulate a Fabric Building: Tips for Energy Efficiency

Insulating a fabric building involves selecting suitable materials, preparing the structure, and achieving a precise installation. Options such as foam boards, spray foam, and radiant barriers offer unique advantages for temperature regulation and energy savings. Careful planning is key, taking into account factors like climate, intended use, and budget. For optimal results, professional expertise can help maximize performance and longevity, keeping your fabric building comfortable and efficient year-round.
Table of Contents
- Understanding Your Goals: Pre-Insulation Preparation
- Types of Insulation Materials for Fabric Buildings
- Step-by-Step Guide to Insulating a Fabric Building
- Benefits of Professional Installation by The Coverco Building Team
- Final Thoughts: Maximizing Comfort and Efficiency
Fabric buildings are becoming increasingly popular for their versatility, durability, and cost-effectiveness in various industries, from agriculture to warehousing. However, without proper insulation, these structures can struggle to maintain comfortable temperatures, especially in extreme climates. Insulating a fabric building not only enhances energy efficiency but also extends its lifespan and improves functionality.
For those considering insulation, understanding the process and available options is crucial. From selecting the right materials to ensuring a precise installation, each step plays a vital role in achieving optimal results.
Working with experienced professionals like The Coverco Building team can provide valuable insights and tailored solutions to meet your specific needs. By exploring key considerations, materials, and steps for effective insulation, you’ll gain the knowledge needed to make informed decisions.
Understanding Your Goals: Pre-Insulation Preparation
Before insulating a fabric building, thorough preparation is essential to achieve the best results. Taking the time to assess your needs and understand the specific requirements of your structure can significantly impact the effectiveness of the insulation. Below are the key factors to consider during this phase:
Evaluate the Building’s Purpose
- Intended Use. Determine how the building will be used (e.g., storage, workspace, livestock shelter) to identify insulation priorities. For example, temperature-sensitive activities may require higher R-values.
- Occupancy Patterns. Consider whether the space will be occupied continuously or intermittently, as this affects heating and cooling demands.
Assess Climate Conditions
- Temperature Extremes. Understand the local climate—cold winters or hot summers—to choose materials that perform well in those conditions.
- Moisture Levels. If you’re in a humid or rainy area, prioritize moisture-resistant insulation to prevent mold and mildew.
Set a Realistic Budget
- Material Costs. Research the price range of insulation options like foam boards, fiberglass, or spray foam. Balance cost with performance to find the right fit for your project.
- Installation Costs. Factor in labor costs if hiring professionals, or allocate time for a DIY approach if you have the necessary skills.
Plan for Accessibility and Maintenance
- Ease of Installation. Ensure the insulation method you choose can be easily applied to the unique design of a fabric building.
- Long-Term Maintenance. Select materials that are durable and require minimal upkeep to reduce future expenses.
By addressing these considerations during the pre-insulation phase, you lay the groundwork for a successful project. Thoughtful planning helps align your goals with practical solutions, setting the stage for an efficient and comfortable fabric building.
Types of Insulation Materials for Fabric Buildings
Choosing the right insulation material is a critical step in optimizing the performance of your fabric building. Each material has unique properties that cater to specific needs, such as temperature control, moisture resistance, or budget constraints. Below is an overview of the most common options and their benefits:
1. Foam Boards.
- Best For: High thermal resistance in a lightweight format.
- Key Features:
- Rigid panels made from polystyrene, polyurethane, or polyisocyanurate.
- Easy to cut and install, making them suitable for DIY projects.
- Excellent for maintaining consistent temperatures in extreme climates.
2. Spray Foam.
- Best For: Sealing gaps and creating an airtight barrier.
- Key Features:
- Expands to fill cracks and crevices, providing superior insulation coverage.
- Offers both open-cell (flexible, cost-effective) and closed-cell (dense, moisture-resistant) options.
- Ideal for irregularly shaped spaces or hard-to-reach areas.
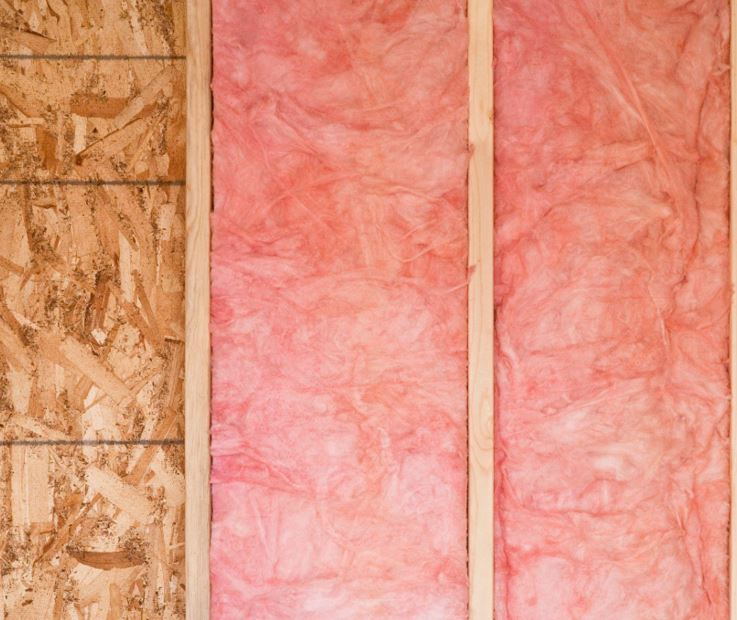
3. Fiberglass Insulation.
- Best For: Budget-friendly and versatile solutions.
- Key Features:
- Made from fine glass fibers, available in batts or rolls.
- Provides good thermal performance and soundproofing.
- Requires careful handling due to potential skin irritation from fibers.
4. Radiant Barriers.
- Best For: Reflecting heat in hot climates.
- Key Features:
- Typically made from reflective foil laminated onto substrates like plastic or cardboard.
- Reduces heat gain by reflecting radiant energy away from the building.
- Often used in combination with other insulation materials for enhanced performance.
5. Blanket Insulation.
- Best For : Simple installation in framed structures.
- Key Features :
- Flexible and easy to work with, often made from fiberglass, wool, or cotton.
- Fits snugly between framing members, reducing thermal bridging.
- Cost-effective but may require additional vapor barriers in humid climates.
By understanding the strengths and limitations of each insulation type, you can select the option that best aligns with your goals and conditions. According to Forbes, proper insulation significantly lowers energy costs by improving heating and cooling efficiency. Matching the material to your building’s needs contributes to improved comfort, energy efficiency, and long-term durability.
Step-by-Step Guide to Insulating a Fabric Building
Insulating a fabric building requires careful planning and execution to achieve optimal results. Below is a detailed breakdown of the process, from preparation to final touches, helping you complete the project efficiently and effectively:
Step 1. Prepare the Structure
- Inspect the Building. Check for any damage or wear in the fabric panels. Repair or replace compromised sections before starting insulation.
- Clean the Interior. Remove dirt, debris, and obstacles to create a clean workspace. This step improves precision during installation.
- Gather Tools and Materials. Collect all necessary supplies, including insulation materials, adhesives, fasteners, and safety gear like gloves and masks.
Step 2. Measure and Plan
- Take Accurate Measurements. Measure the dimensions of walls, ceilings, and other areas to calculate material requirements.
- Create a Layout. Map out where each insulation type will be installed, prioritizing areas prone to heat loss or moisture buildup.
Step 3. Install the Insulation
- Start with the Frame. If using foam boards or blanket insulation, secure them between framing members. Use adhesive or mechanical fasteners for stability.
- Apply Spray Foam (If Needed). For hard-to-reach areas or gaps, apply spray foam evenly, allowing it to expand and cure as directed.
- Add Radiant Barriers. Install reflective barriers on the interior side of walls or ceilings to deflect heat. Secure them tightly to avoid sagging.
Step 4. Seal Gaps and Edges
- Use Weatherproof Tape. Seal seams and edges to prevent air leaks or moisture intrusion. Pay special attention to joints and corners.
- Check for Uniform Coverage. Review the entire installation to confirm no areas are left exposed or improperly secured.
Step 5. Final Touches
- Install Vapor Barriers (If Required). Add a vapor barrier on the warm side of the insulation to reduce condensation risks in humid climates.
- Test Performance. Monitor temperature and humidity levels after installation to evaluate effectiveness. Make adjustments if needed.
By following these steps, you can achieve a well-insulated fabric building that supports comfort, energy efficiency, and durability. Attention to detail at each stage contributes to long-term performance and satisfaction.
Benefits of Professional Installation by The Coverco Building Team
When deciding how to insulate your fabric building, it’s important to weigh the pros and cons of DIY installation versus hiring professionals. Below is a comparison table to help you make an informed choice:
| Aspect | DIY Insulation | Professional Installation |
| Cost | Lower upfront costs, but potential for mistakes that lead to higher expenses. | Higher initial investment, but cost efficiency through expertise and precision. |
| Time Commitment | Time-intensive; requires research, preparation, and hands-on work. | Streamlined process with faster completion and minimal disruption. |
| Expertise | Limited knowledge may result in improper installation or material selection. | Skilled teams bring experience and technical know-how for optimal results. |
| Tools and Materials | Requires purchasing or renting tools and sourcing materials independently. | Access to high-quality materials and specialized equipment for better outcomes. |
| Precision and Quality | Risk of uneven coverage, air leaks, or moisture issues due to inexperience. | Precision installation minimizes risks and secures long-term durability. |
| Problem-Solving | Challenges like structural gaps or climate-specific needs may be hard to address. | Experts anticipate and resolve issues efficiently, making sure a seamless process. |
| Support and Maintenance | Limited post-installation support; troubleshooting falls entirely on the owner. | Many companies offer follow-up services, maintenance tips, and warranty coverage. |
While DIY insulation can be cost-effective for those with the right skills and time, professional installation offers unmatched expertise, efficiency, and quality. Skilled teams handle every aspect of the project, from material selection to precise application, reducing the risk of errors and ensuring long-term performance. For complex projects or those requiring specialized solutions, professional assistance often proves to be the most reliable option.
Final Thoughts: Maximizing Comfort and Efficiency
Insulating a fabric building is a critical step in creating a functional, energy-efficient, and durable space. Whether you’re aiming for temperature control, moisture resistance, or long-term performance, careful planning and execution are essential. By understanding your goals, selecting the right materials, and considering professional assistance, you can achieve a solution that meets your specific needs.
For those weighing their options, the choice between DIY and professional installation ultimately depends on factors like budget, time, and complexity. While DIY projects offer flexibility and cost savings, professional expertise provides precision, efficiency, and peace of mind. Regardless of the path you choose, prioritizing quality and attention to detail will yield the best results.
By taking the time to prepare and make informed decisions, you can create a fabric building that supports comfort, sustainability, and functionality. With the right approach, your insulated structure will serve as a reliable asset for years to come.